
You can easily add your Protect cameras to Streamie and stream them to your iPhone, iPad, Apple TV or Apple Silicon Mac.
Protect uses H.264 video over RTSP, so you have two choices when it comes to adding your Protect cameras to Streamie: RTSP or the UniFi Protect Integration.
Also, yes, the screenshots were taken on an iPad, but the exact same functionality and interface exists on an Apple TV, it’s just less fun to make screenshots on the Apple TV.
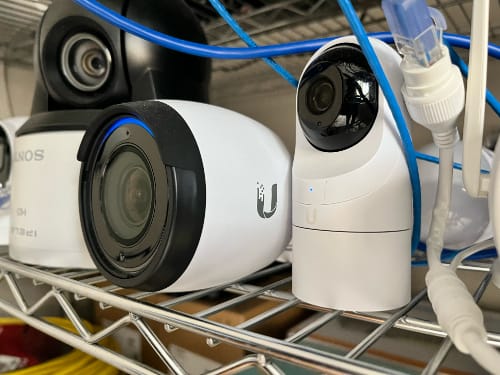
Going the RTSP route is simple and easy, but it also provides the fewest features. To get started, when configuring Protect, you need to enable RTSP for each camera.
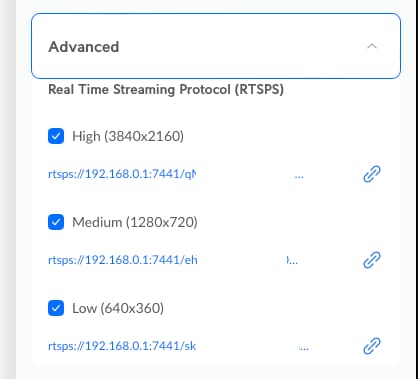
Each RTSP URL looks something like this:
- rtsps://192.168.0.1:7441/qM…u3?enableSrtp
The URL that you provide to Streamie instead needs to look like this:
- rtsp://192.168.0.1:7441/qM…u3
You need to change “rtsps” to “rtsp” and you need to remove the “?enableSrtp” off the end.
With that URL in hand, in Streamie, go to the Home tab ==> Cameras ==> Options ==> Add ==> Options ==> Add Manually ==> RTSP. Fill out the form with the modified URL.
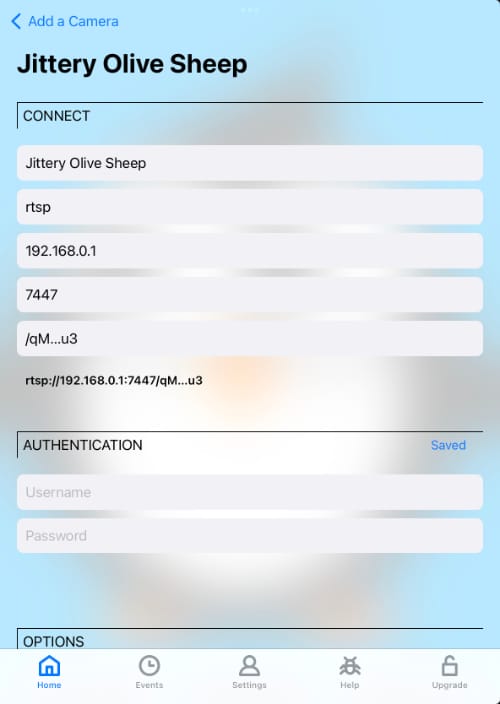
You don’t need a username or password. Click “Connect” then “Save & Close” and your new camera should be ready to use. You’ll find your newly added camera in the Home ==> Cameras screen, which you can stream by tapping on it.
Instead of working directly with the RTSP cameras, you can enable the UniFi Protect Integration in Streamie to get a lot more out of both Streamie and Protect. Streamie will be able to discover your cameras without dealing with RTSP URLs, and Streamie will be able to “follow” a camera even if it changes its IP address. You’ll also be able to take advantage of motion alerts and other events from Protect.
As in the previous section, you need to enable RTSP in Protect for each camera you want to stream. After that’s done, continue along with these instructions.
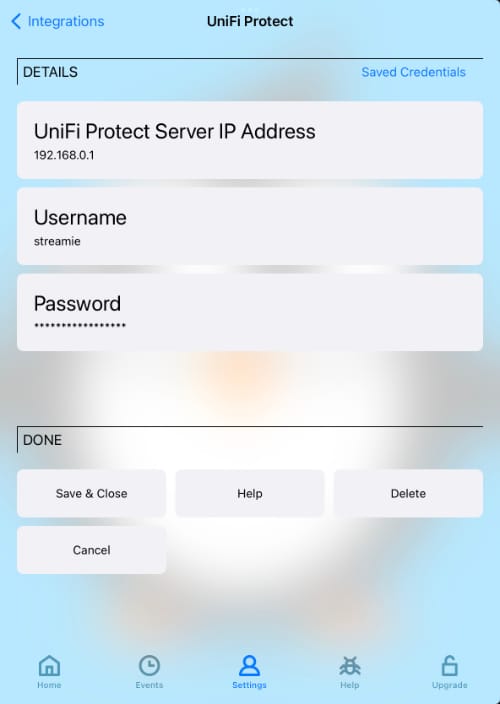
Navigate in Streamie to the Settings tab ==> Integrations ==> Add Integration ==> UniFi Protect.
Enter the local IP address of your Protect system and a valid username and password for it. It doesn’t have to be an admin user, but it obviously has to have access to the Protect cameras. Hit “Save & Close” and you’re ready to add your cameras.
Navigate to the Home tab ==> Cameras ==> Options ==> Add. This is the Add-a-Camera screen that shows all of the cameras that Streamie has discovered. Scroll down to the “UniFi Protect” section. If all has gone well, your cameras are there. Tap on a camera.
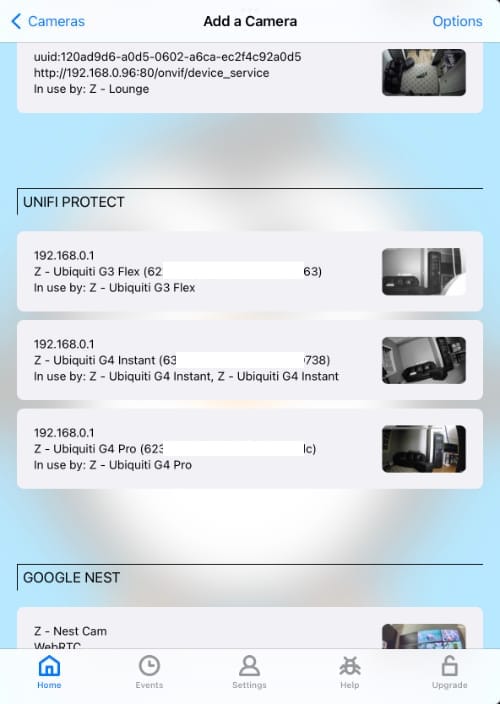
Once you’ve tapped on a UniFi Protect camera, you can see some details about it and choose from the available streams.
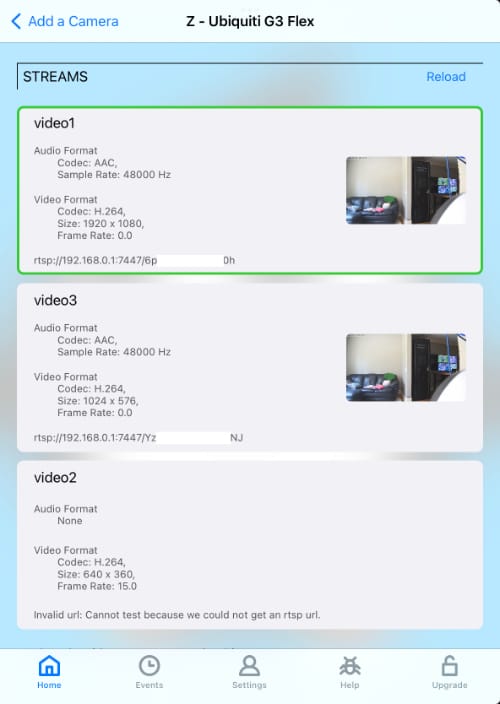
Choose one stream. Hit “Save & Close”. You’ll find your newly added camera in the Home ==> Cameras screen, which you can stream by tapping on it.
Depending on which streams you’re working with, you should be able to stream up to 25 (possibly more) cameras at once on a modern Apple TV.
Created: 2 years ago
Updated: 2 years ago
Author: Curtis Jones
Streamie provides a best-in-class user experience on your iPhone, iPad, Apple TV and Apple Silicon Mac, with an intuitive user interface that makes it simple to discover, stream, record, monitor and share your HomeKit, Google Nest, Ubiquiti UniFi Protect and ONVIF-compatible IP and RTSP cameras. Streamie keeps you informed with motion event notifications and it works with most cameras using its advanced audio and video codec support. You can watch your cameras from anywhere, record 24/7 to your private NAS, remotely manage multiple locations, device permissions and seamlessly synchronize settings across your devices; configure Hubitat smart home automations, live stream to YouTube and rely on the in-app technical support system when you need help -- and you can also reach us by phone. Download Streamie today for all of your CCTV needs.