Streamie, as of v3.18.0 supports 24/7 cloud recording to Azure Blob Storage, which is a great addition to Streamie's existing S3 support, and the functionality is identical.
Once you have configured your Azure Blob Storage container, you can configure Streamie in just a few minutes. This tutorial will show you how. This process is basically just two steps: set up the Integration, and then set up the File Server.
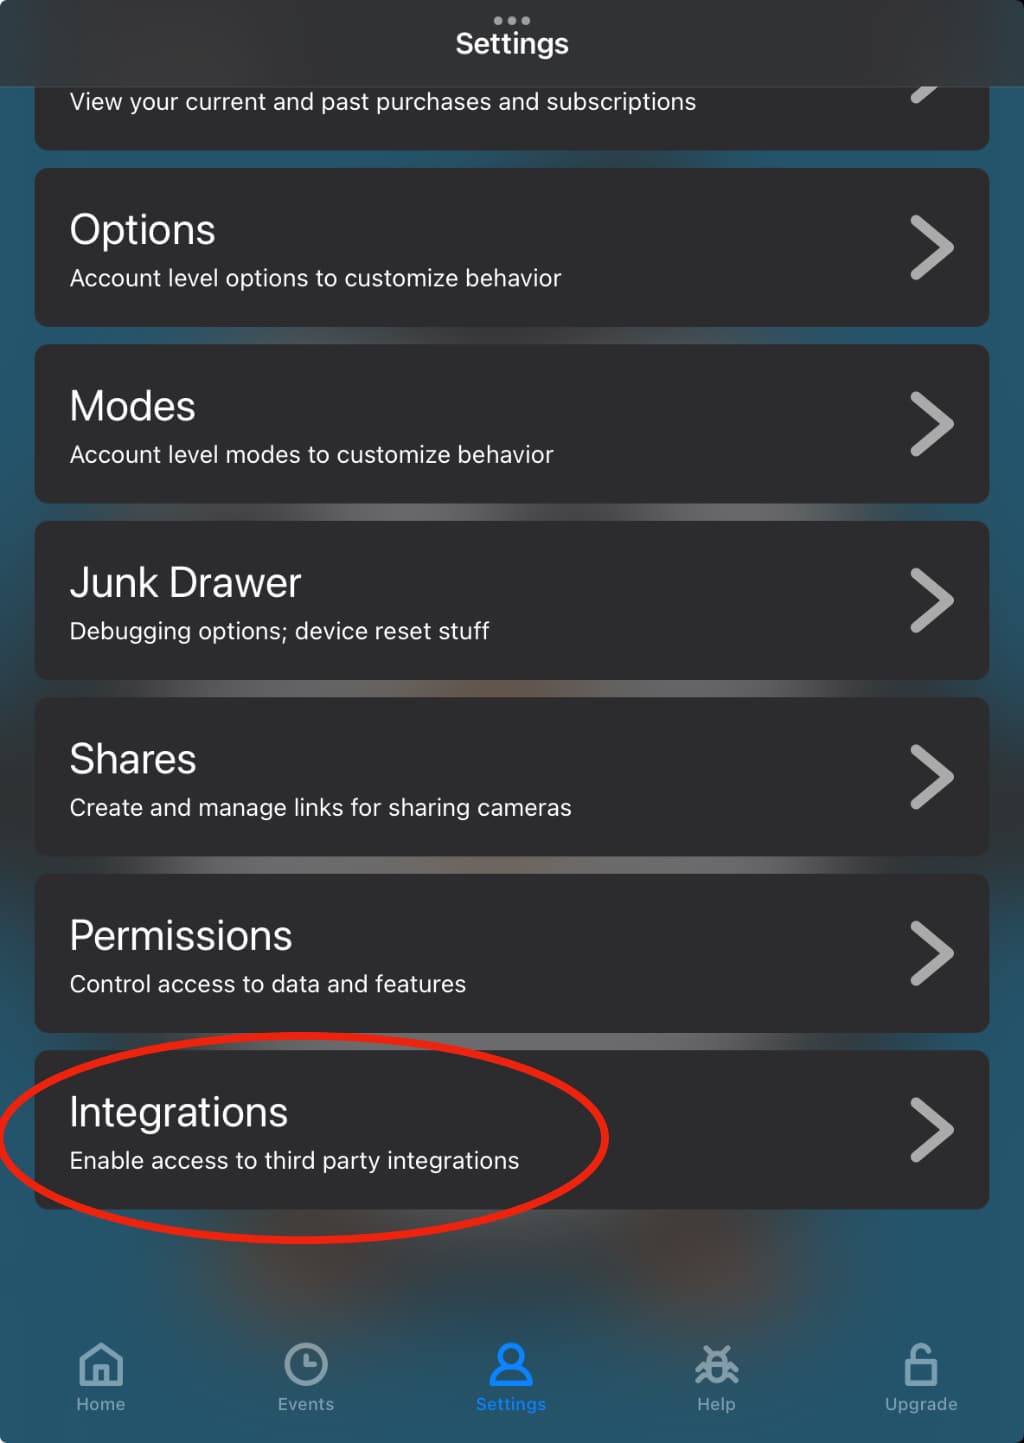
Navigate to Settings ==> Integrations.
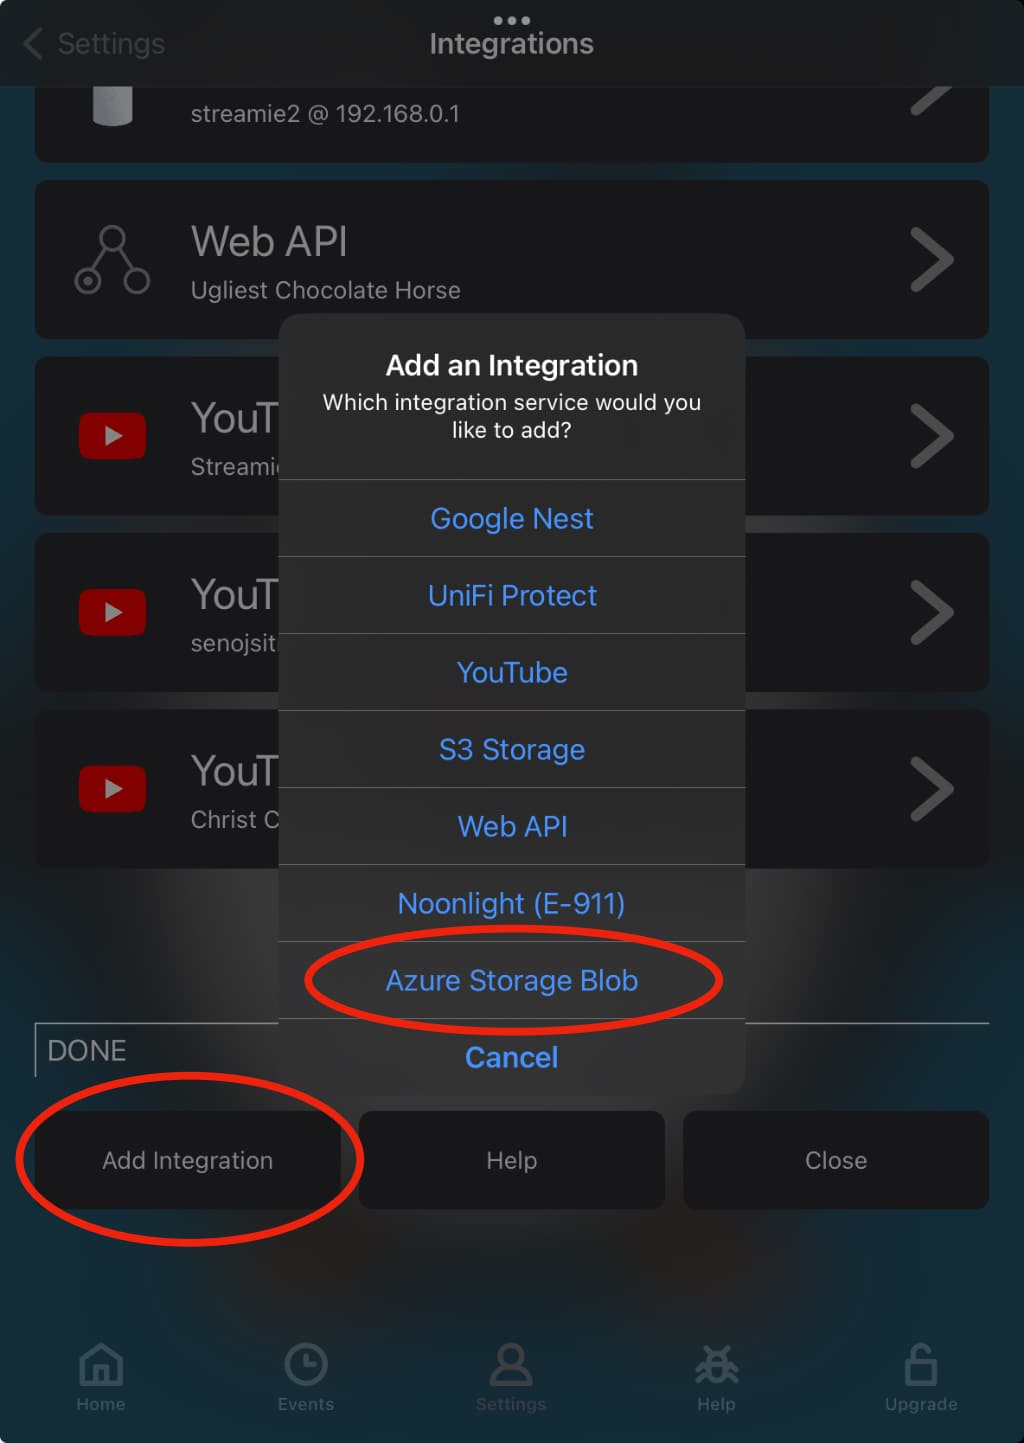
Choose Add Integration ==> Azure Blob Storage. Yes, I know it is Blob Storage not Storage Blob, but I had already made the screenshot when I caught the typo, so it is what it is.
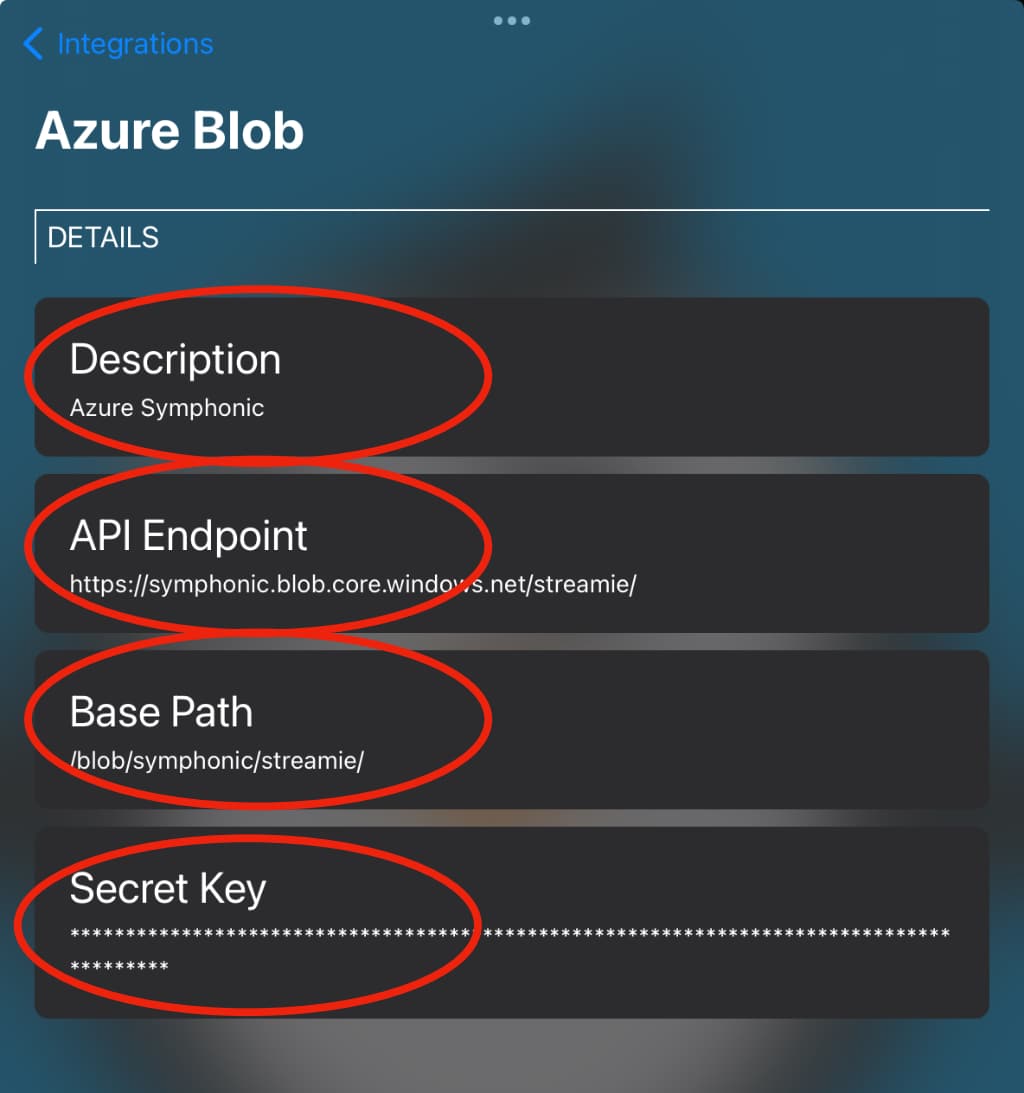
You've got four fields to fill in.
- Description: This is a name you can pick. This Integration is container-specific, so the name might reflect the name of the container, but it is entirely up to you.
- API Endpoint: The endpoint follows the pattern of https://company.blob.core.windows.net/container/.
- Base Path: The base path follows the pattern of /blob/company/container/.
- Secret Key: You'll generate a SAS (Shared Access Signature) key in the Azure portal, and copy that secret key here. This will allow Streamie to write your recordings to your container. Streamie must also have read and list access in order to browse your recordings.
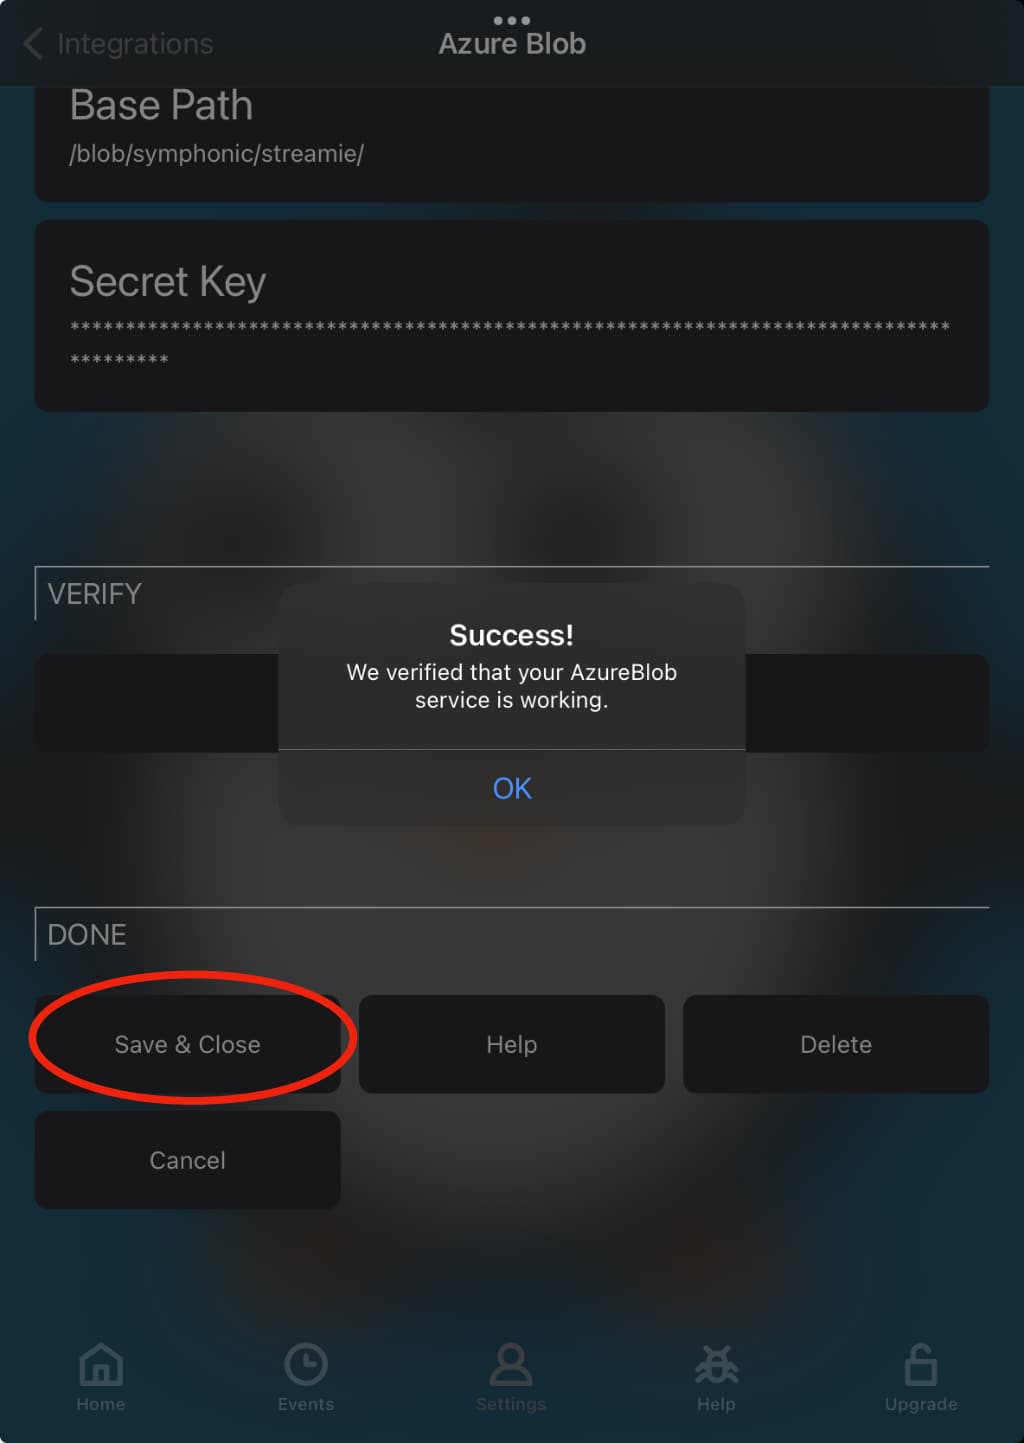
Hit the Verify button and Streamie will try to connect to your container and verify that everything is rockin'.
Hit Save & Close and we are done with this step.
With the Integration in place, we can create a new File Server which will use it as the storage mechanism. Streamie also supports SMB and S3 for this purpose.
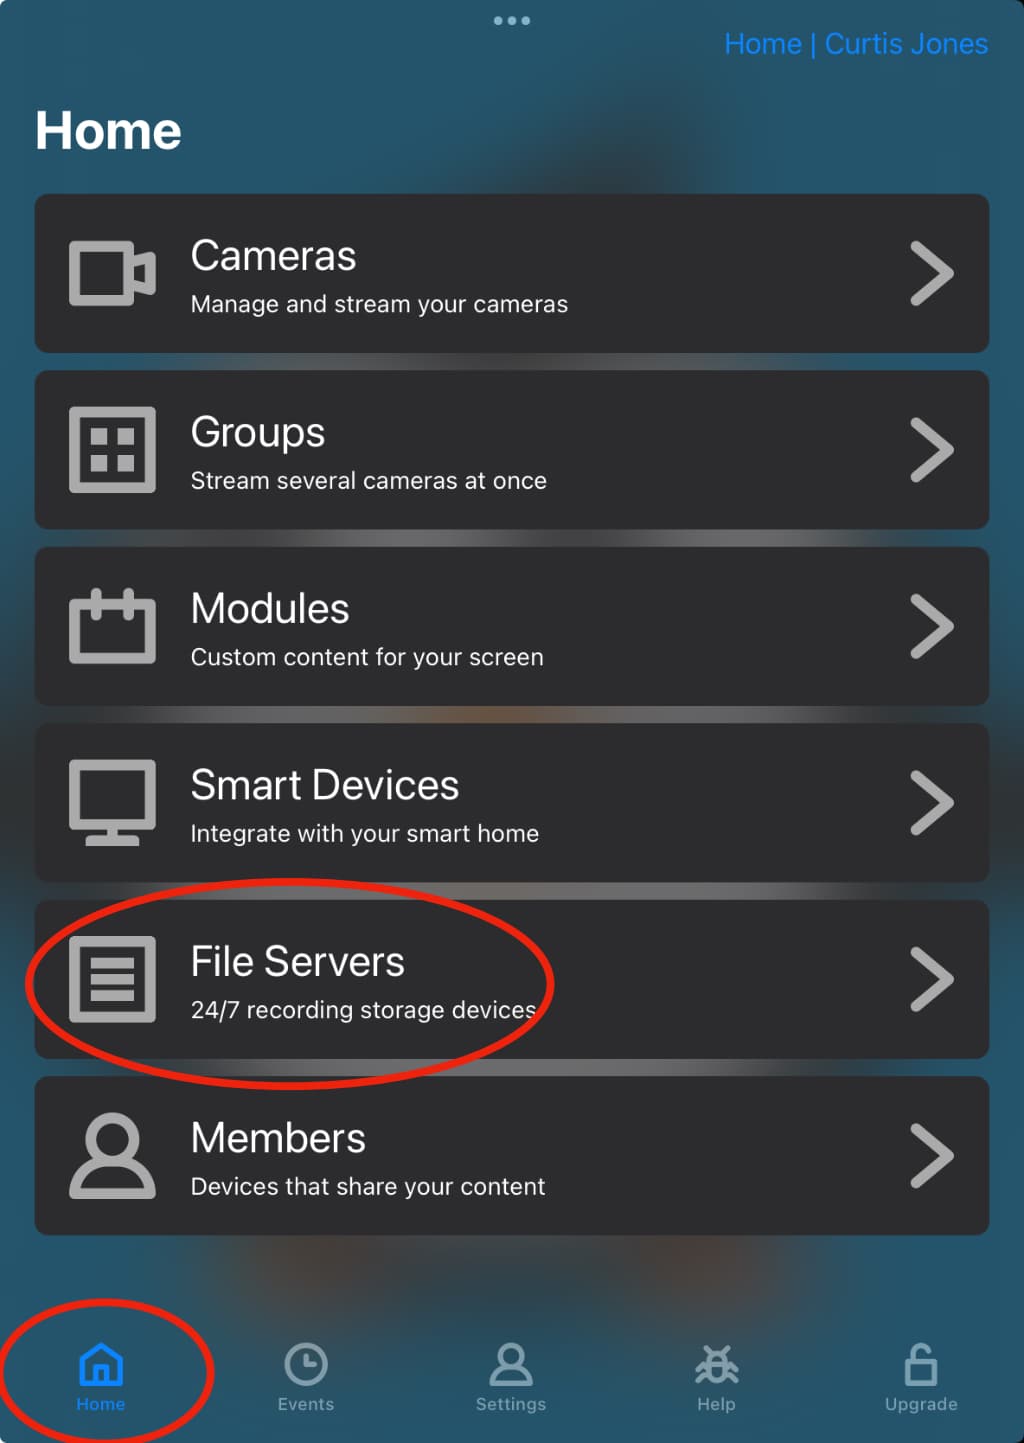
Navigate to Home ==> File Servers.
Choose Options ==> Add.

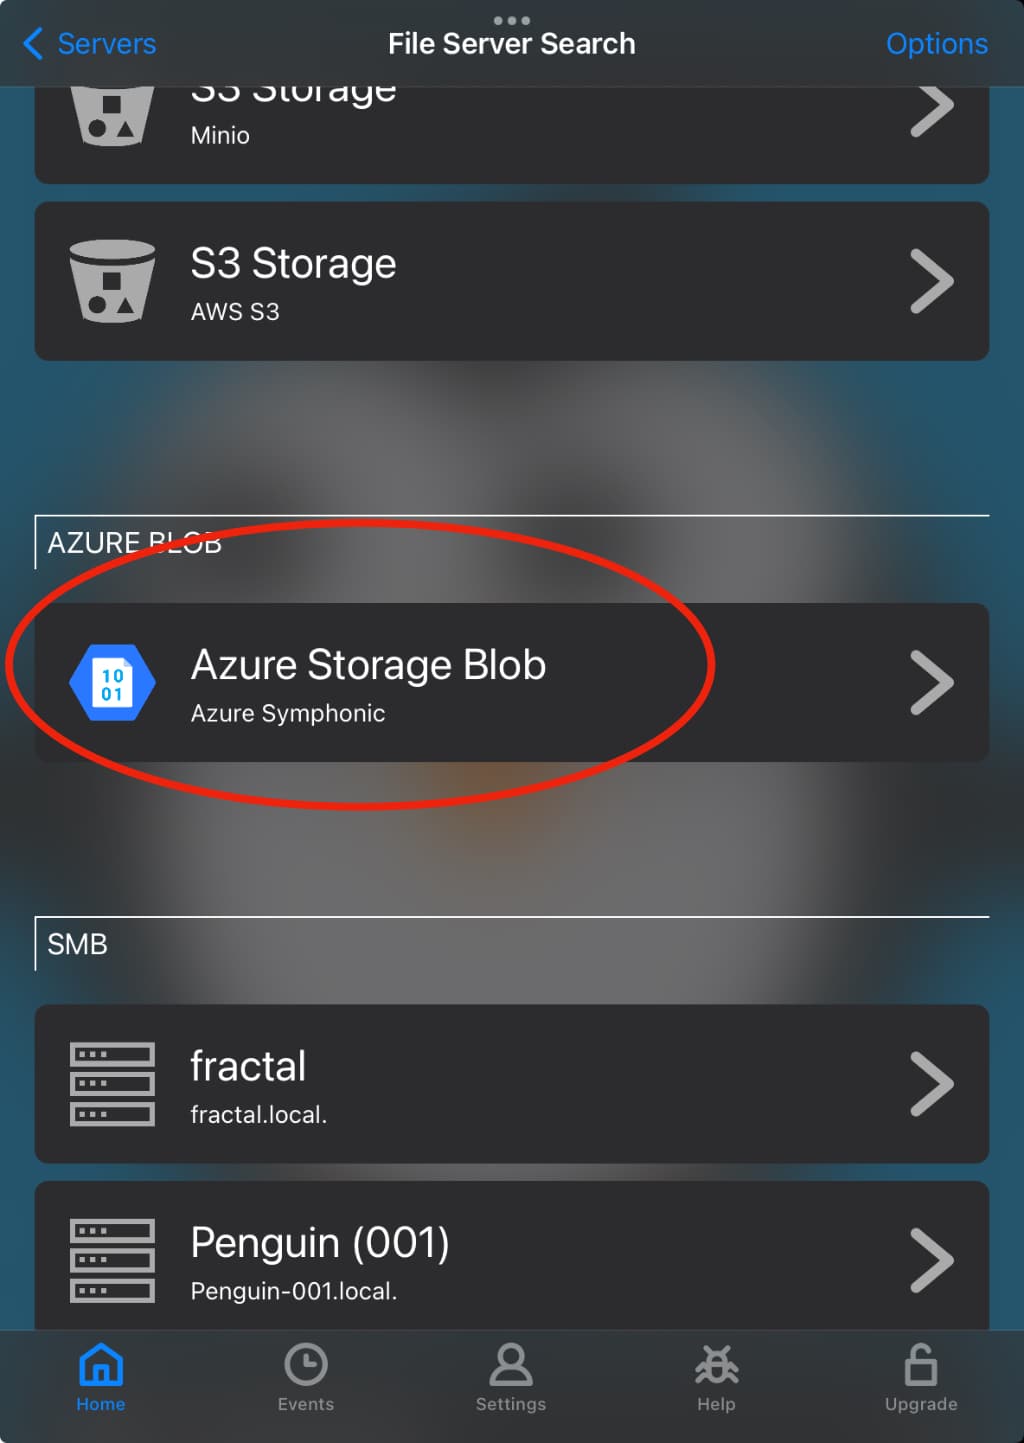
Scroll down to the Azure Blob section and choose the Integration you just added.
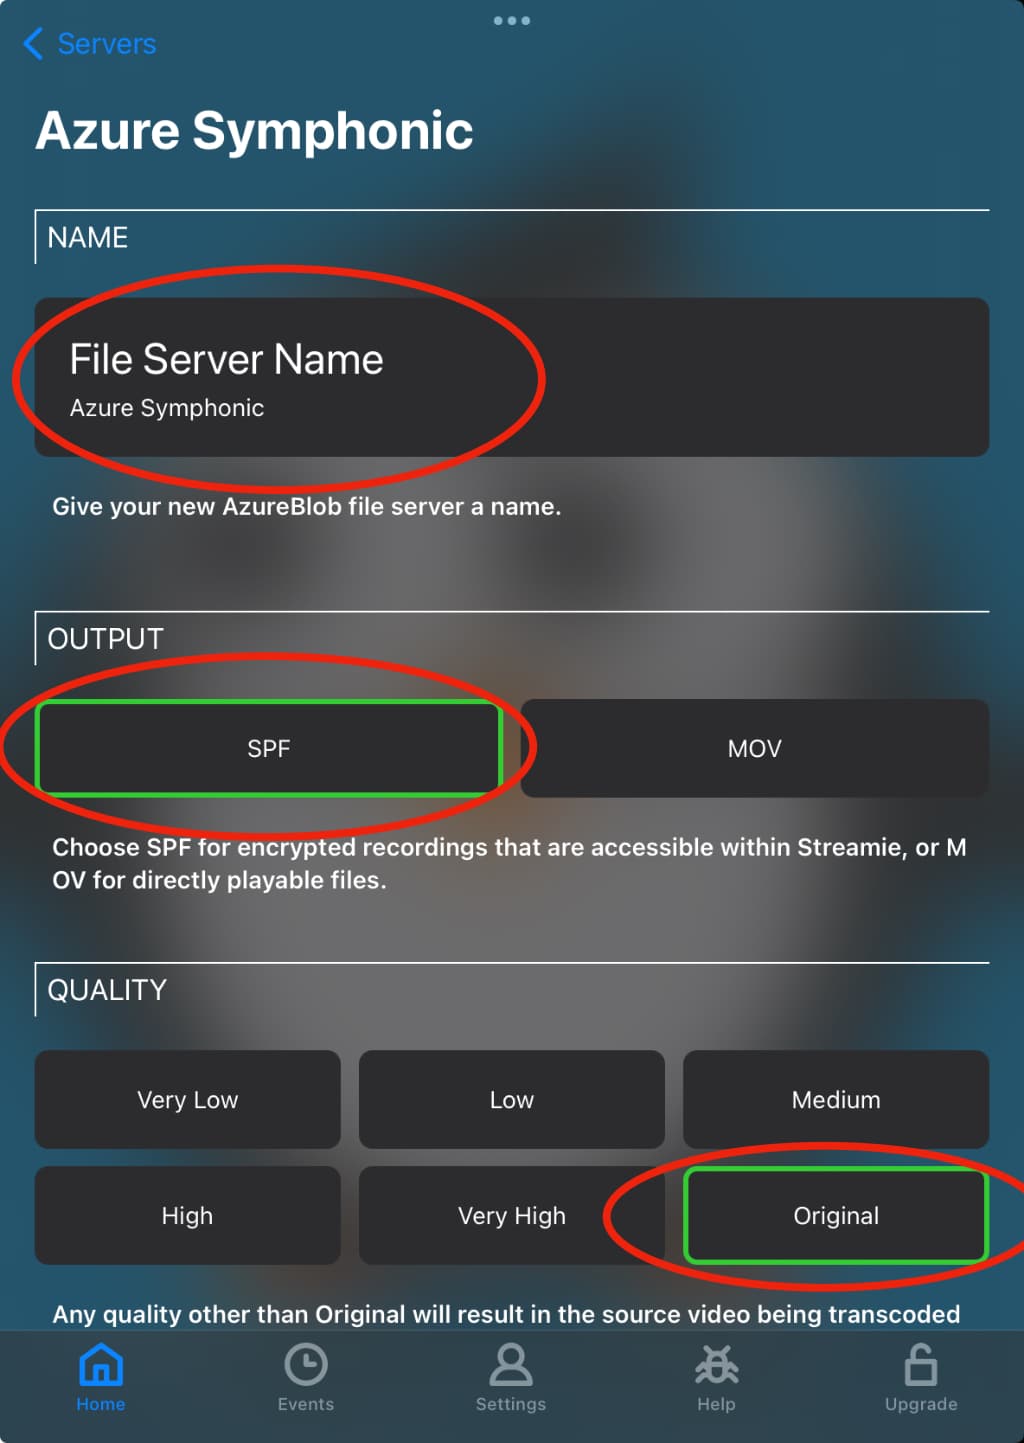
- File Server Name: This is an arbitrary name for your file server. It might also be the same as the Azure Blob Storage container name. It is entirely up to you.
- Output: Streamie can output SPF (Streamie Packet File), which is the best option for secure and efficient recording. Alternatively, Streamie can output an industry standard MOV file, which is widely playable by most movie player apps.
- Quality: Choose Original for improved scalability, as it doesn't require any transcoding, but it also consumes the most storage space. You can come back and change this setting at any time.
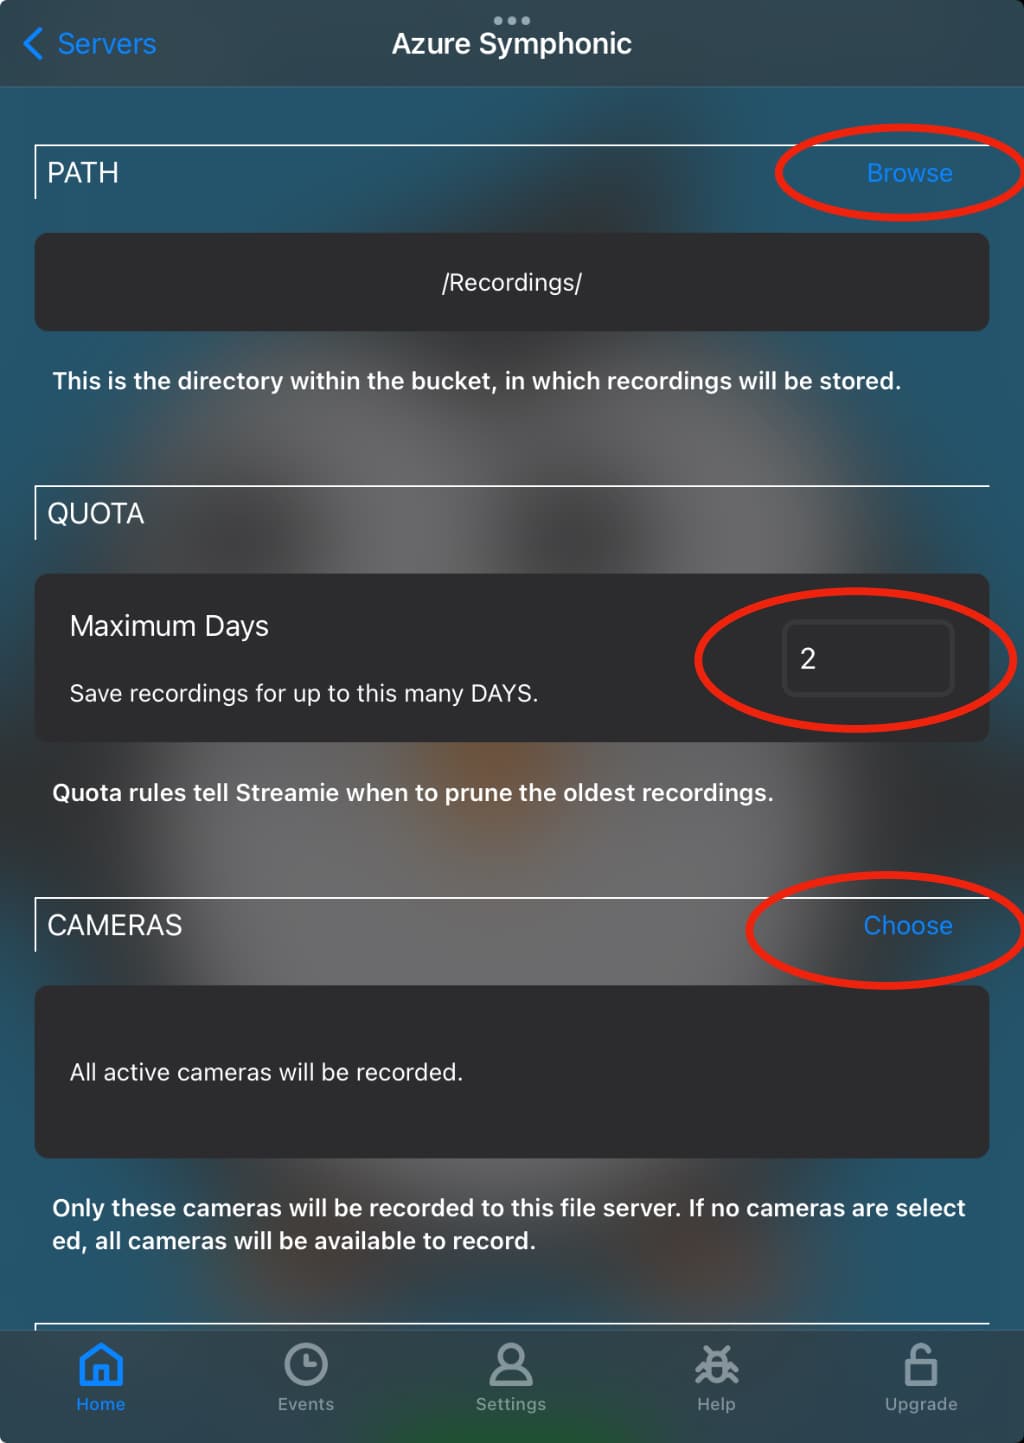
- Path: Choose Browse and choose the path prefix where Streamie will place your recordings.
- Quota: Choose the number of days of recordings to be stored. When you choose n days, then you will always have at least n days of recordings available. Recordings will accumulate all the way to n+1, and then the +1 will be pruned (shortly after midnight).
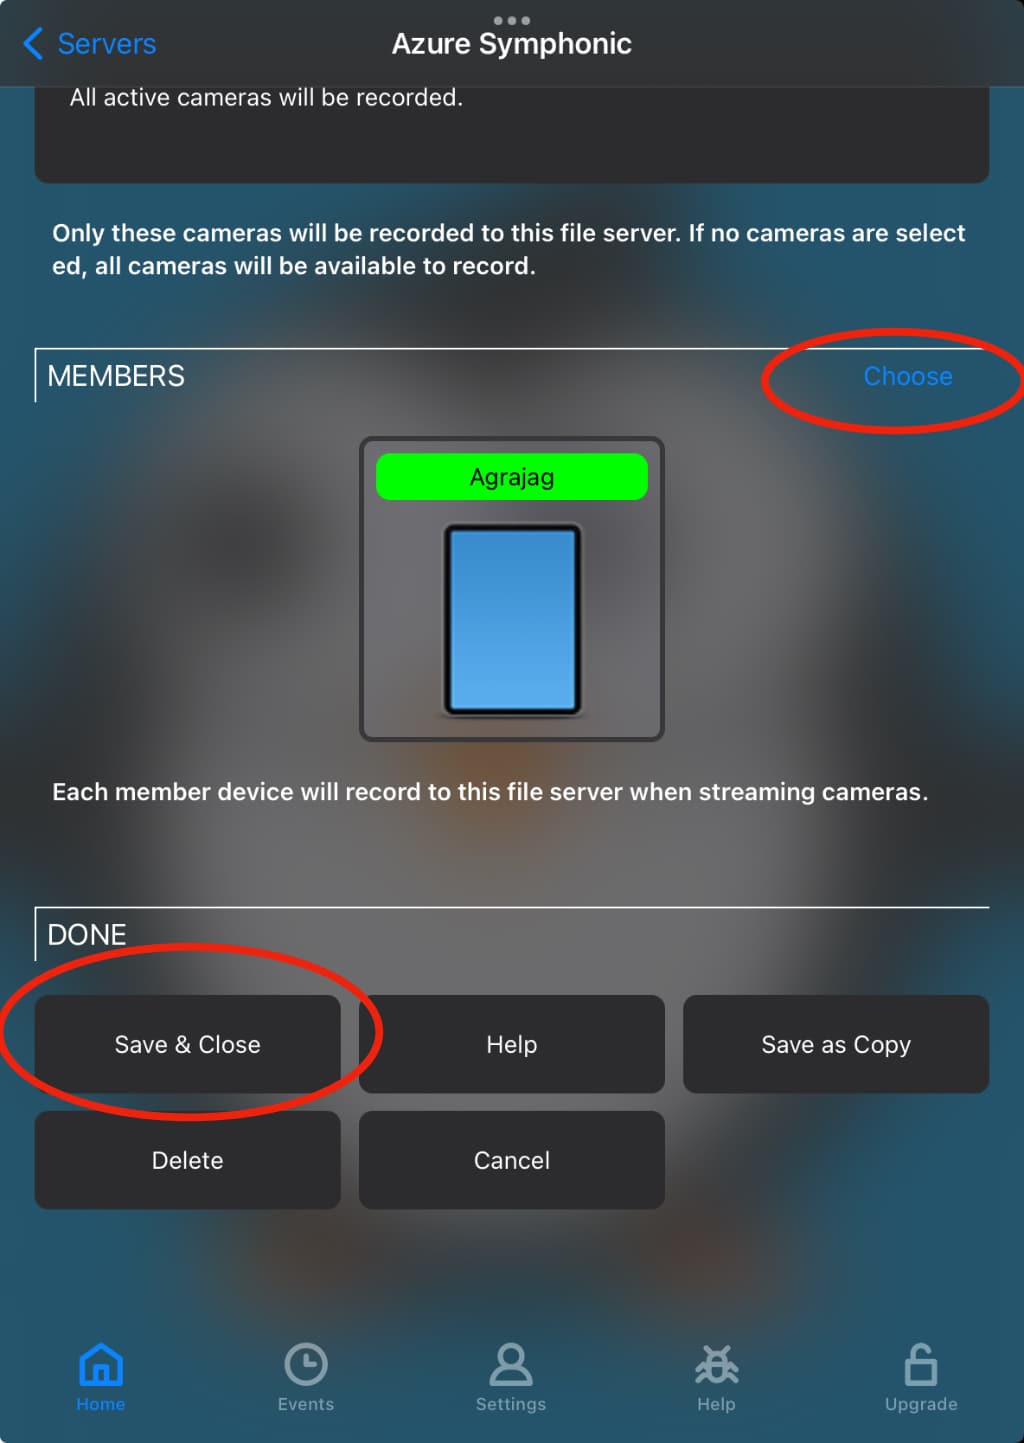
- Cameras: If you only want a subset of your cameras to be recorded, you can choose which cameras to record.
- Members: By default, your current device has been added as a Member on this File Server. This means that whenever this device (or whichever devices you specify) stream any of the available cameras, those cameras will be recorded to this file server.
- Save & Close: You are done.
As a last step, start streaming the cameras you want to record. Every ~10 minutes, Streamie will emit a recording for each camera and dump it to this file server. It is important to note that you MUST be actively streaming the camera in order for it to be recorded. There's no magic here.
To browse your recordings, just navigate to Home ==> File Servers and tap on your file server. You can do this from a 2nd device associated with the same account and thereby not interrupt the recording process.
Created: 1 year ago
Updated: 7 months ago
Author: Curtis Jones
Topics: S3 How To Integrations Record to Cloud
Streamie provides a best-in-class user experience on your iPhone, iPad, Apple TV and Apple Silicon Mac, with an intuitive user interface that makes it simple to discover, stream, record, monitor and share your HomeKit, Google Nest, Ubiquiti UniFi Protect and ONVIF-compatible IP and RTSP cameras. Streamie keeps you informed with motion event notifications and it works with most cameras using its advanced audio and video codec support. You can watch your cameras from anywhere, record 24/7 to your private NAS, remotely manage multiple locations, device permissions and seamlessly synchronize settings across your devices; configure Hubitat smart home automations, live stream to YouTube and rely on the in-app technical support system when you need help -- and you can also reach us by phone. Download Streamie today for all of your CCTV needs.