
Streamie has had built-in support for Rhombus since v4.7.0.
Rhombus support in Streamie is based off a new Integration. This API-level support allows Streamie to discover your cameras which enables you to quickly and easily add your cameras.
The process involves first creating a new Rhombus Integration in Streamie and giving it a Rhombus API key. Streamie can then auto-discover your cameras and you can quickly tap on each camera to add it.
Streamie’s built-in support for Rhombus camera streaming is based on Secure Raw Streams. You must enable SRS for your cameras before they will work with Streamie.
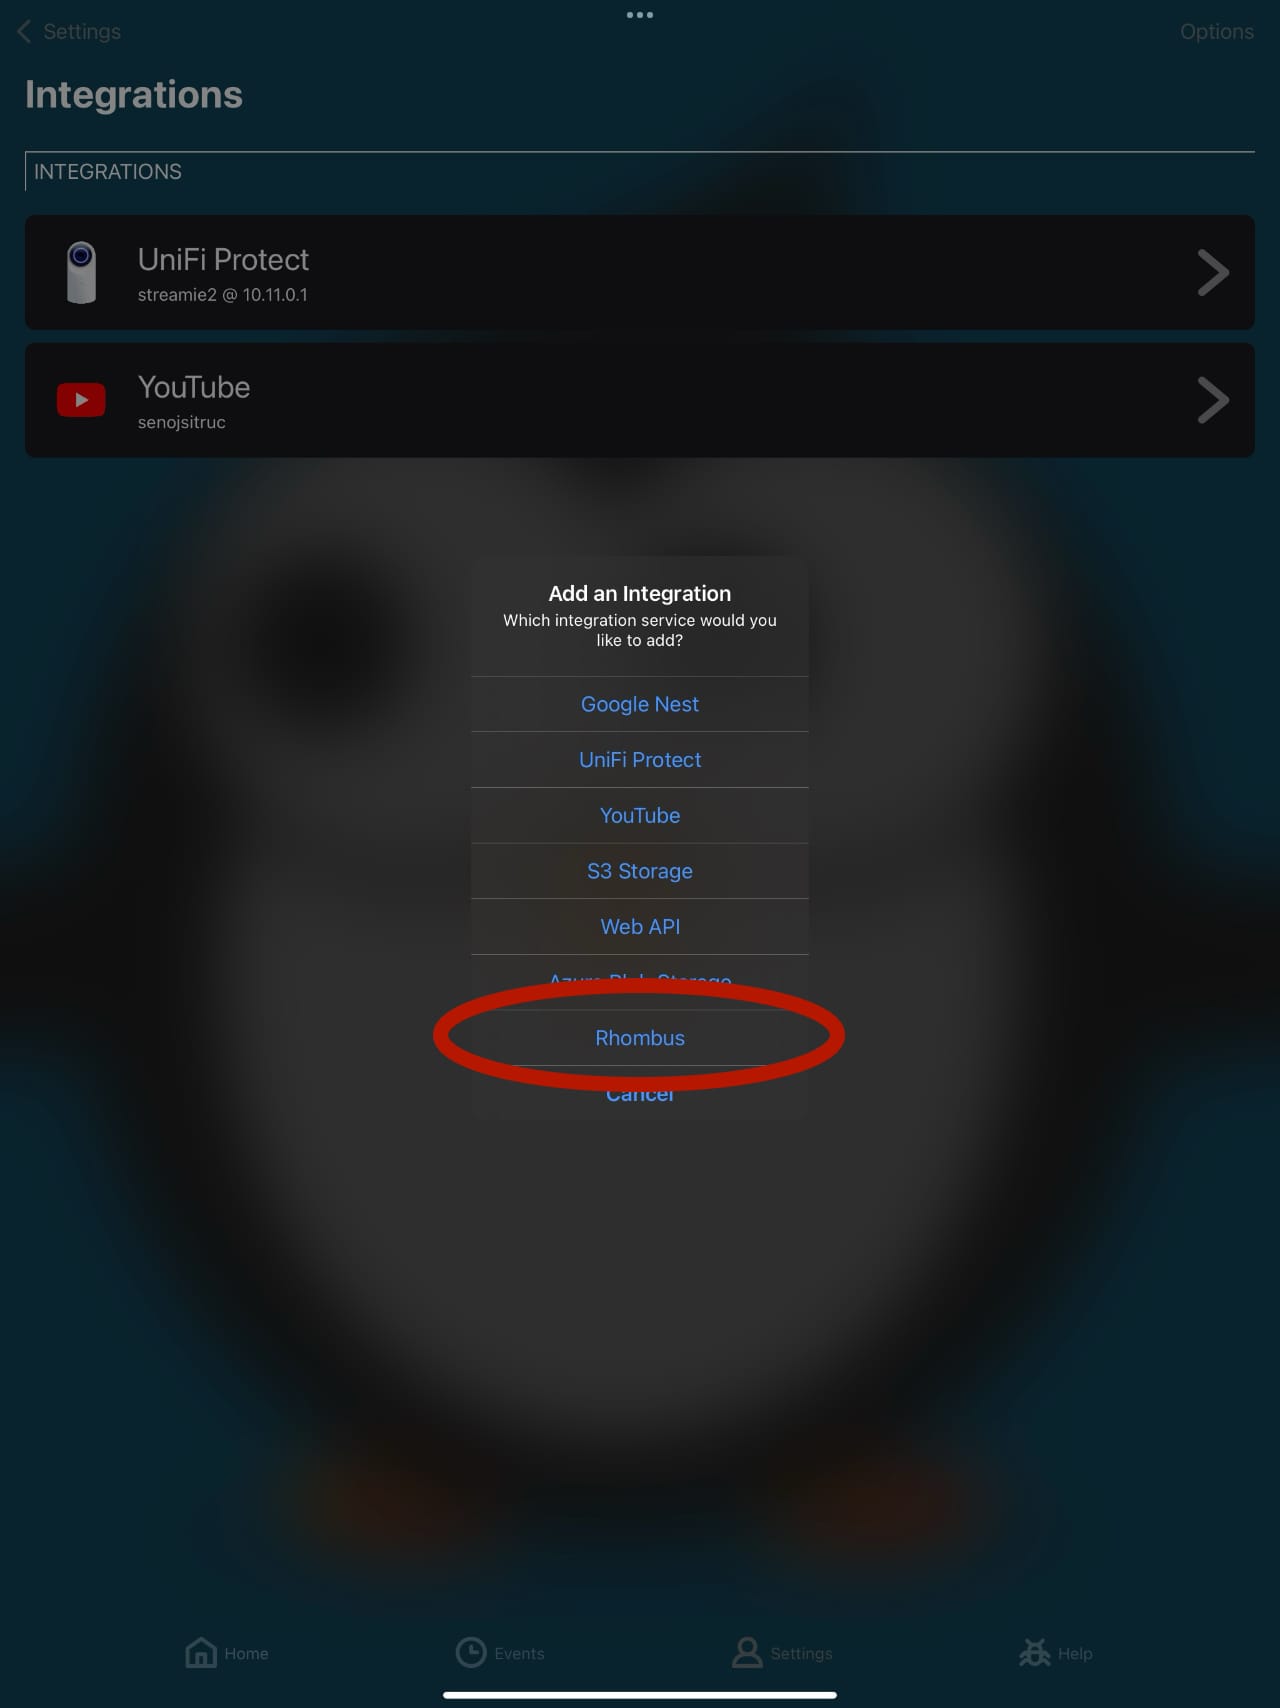
To create the Rhombus Integration in Streamie, navigate to Settings ==> Integrations ==> Options ==> Add Integration and choose Rhombus.
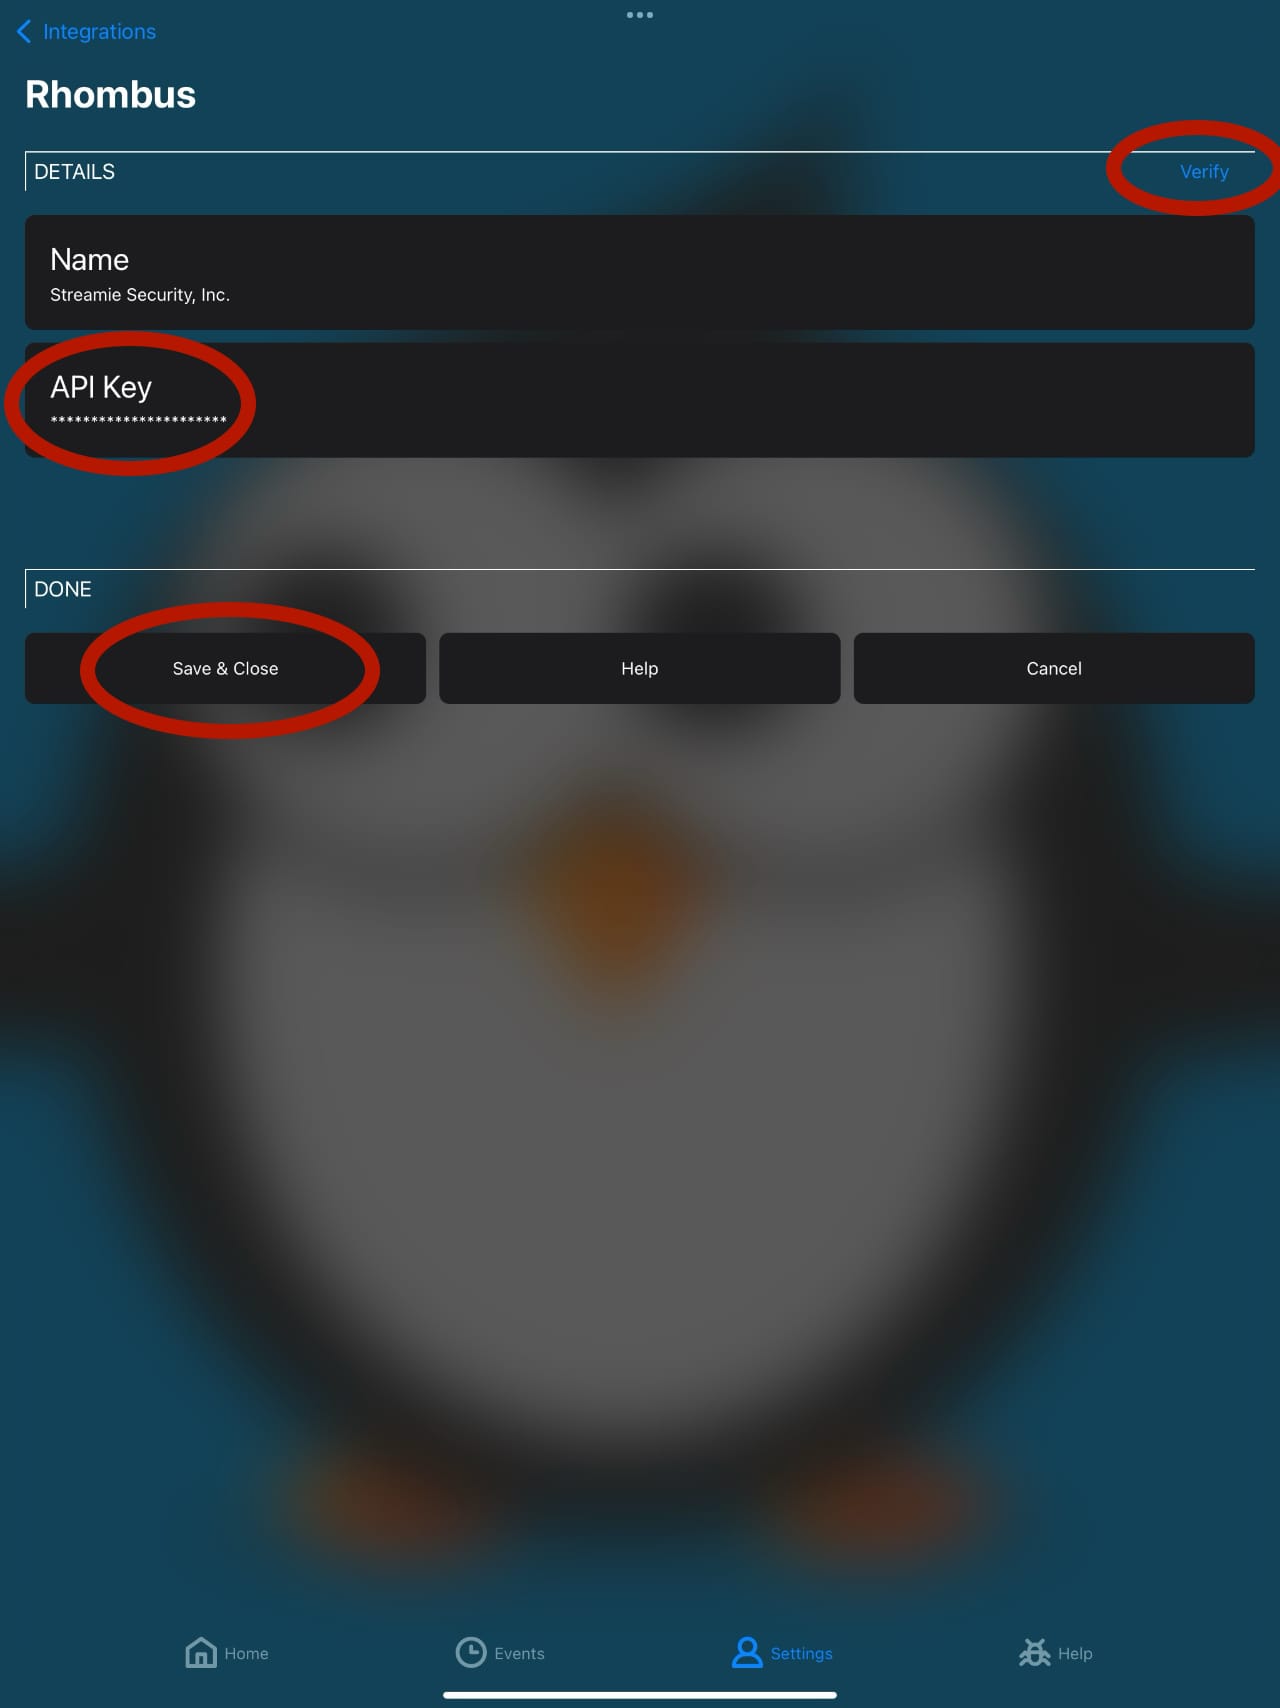
Copy and paste your API key into the correct field and tap the Verify button. The name field should automatically populate with the name of your organization. You can edit that if you want.
Hit Save & Close to continue.
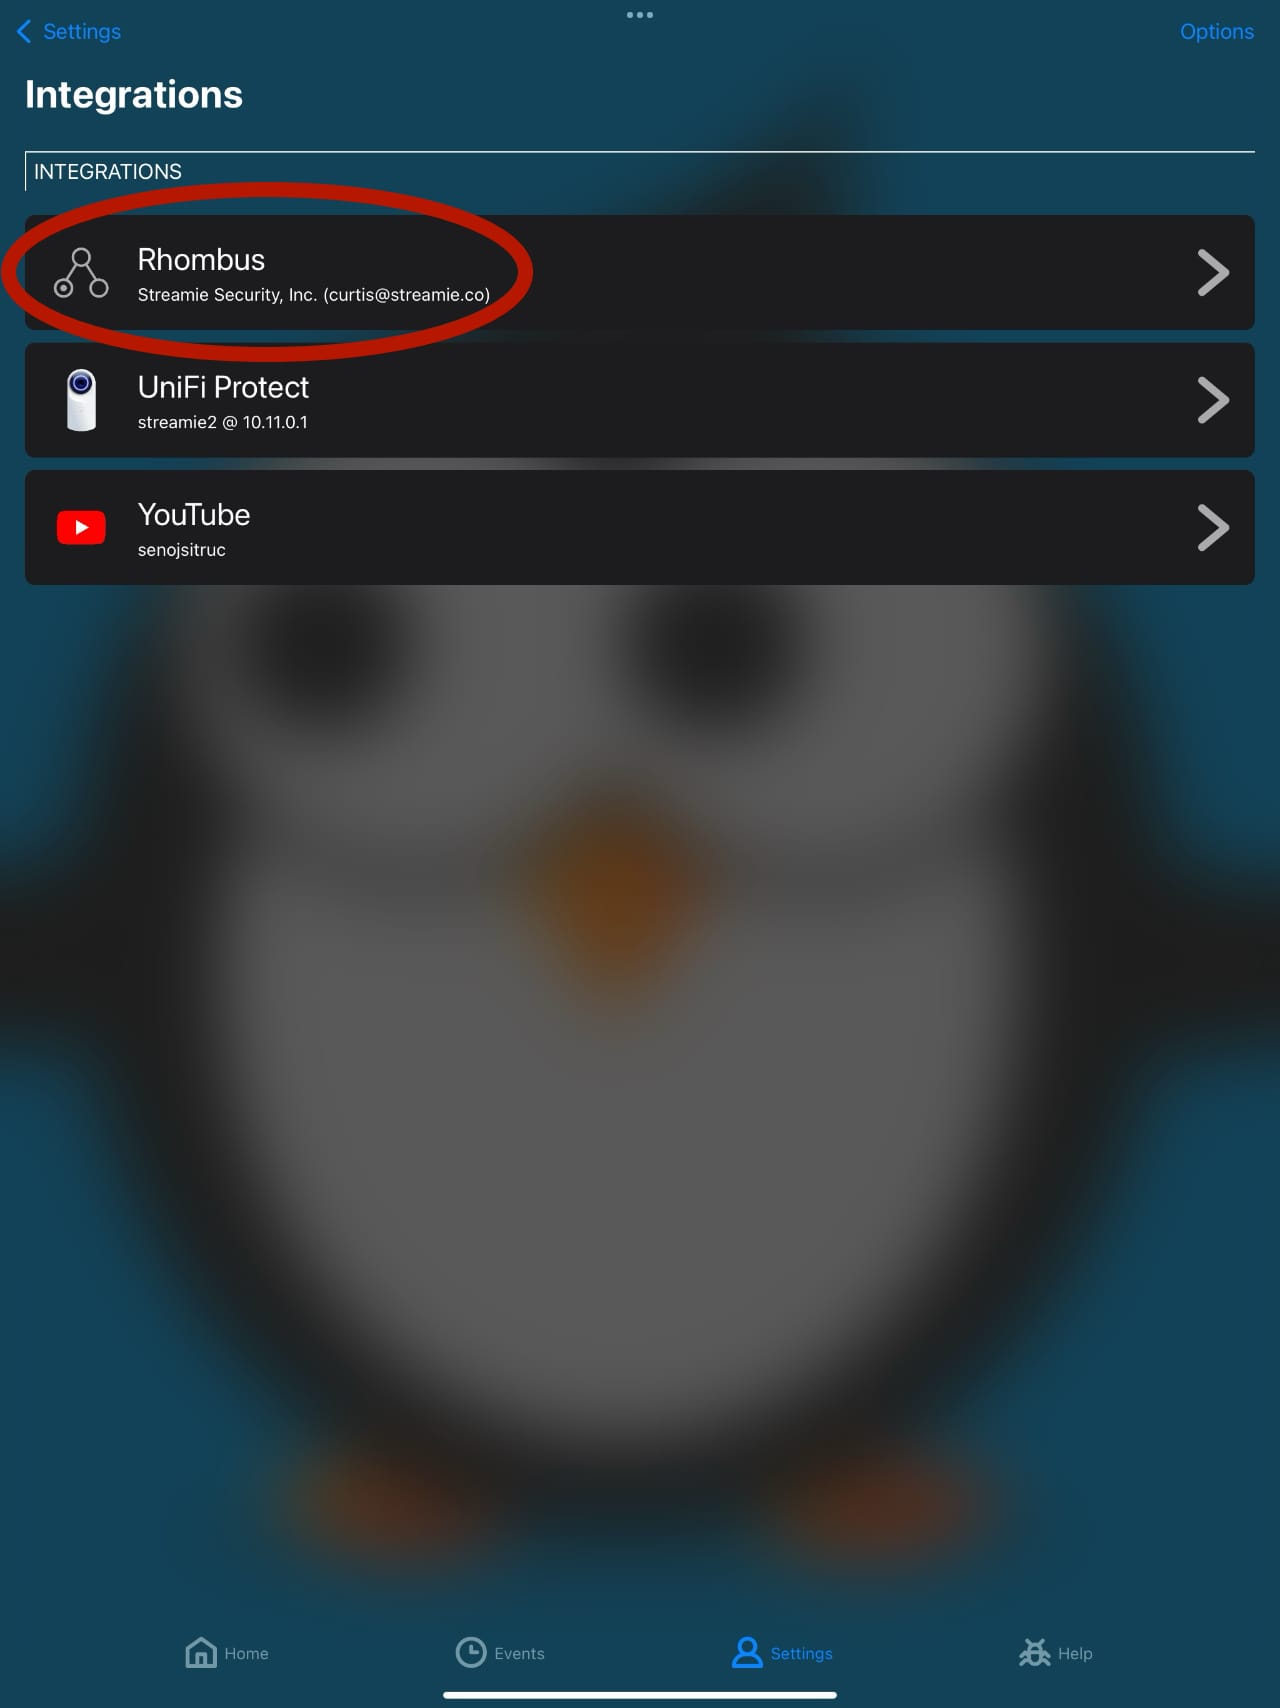
You should now be able to see your newly added Rhombus Integration.
That’s it for the integration side of things. Let’s get your cameras set up.
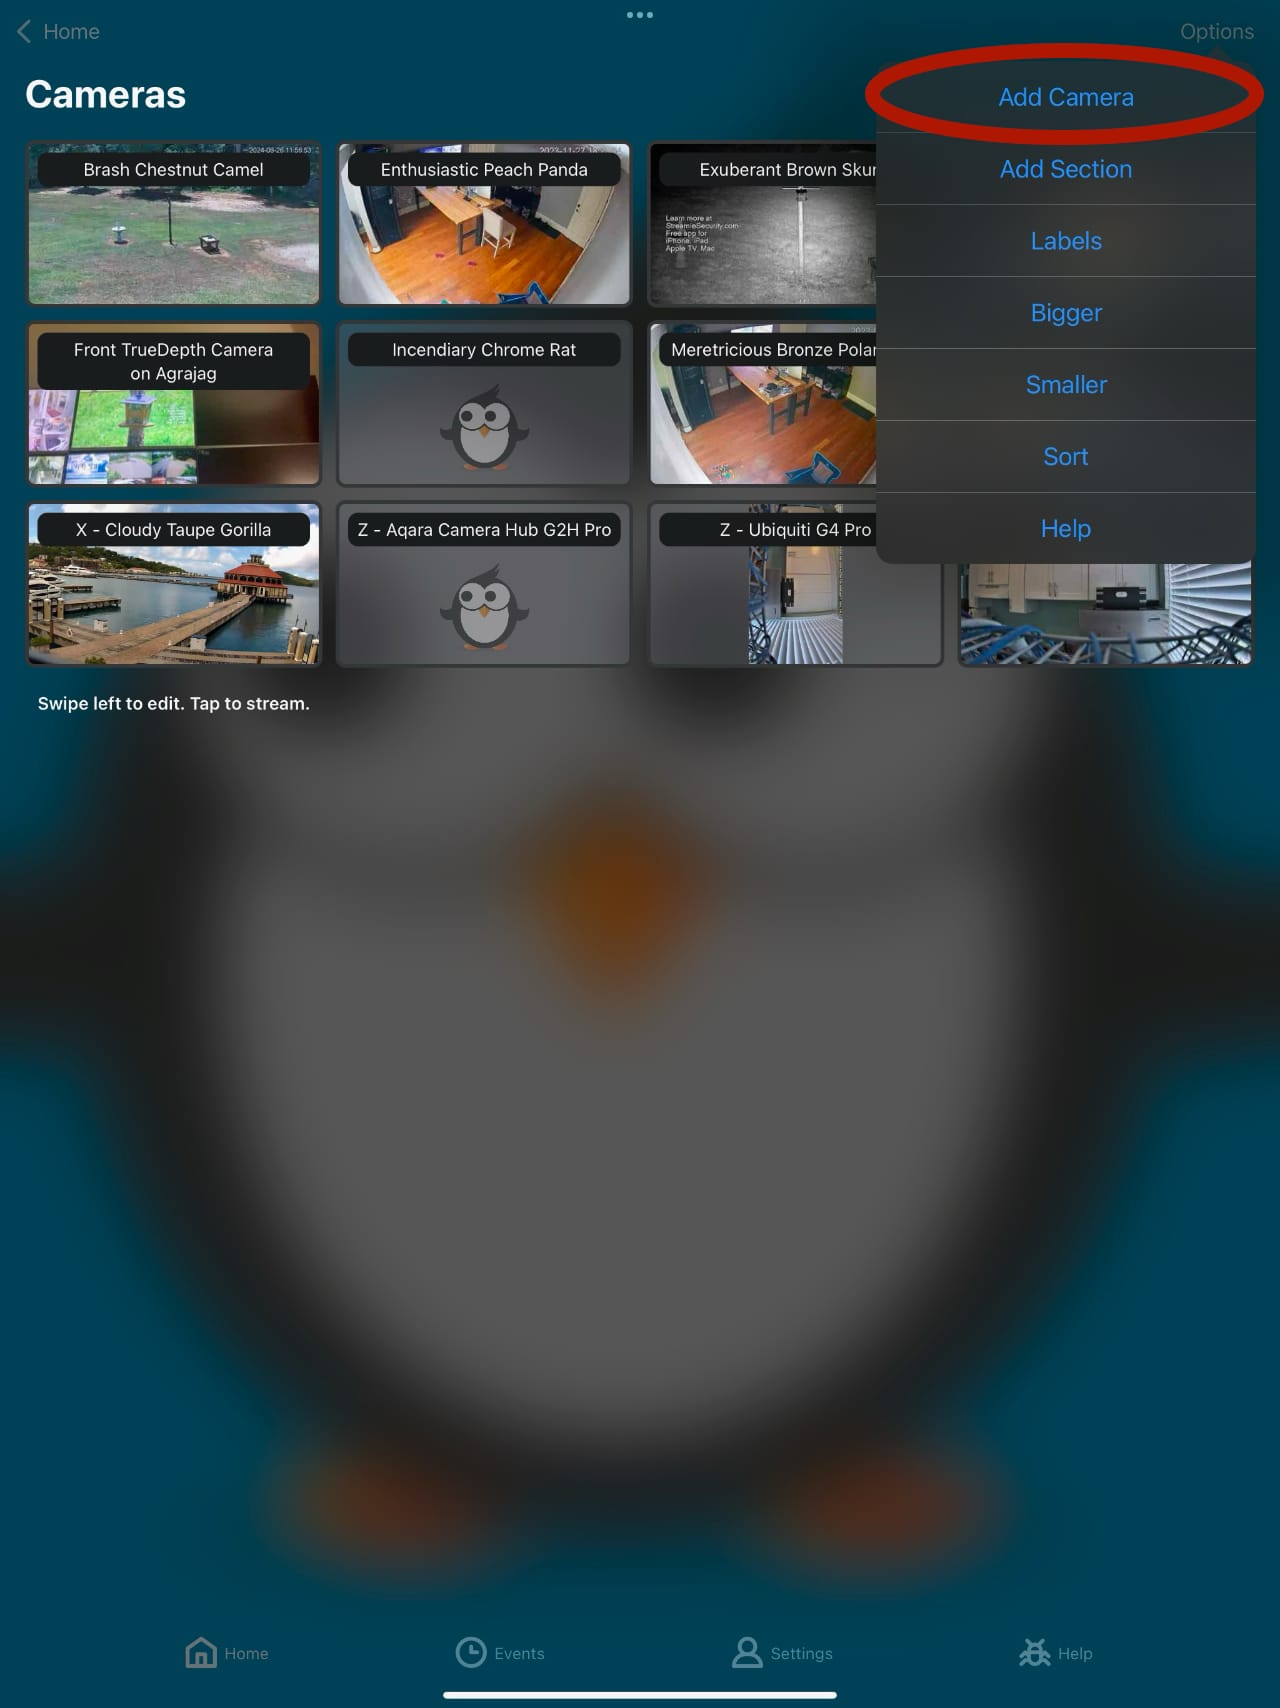
Navigate in Streamie to Home ==> Cameras ==> Options and choose Add Camera.
This is the Cameras Search screen. Scroll down to the Rhombus section and you should see a list of your cameras.
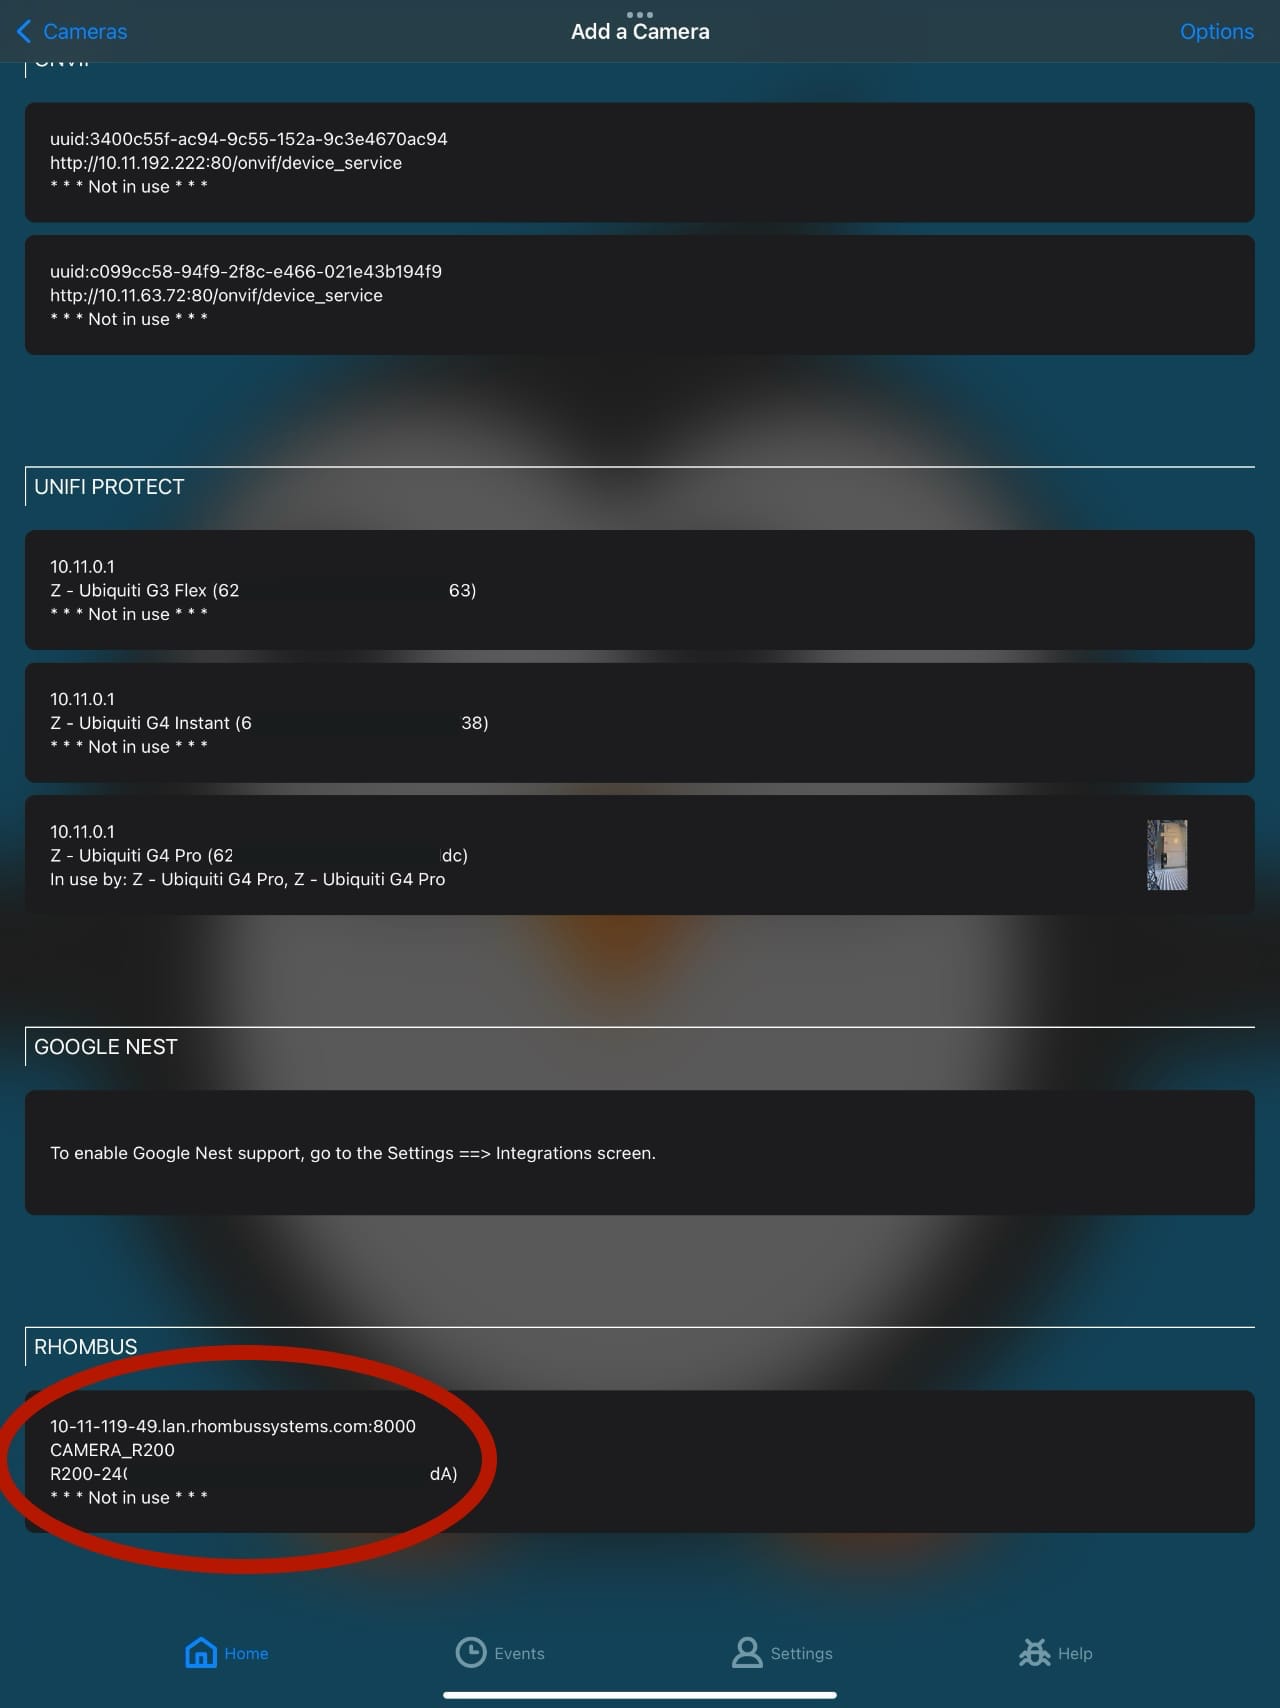
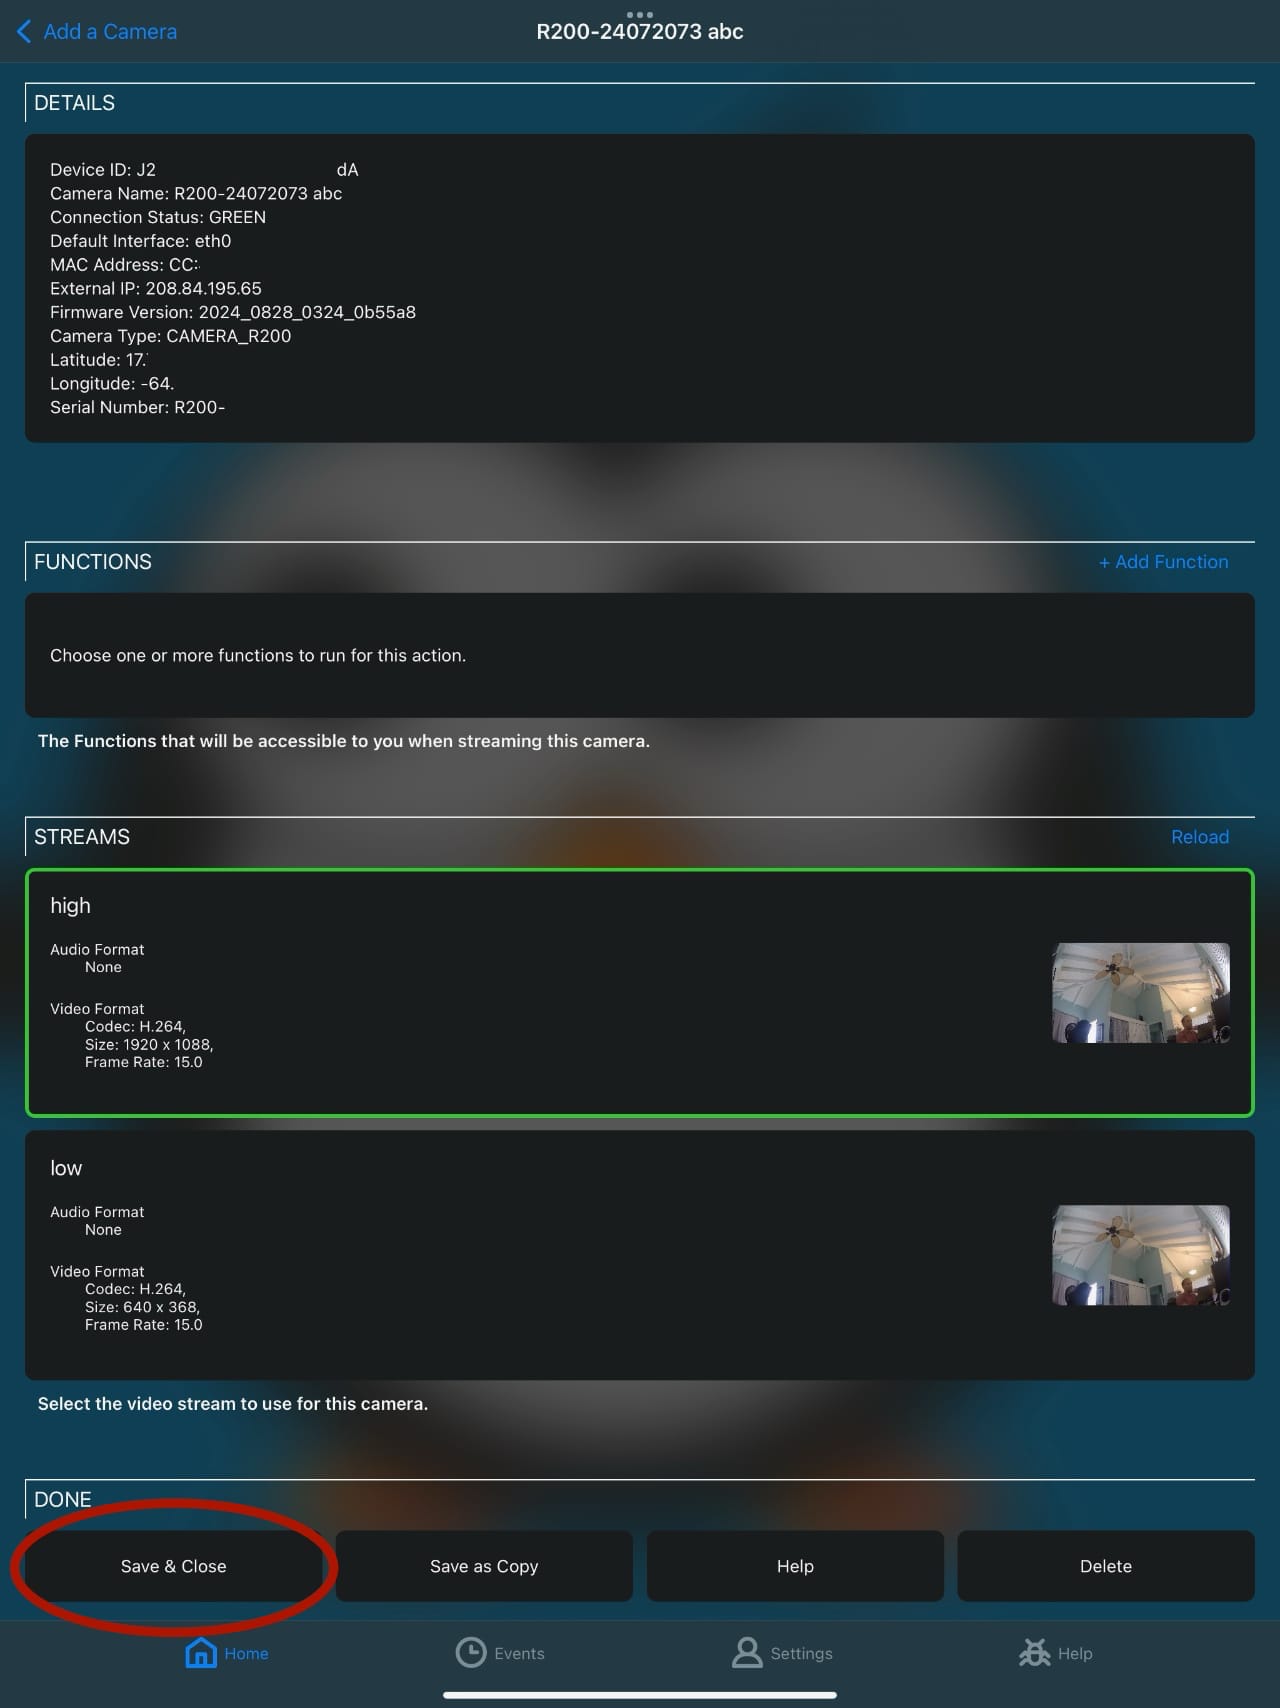
Tap on one of your cameras to view the Rhombus Camera Configuration screen. You can see hardware details about your camera and the list of available streams.
Hit Save & Close to add this camera to Streamie.
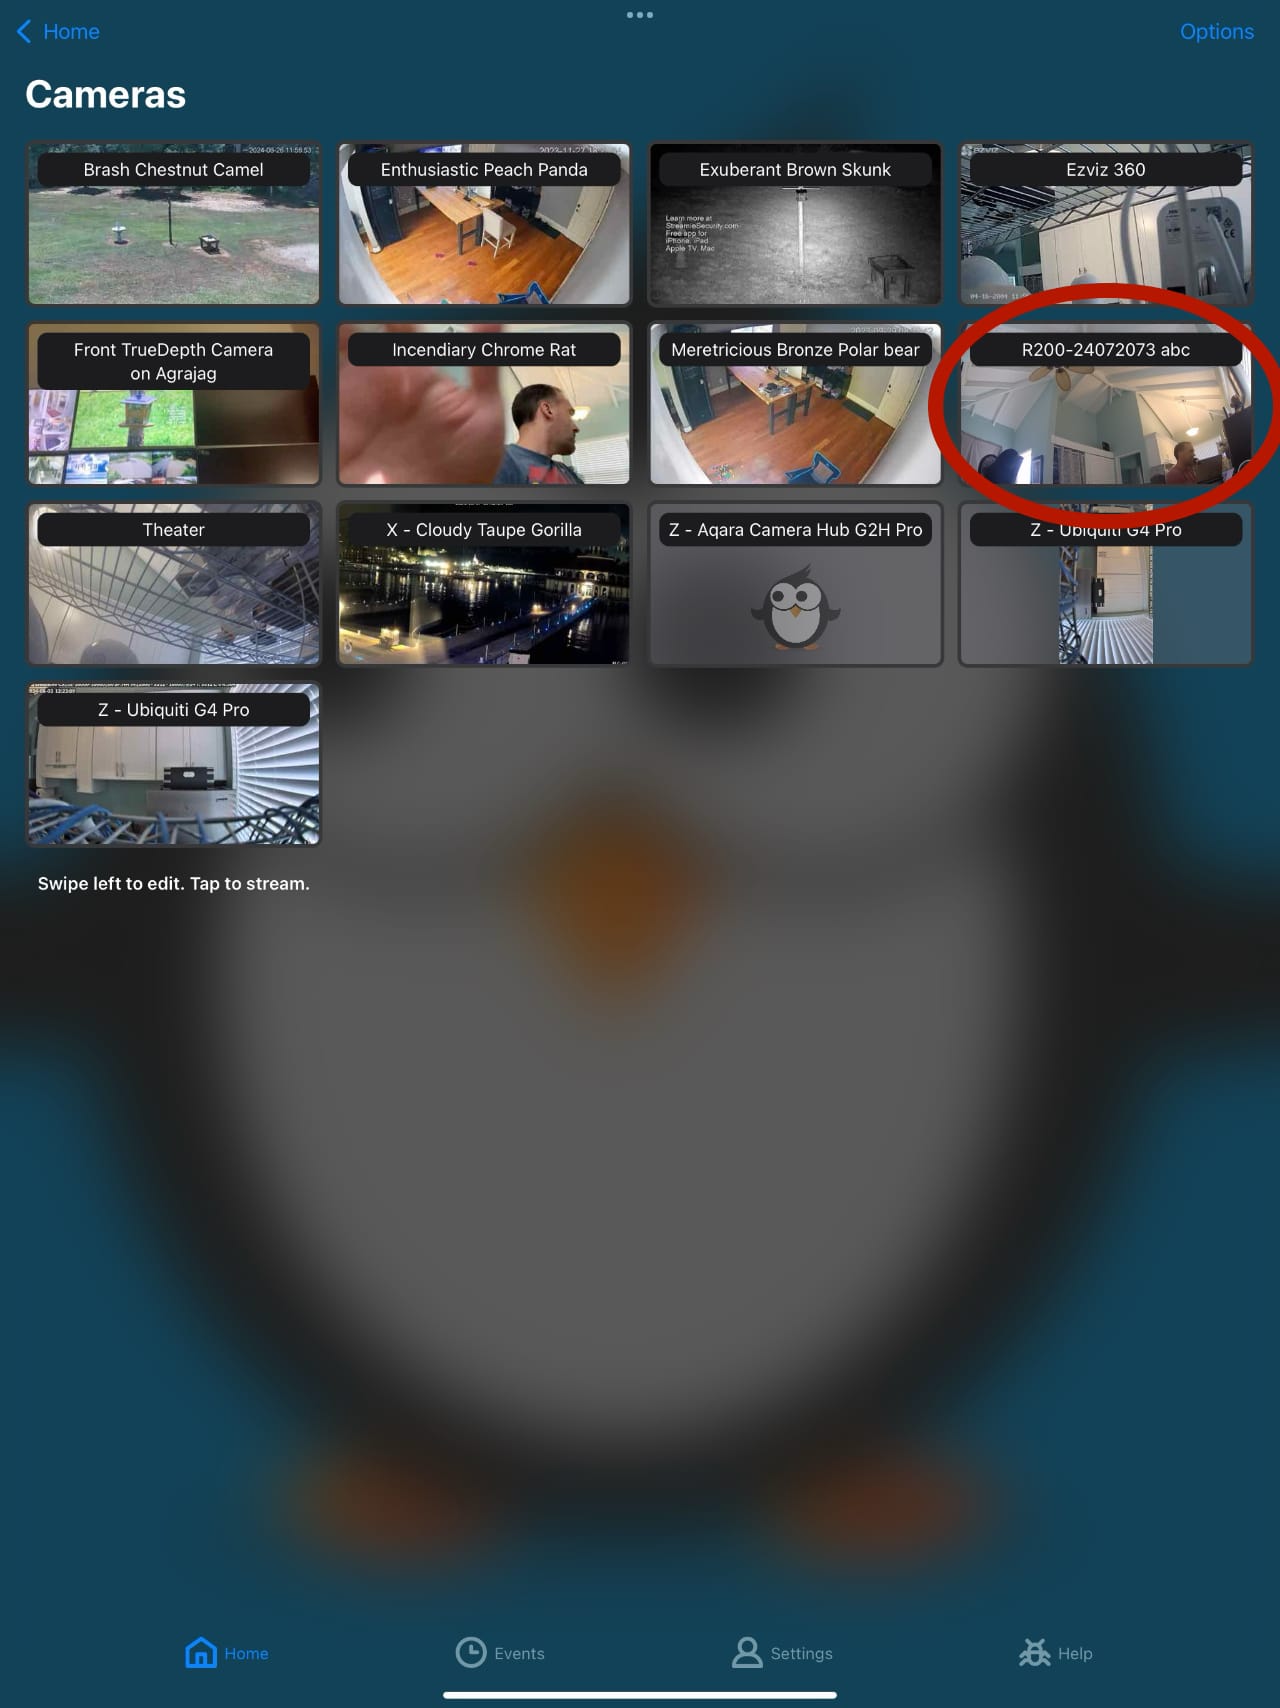
Navigation in Streamie back to the Home ==> Cameras screen and your newly added camera should be visible there.
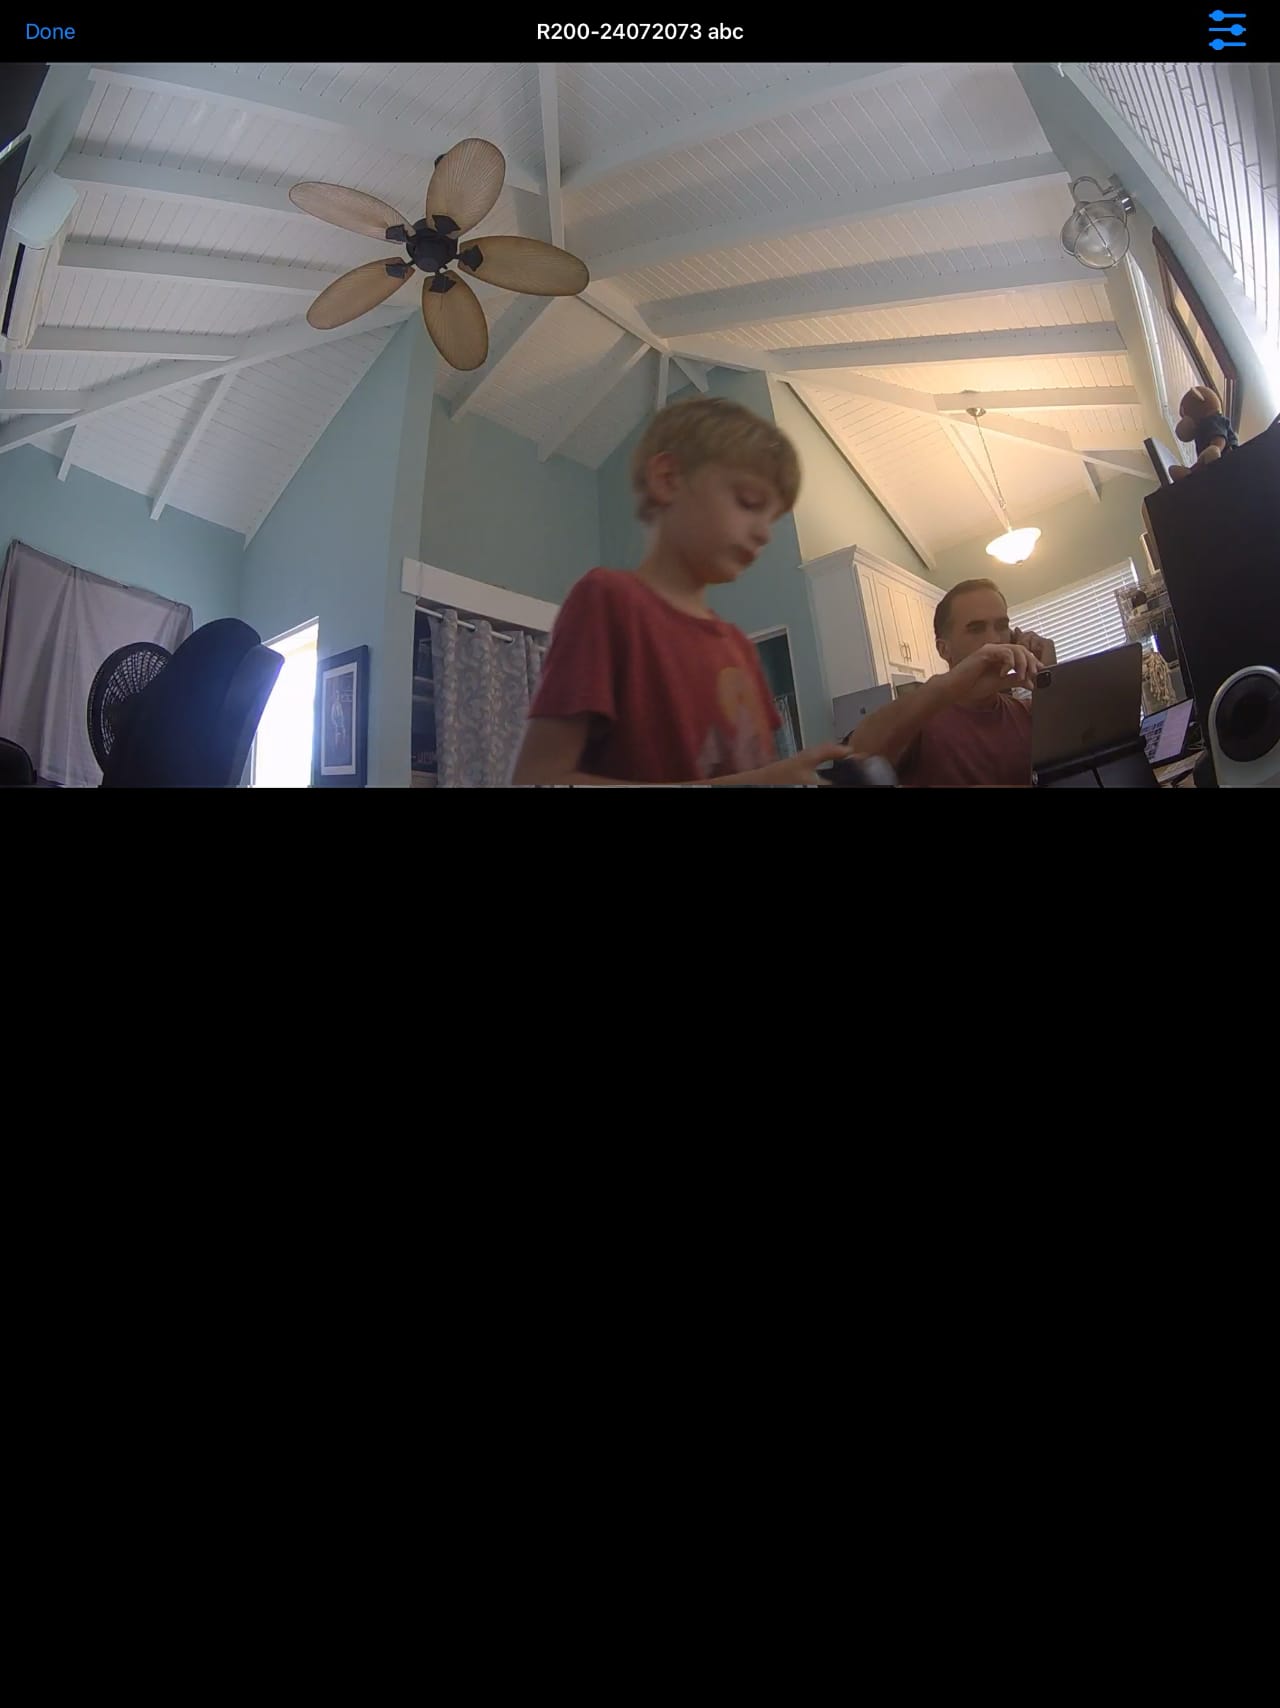
Tap on the camera to start streaming it. Yes, I’m taking screenshots for this tutorial while stuck on a phone call.
Repeat these add camera steps for each of your Rhombus cameras.
Streamie has built-in support for Rhombus Webhooks. We will create a webhook URL in Streamie and enter it into your Rhombus console so that Streamie can act on motion events (and other things).
To get started, navigate in Streamie to Settings => Webhooks => Options => Add Webhook. Give your new Webhook a name, such as Rhombus. Make sure the status is Enabled. Tap on the endpoint to copy the URL. Tap Save & Close to finish.
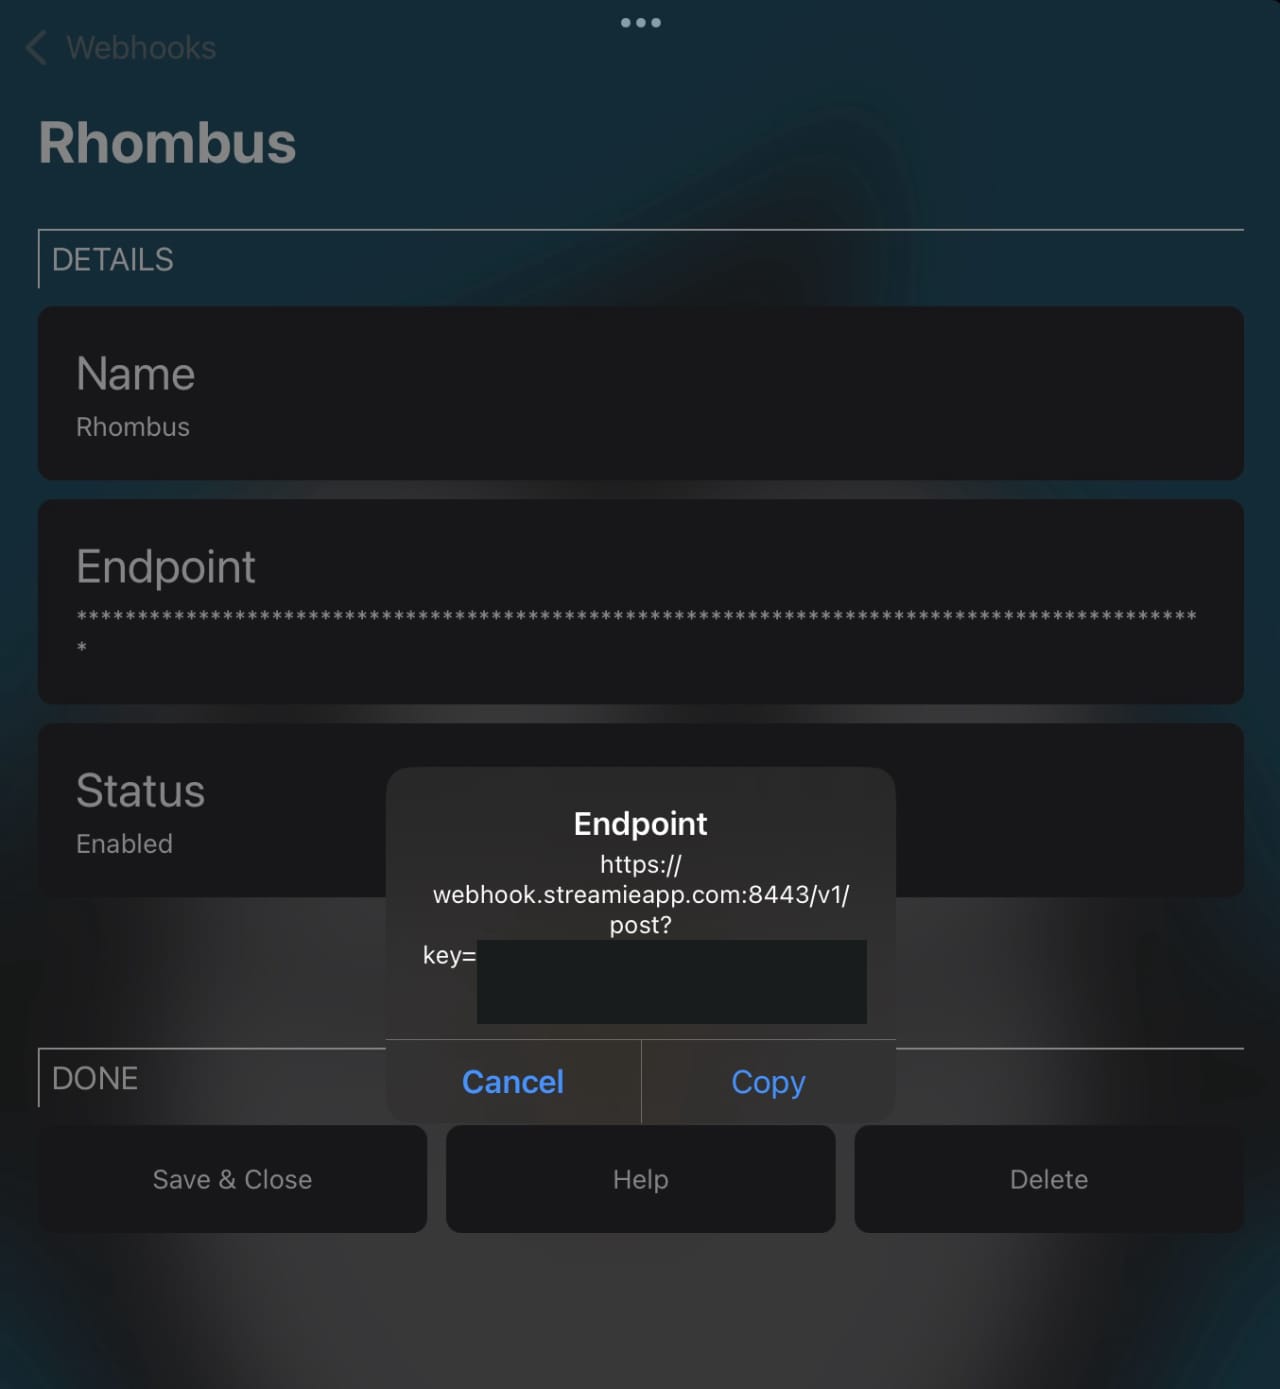
Next, let’s associate this Webhook with your Rhombus Integration. Navigate in Streamie to Settings => Integrations and choose your Rhombus integration. In the Webhooks section, select your new Rhombus webhook. Save & Close to finish.
With this step complete, whenever you’re using a Rhombus camera in Streamie, Streamie will be subscribed to receive Rhombus activity events via the webhook.
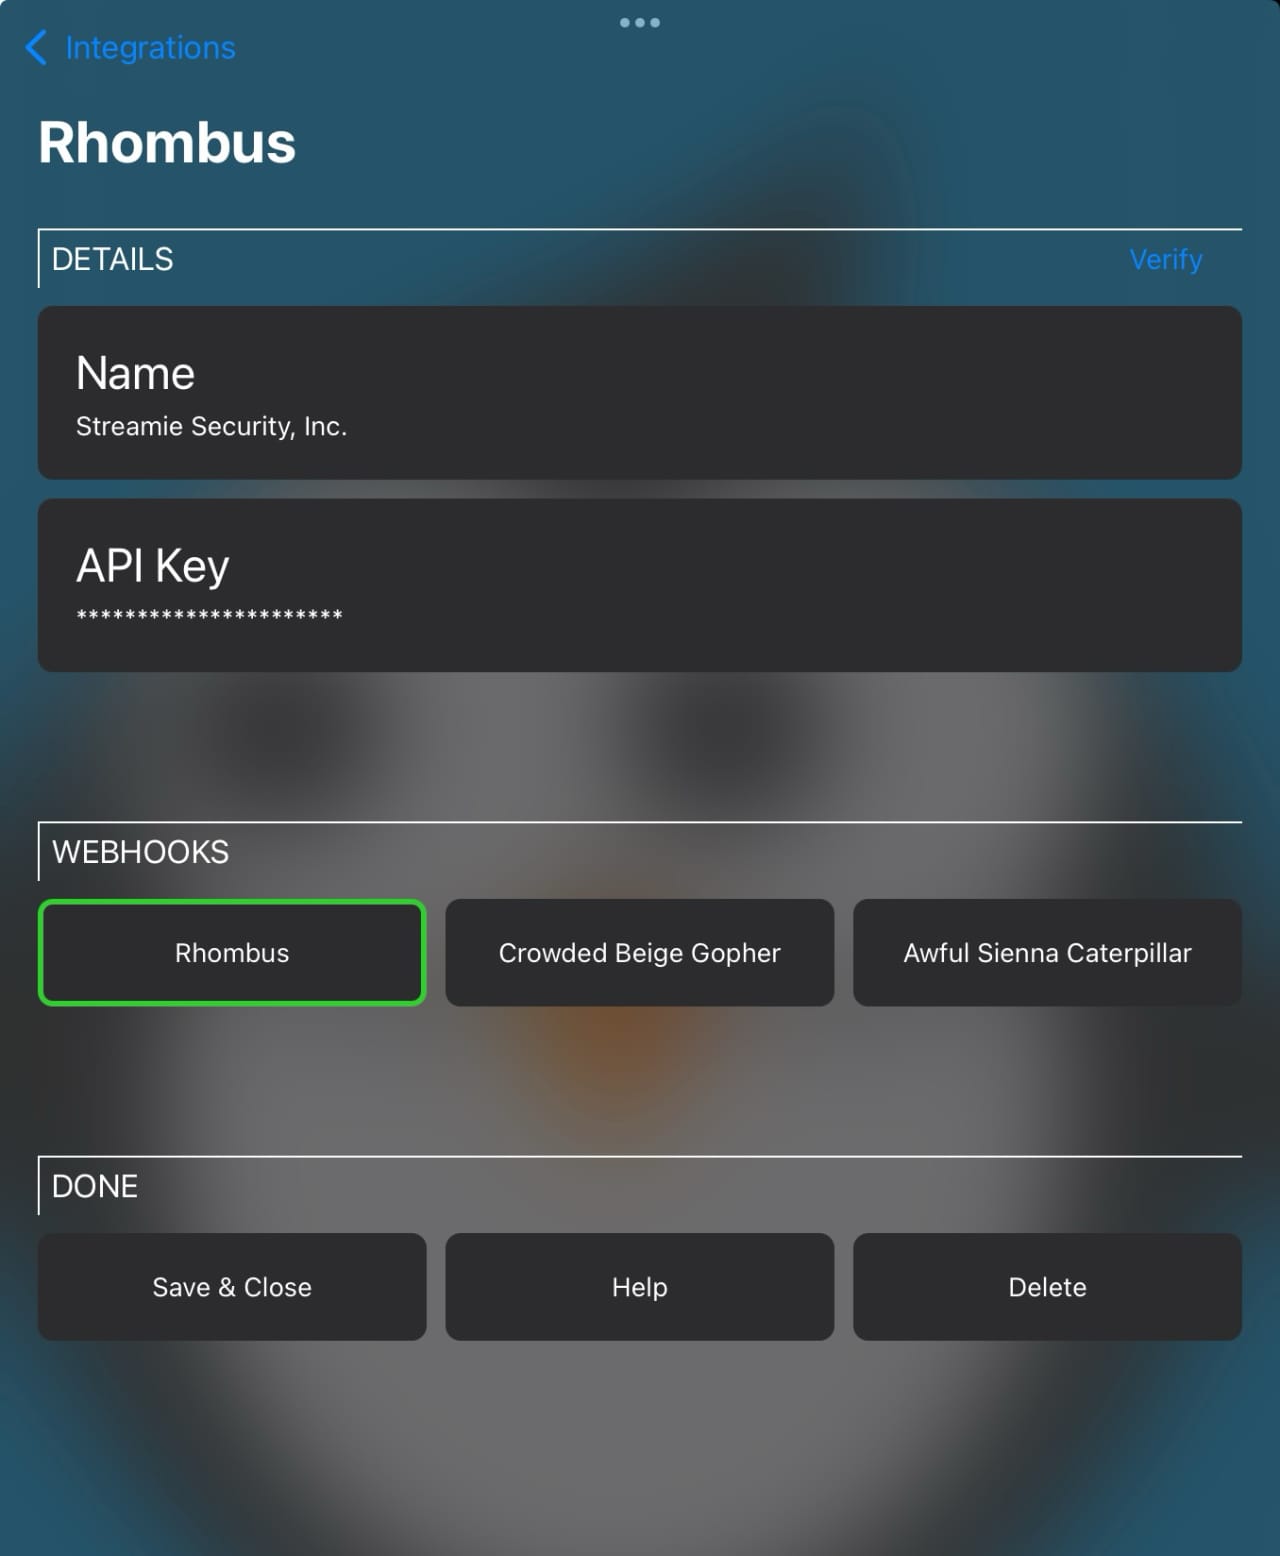
In the Rhombus Console, navigate to Settings => Third Party Integrations => Webhook Settings and create a new Activity Webhook. Paste the URL you just copied from Streamie.
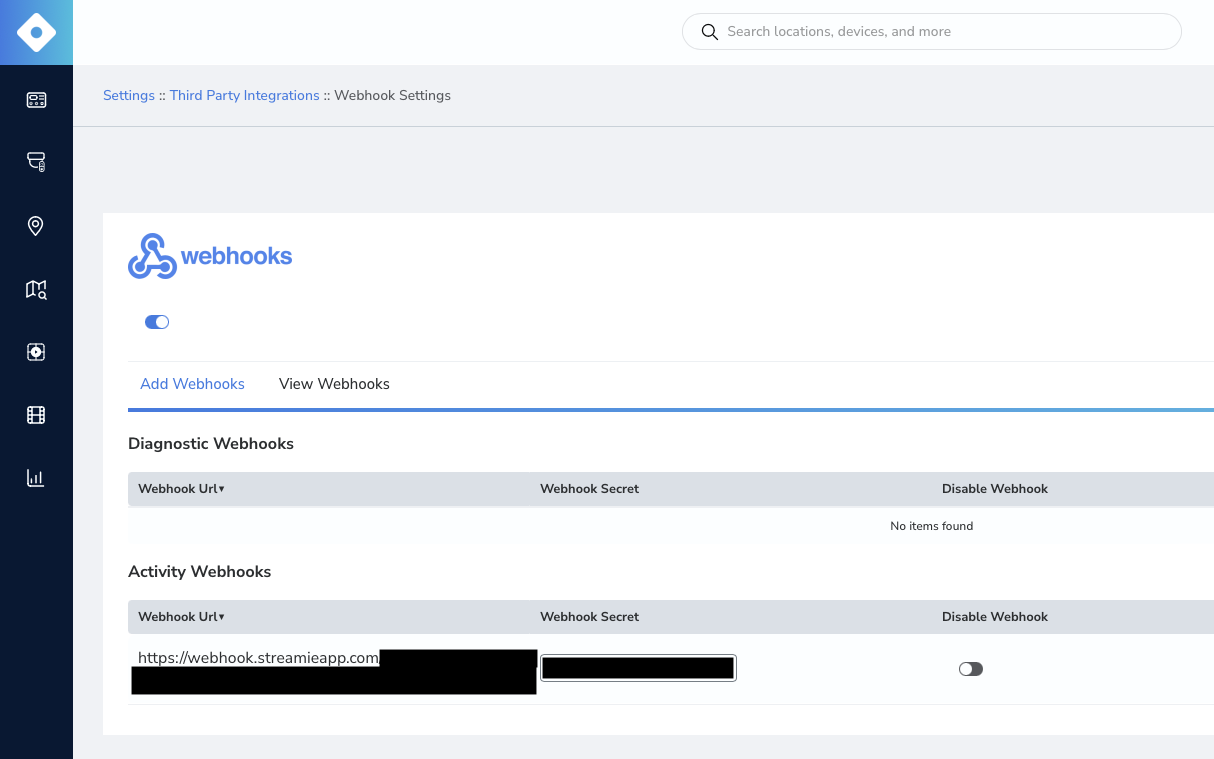
Finally, Streamie needs to learn what Rhombus Activity events each of your cameras can produce. Once Streamie has learned this, you can assign custom actions to those events.
Start streaming your Rhombus cameras. If you’re interested in human motion events, then you need to trigger a human motion event for each of the cameras. Passively, you could just leave the cameras running for a while and check back on them later. Once this step is complete, each of your cameras should have a set of known event types associated with them. Let’s find out….
To add custom actions to a Rhombus camera, navigate in Streamie to Home => Cameras and edit one of your Rhombus cameras (swipe-left on a touch device, or shift+click on a Mac). Scroll down to the Actions section. You can see here that I’ve already added two actions to this camera.
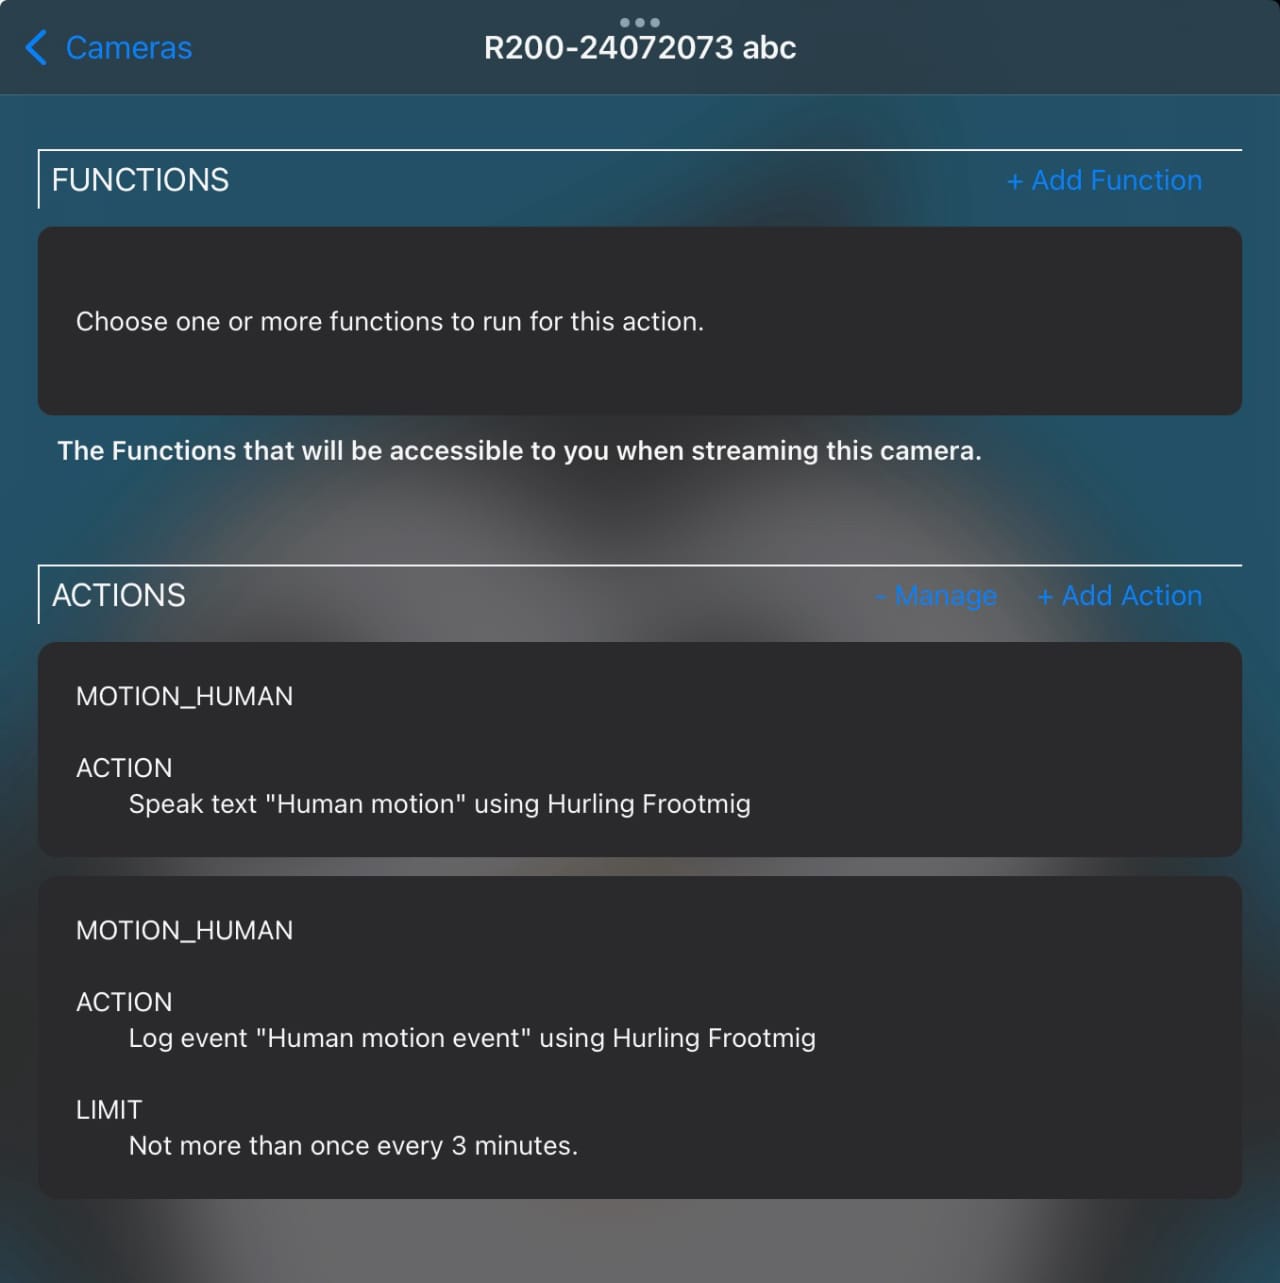
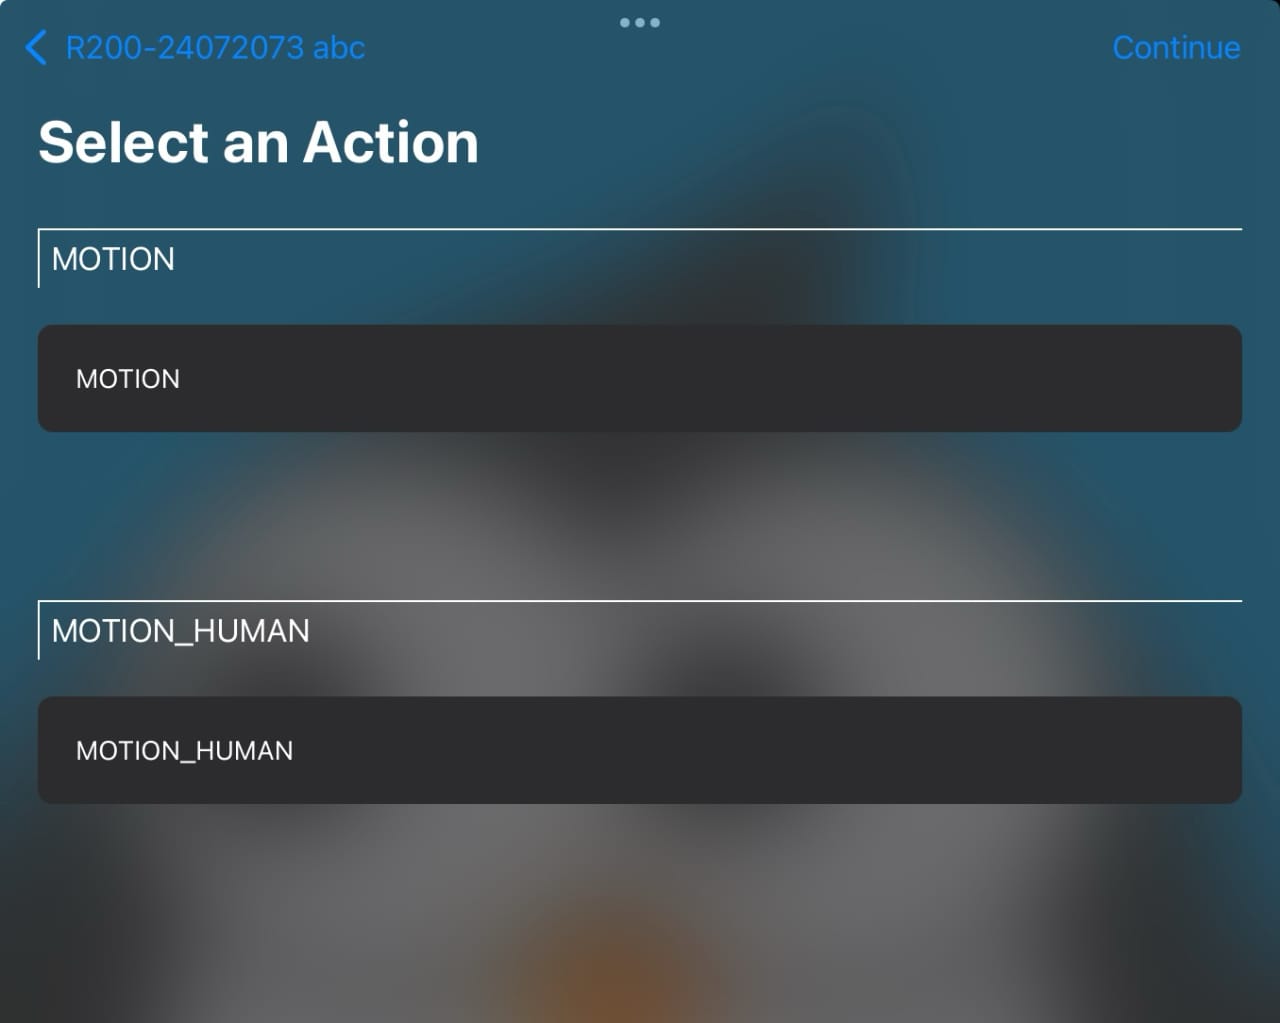
Tap Add Action to see the known event types for that camera. You can see here that Streamie is aware that this camera supports the motion and human motion event types. Tap on the event type that you’re interested in, and tap Continue.
Streamie supports a number of advanced actions, such as logging an event (snapshot + recording + push notification), or even moving a camera into an on-screen location or simply announcing the event audibly (“motion in the driveway”).
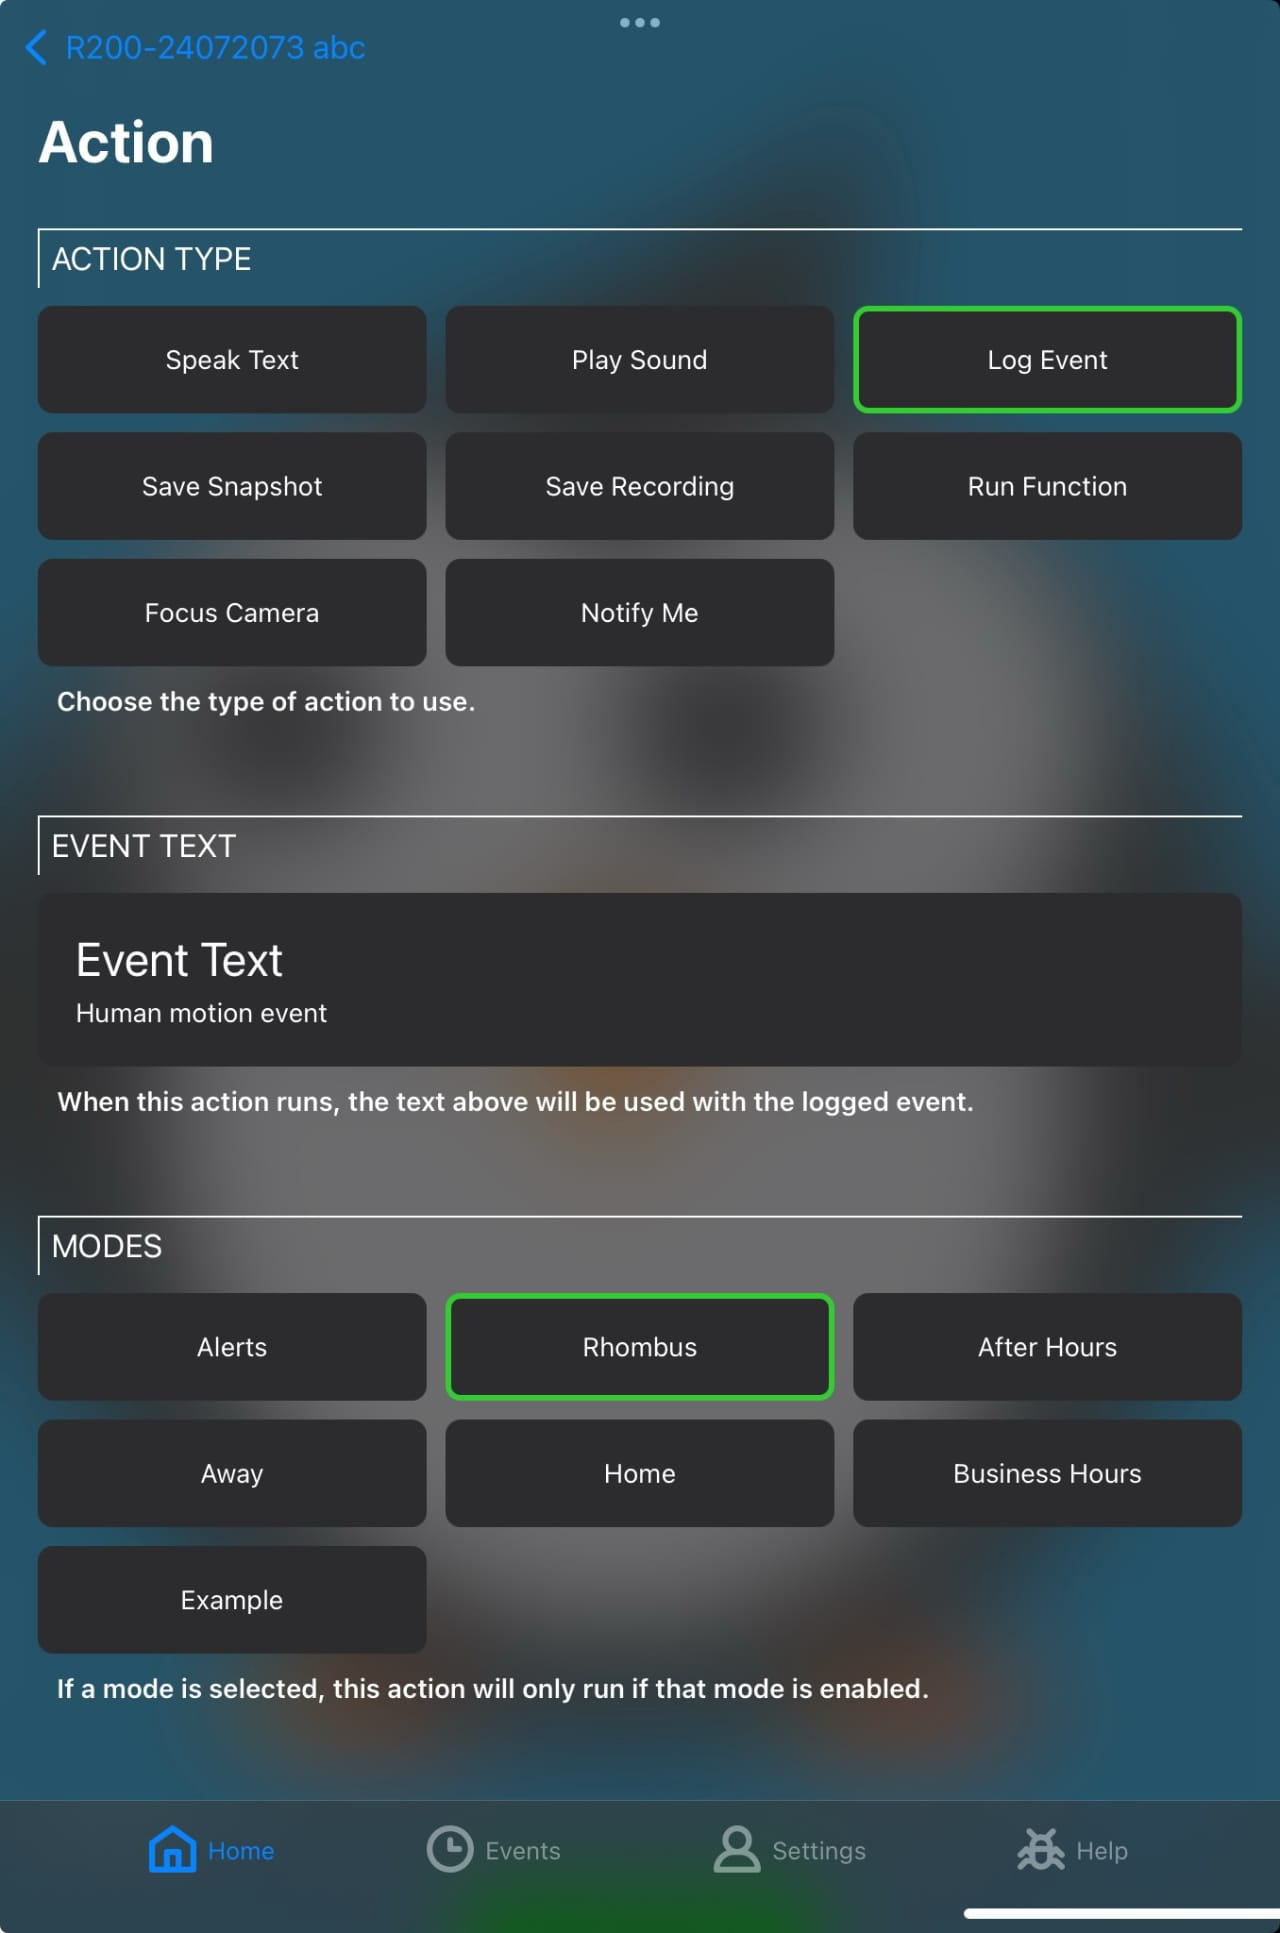
The two most important settings for any events are found in the Members section and the Timeout section. For the former, you need to select which of your Streamie devices will actually perform this action. This needs to be the device (or devices) that are streaming the cameras. For the latter, you want to make sure that this action doesn’t become obnoxious. Setting a timeout prevents the action from occurring rapidly.
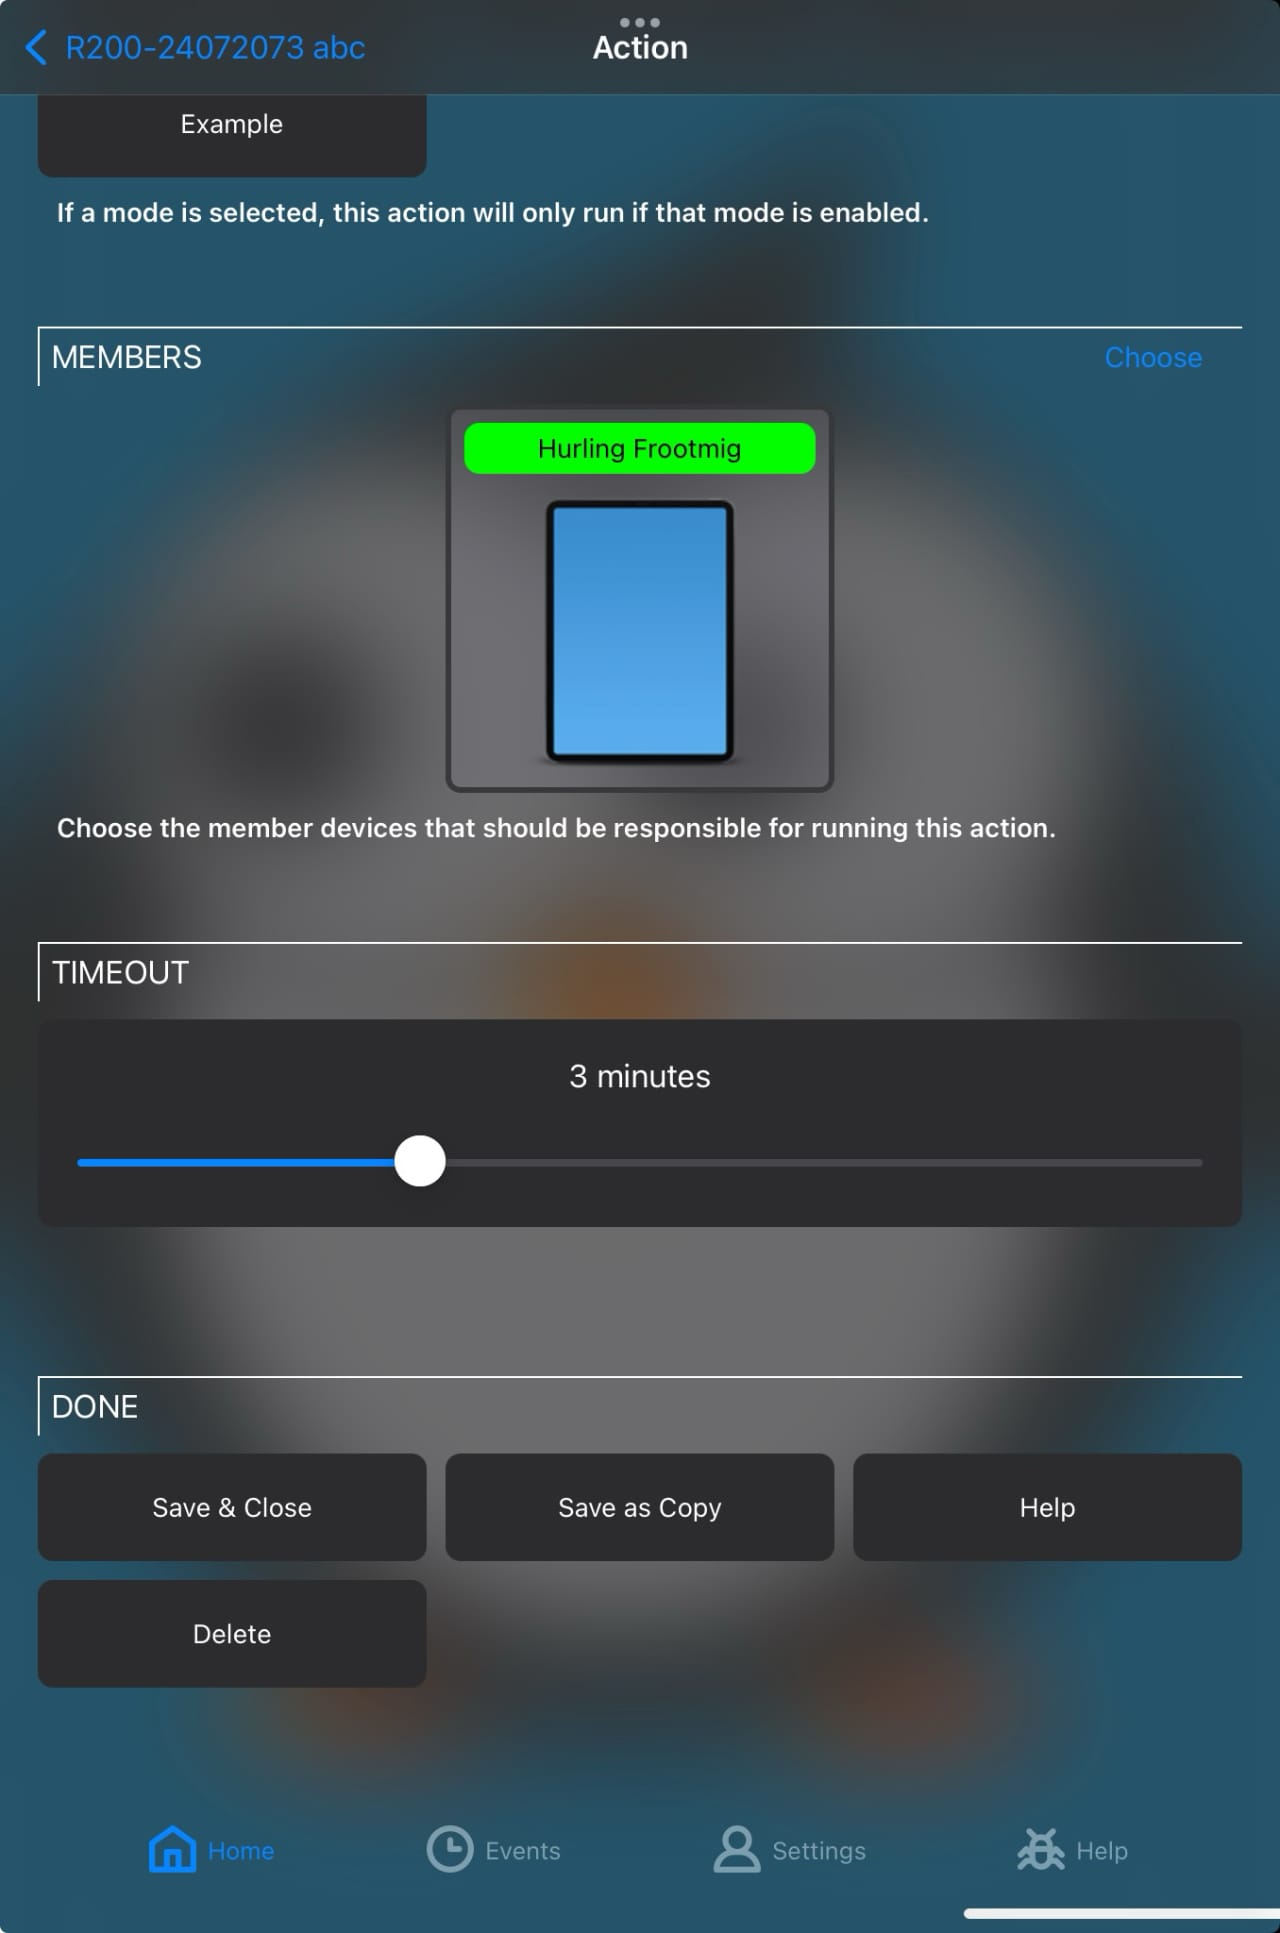
Choose Save & Close AND THEN ALSO choose Save & Close on the camera edit screen. Start streaming your camera, and your event should occur each time Streamie receives that event notification via the webhook.
With adequately low resolution streams, you can stream more than 60 cameras on a single Apple TV. Why would you want to do that? I don’t know, but some Streamie users tell us that it is important to them.
Please contact us if you have any questions.
Created: 1 year ago
Updated: 1 year ago
Author: Curtis Jones
Streamie provides a best-in-class user experience on your iPhone, iPad, Apple TV and Apple Silicon Mac, with an intuitive user interface that makes it simple to discover, stream, record, monitor and share your HomeKit, Google Nest, Ubiquiti UniFi Protect and ONVIF-compatible IP and RTSP cameras. Streamie keeps you informed with motion event notifications and it works with most cameras using its advanced audio and video codec support. You can watch your cameras from anywhere, record 24/7 to your private NAS, remotely manage multiple locations, device permissions and seamlessly synchronize settings across your devices; configure Hubitat smart home automations, live stream to YouTube and rely on the in-app technical support system when you need help -- and you can also reach us by phone. Download Streamie today for all of your CCTV needs.