
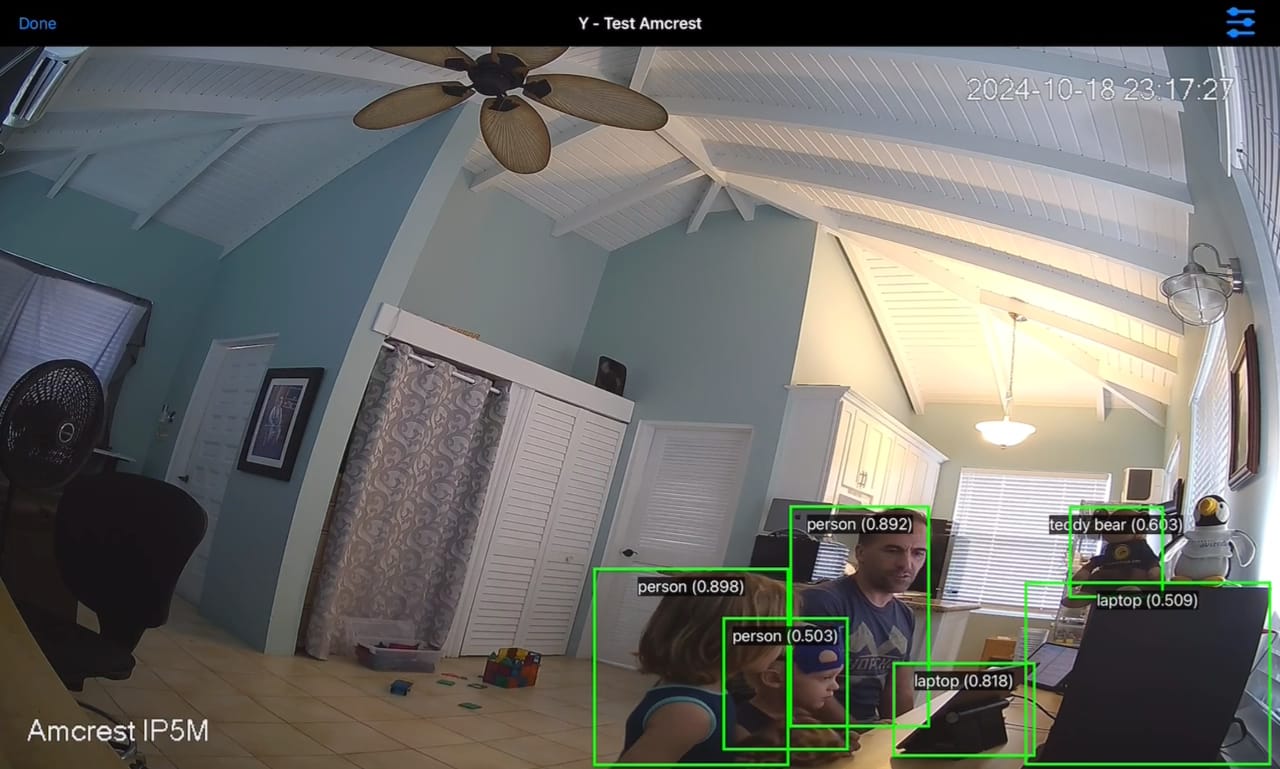
The AI Classify integration in Streamie, which is new in v4.8.0, lets you incorporate feedback from an external AI image processor with Streamie. Using the JSON response from the image processor, Streamie will overlay the boxes.
It’s important to note that this is a new, still-in-development feature in Streamie and is subject to breaking changes.
In this tutorial I will reference two different mechanisms for processing images from Streamie: Cloudflare Workers AI and Local Python. There are pros and cons to each. You can even combine them in some situations.
Cloudflare Workers AI
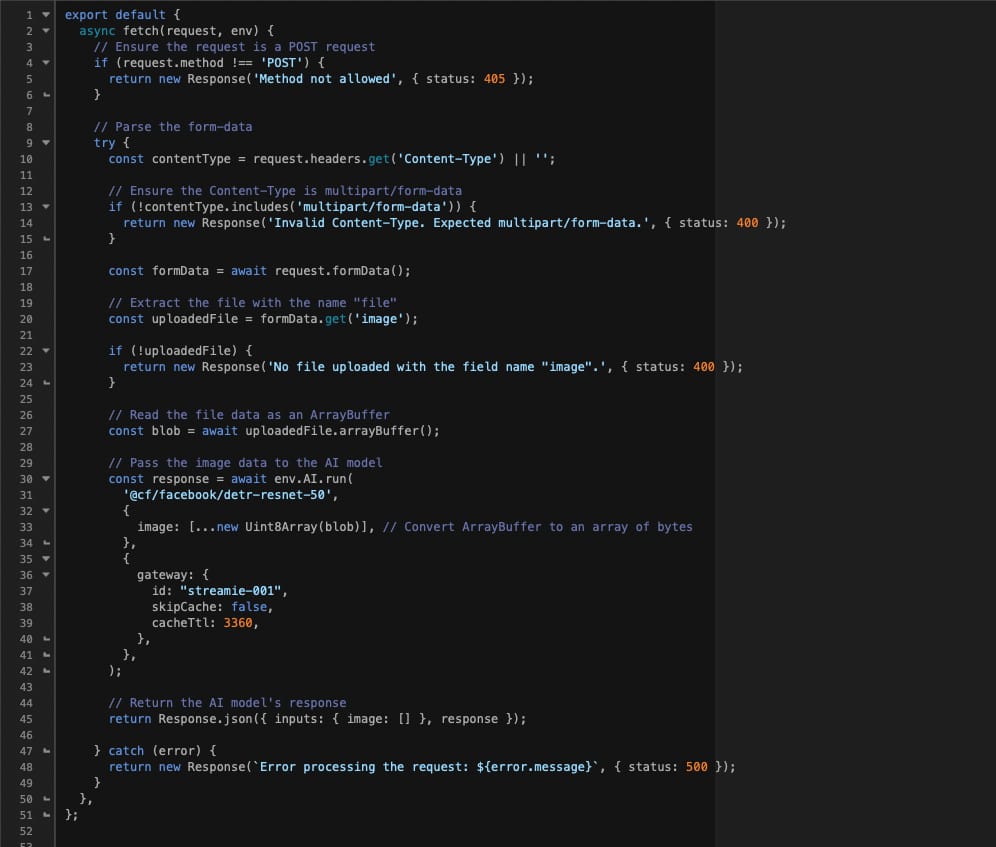
You’ll want to read more about Workers AI before going this route. It actually only takes a few clicks. This solution uses the facebook/resnet-detr-50 model. You can download and use the sample code we used for this tutorial from here, which you can also see below.
The pros to this solution is that it is easy to get up-and-running with minimal expertise. It doesn’t require you to dedicate any hardware. It is fairly affordable as well. In the cons column, you’ll see latency due to having to work across the internet. If you don’t like the model results, there’s not much you can do about that.
Local Python
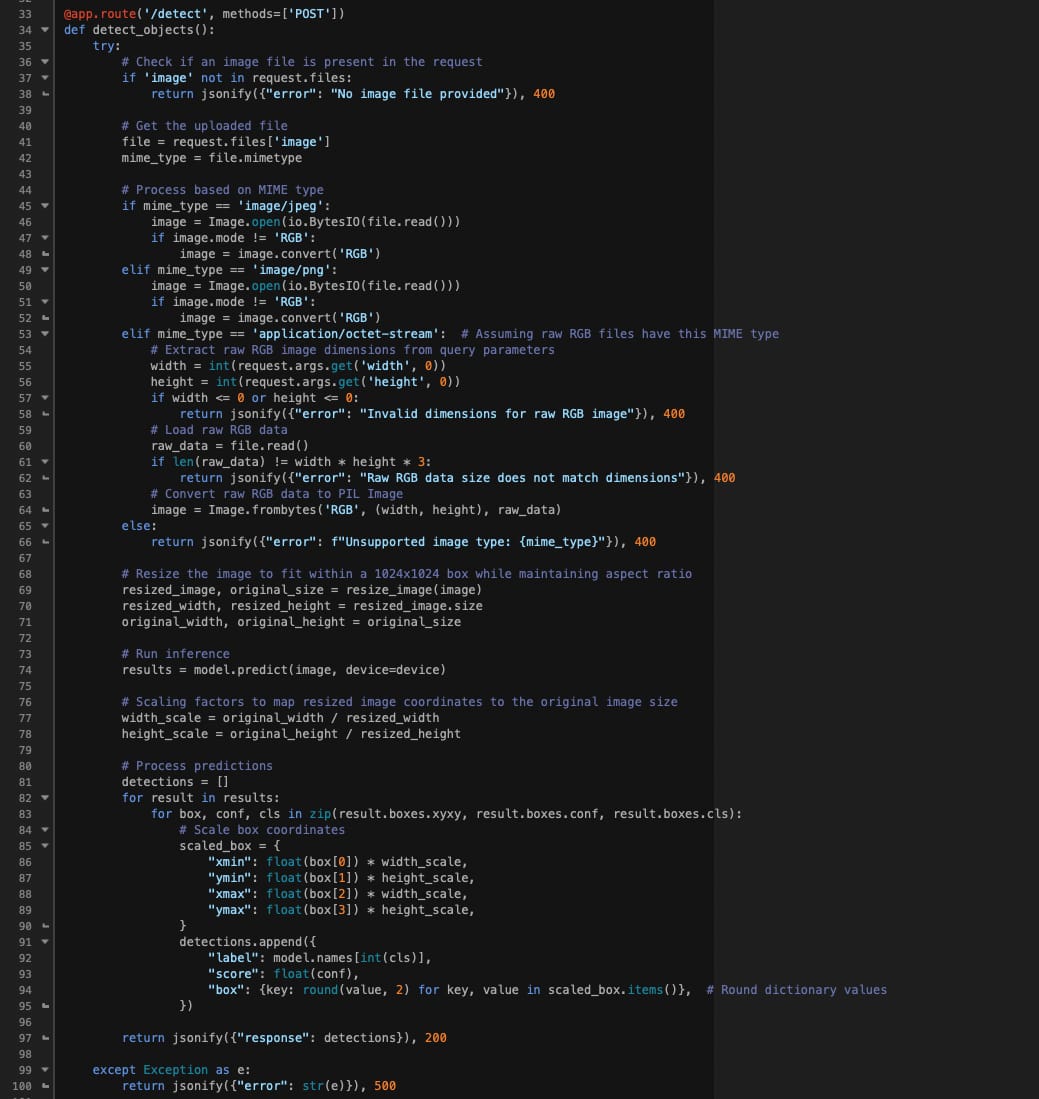
The “local” solution involves running some Python code on another computer. You’ll have to download the model files. In this tutorial we’re using YOLOv10. You can download the sample code we used for this tutorial from here.
The pros to this solution is that the latency is excellent. You have full control over every aspect of the result. You can change models to achieve the desired output. In the cons column, you’ll have to do all of the setup yourself. You need some decent hardware to run everything. You must have network access to the machine running the server.
Response
There are two basic requirements for these AI image processors. (1) It must accept a POST request with a file upload named image. (2) It must return a JSON response that looks like the following. You can download some sample JSON here.
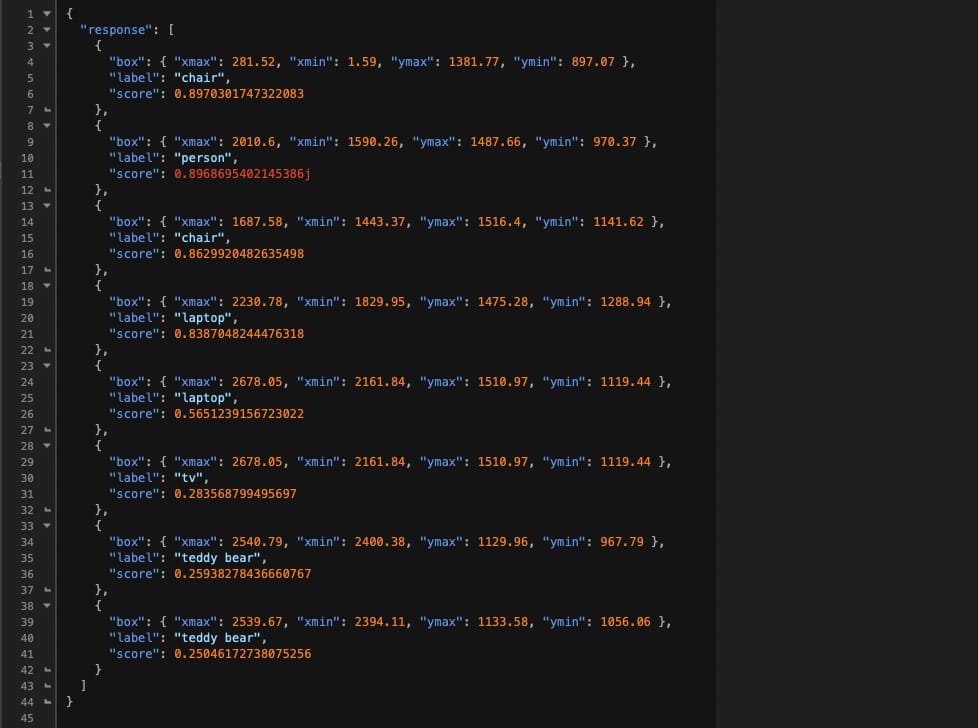
NOTE: To support processing raw RGB files, Streamie will provide width and height query parameters to the HTTP request.
AI Classify Integration
Let’s get started setting up Streamie.
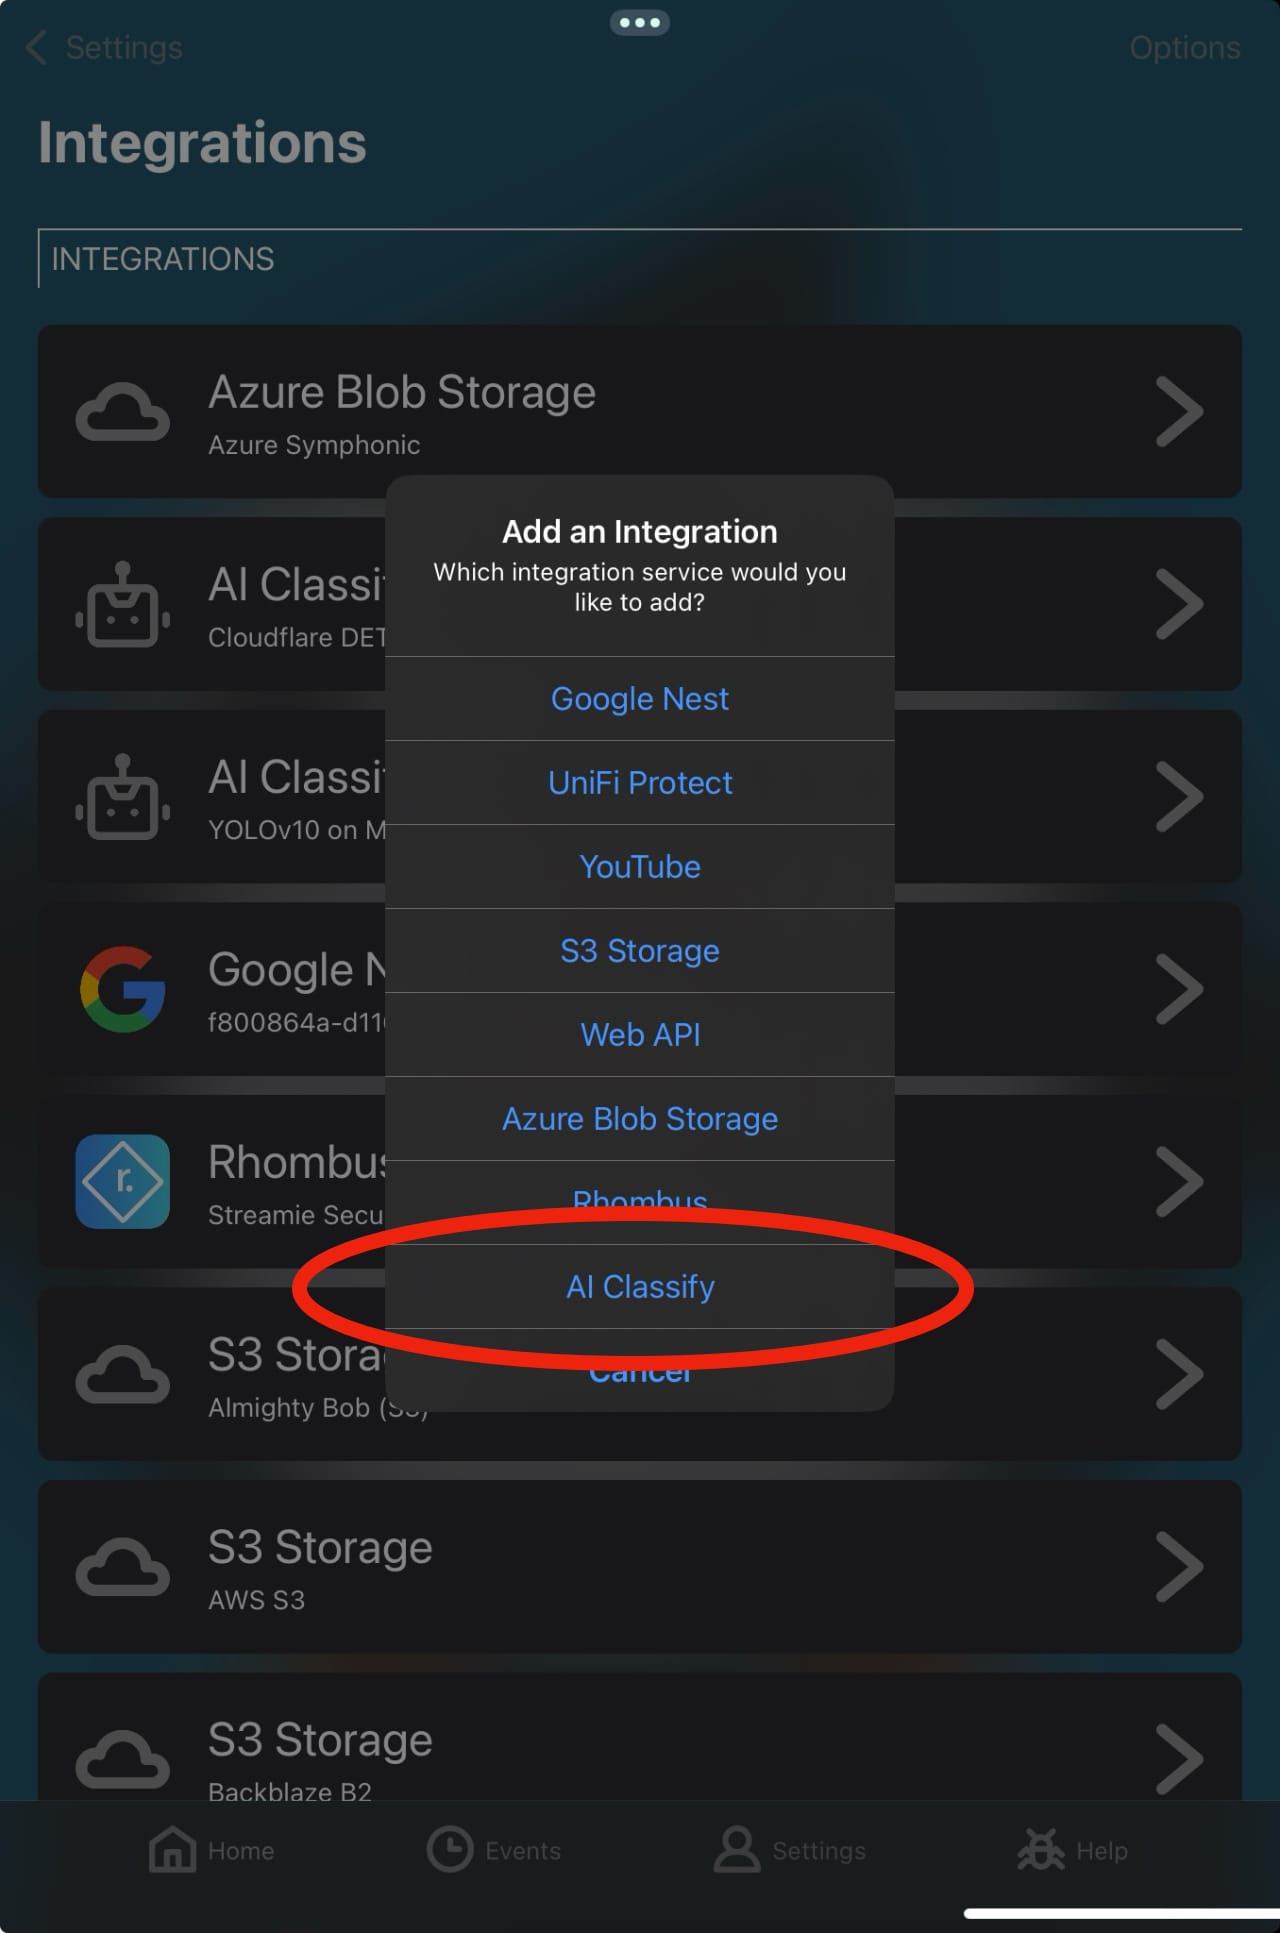
The first step is to create a new AI Classify Integration. Navigate in Streamie to Settings => Integrations => Options => Add Integration and choose AI Classify.
Details
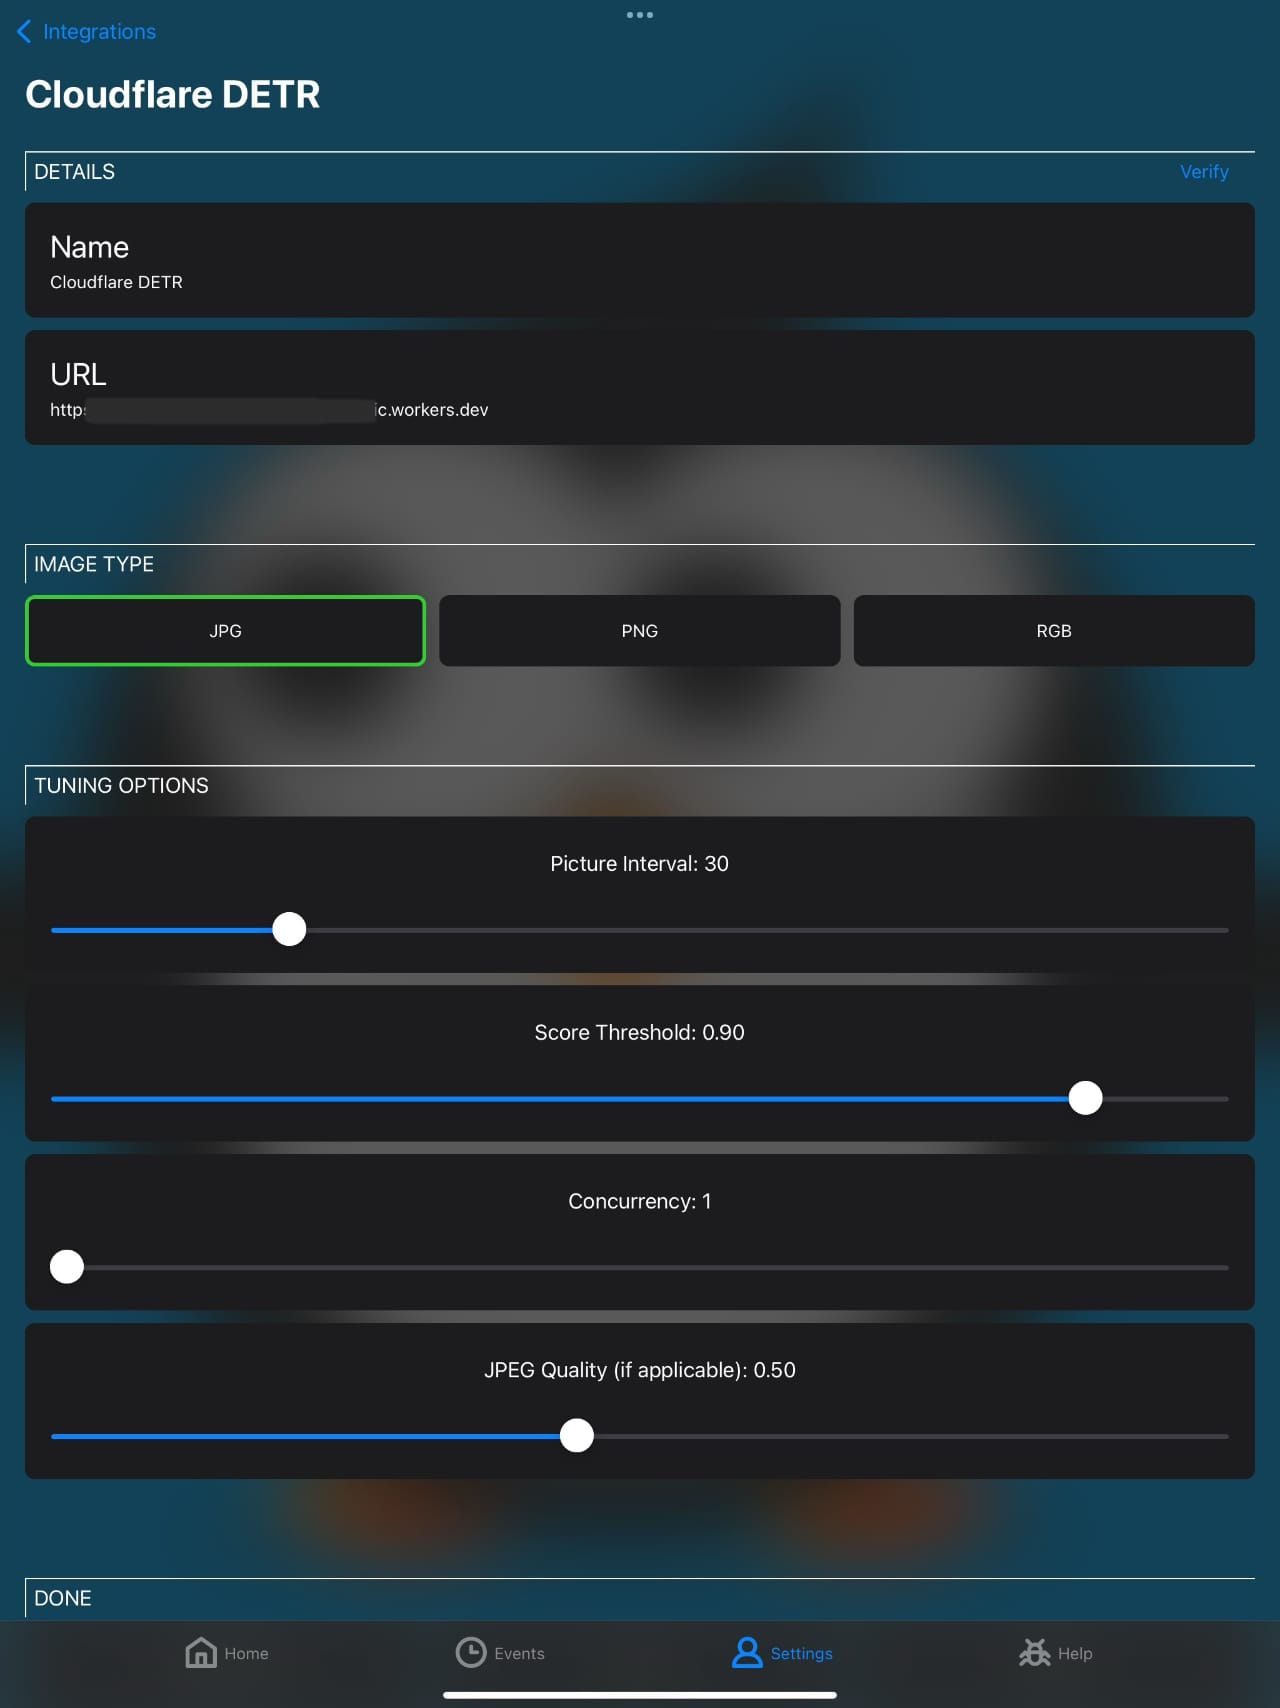
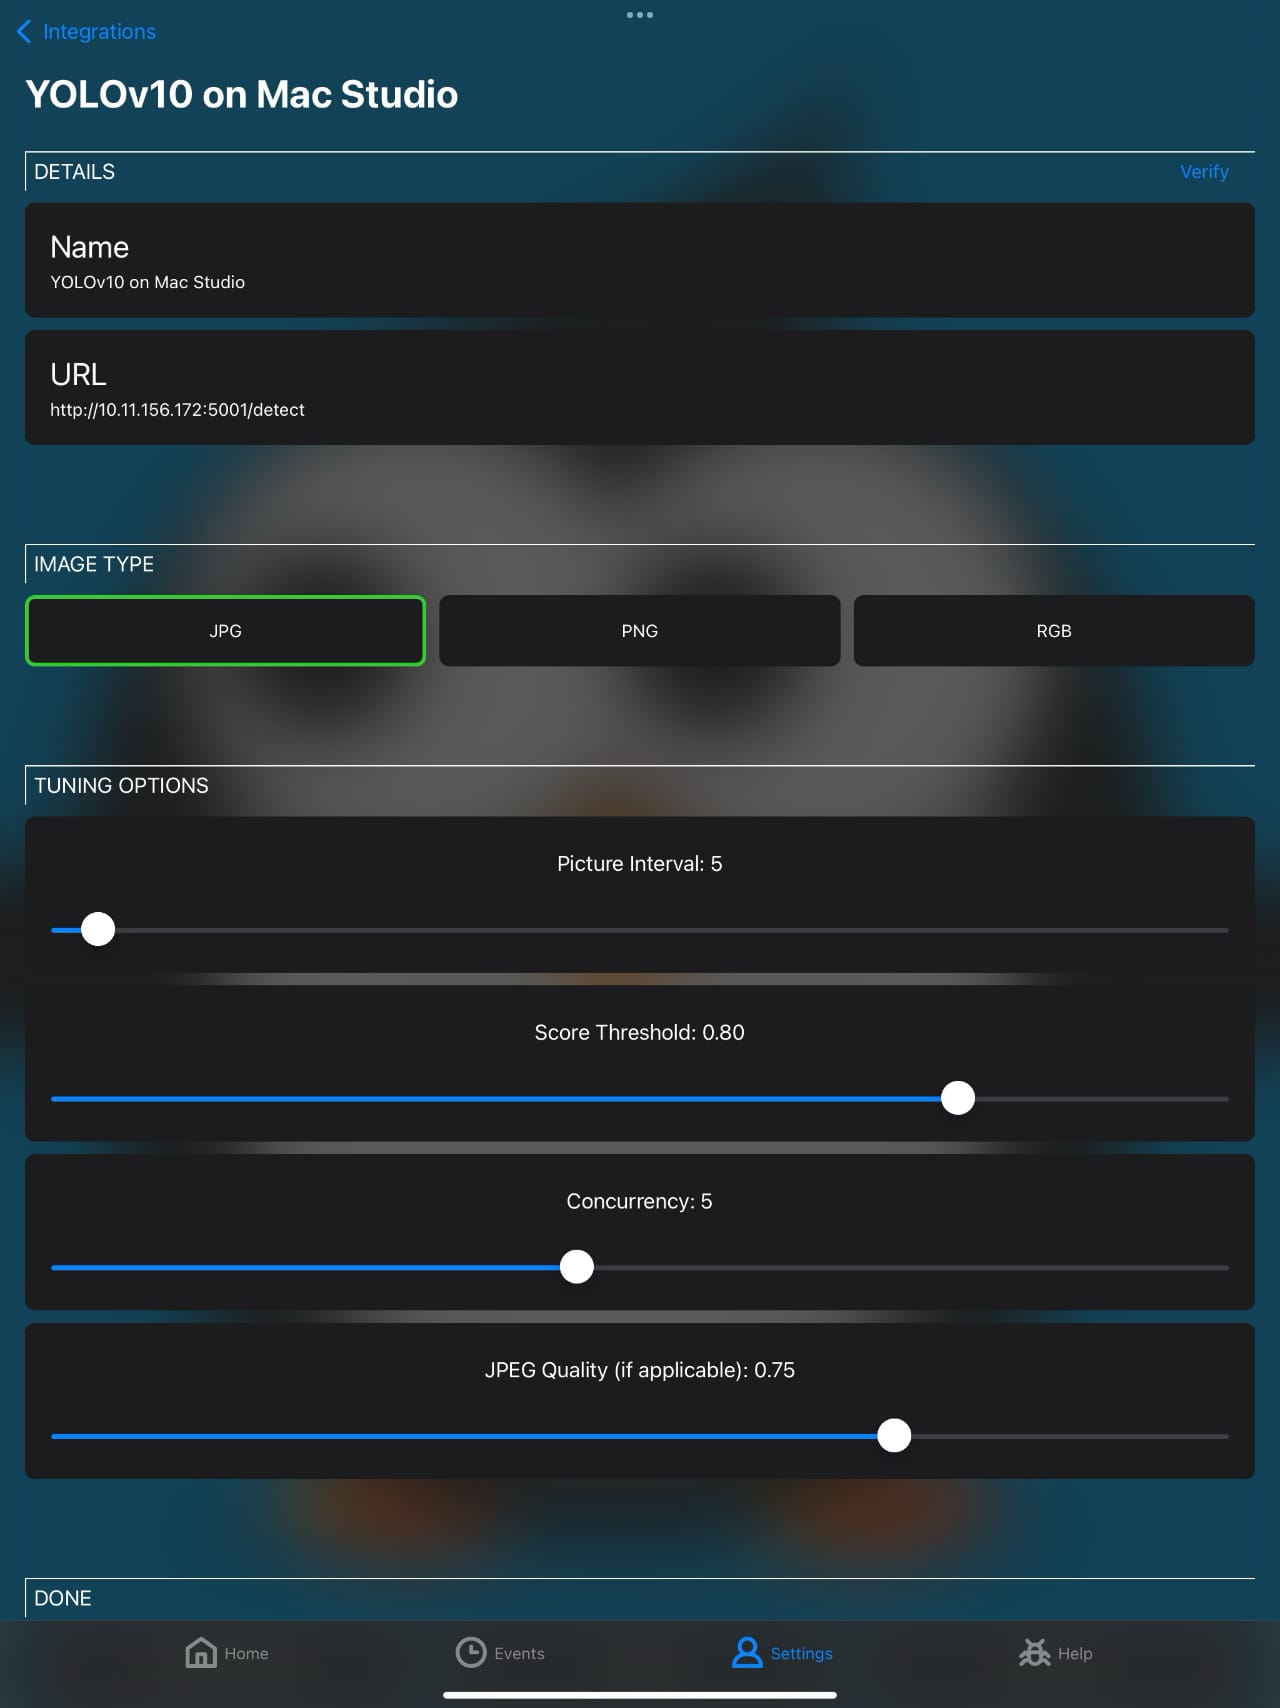
Provide the URL endpoint for your image processor.
Image Type
Choose JPEG for most situations. It will tend to produce the smallest file sizes. RGB is a good option if you want to avoid doing on-device image encoding, and off-device image decoding. However, the resulting data sizes are quite large.
Tuning Options
The Picture Interval lets you specify how frequently an image is sent to your AI. This is based on number of frames from the video source. If your camera produces 30fps, then choosing a Picture Interval of 30 will result in the AI being called once per second.
You can filter the results from the AI using the Score Threshold. All values should fall into the range of 0 - 1. Setting this filter lets you eliminate results under the specified value.
When processing images there can be network and processing latency. The Concurrency setting lets you specify how many images can be “in flight” at the same time. If the concurrency setting is exceeded, frames are dropped.
If you chose the JPEG image type, you can control the JPEG Quality setting for it by adjusting this setting.
The following two screenshots show settings for both cases: Cloudflare Workers AI and Python running on a Mac.
Configured for Cloudflare Workers AI
Configured for Local Python
The final step is to enable the AI Classify integration for your cameras. Navigate in Streamie to Home => Cameras. Edit the particular camera for which you want to enable AI processing. Scroll down to the new AI Classifiers section and tap to enable / disable the classifiers.
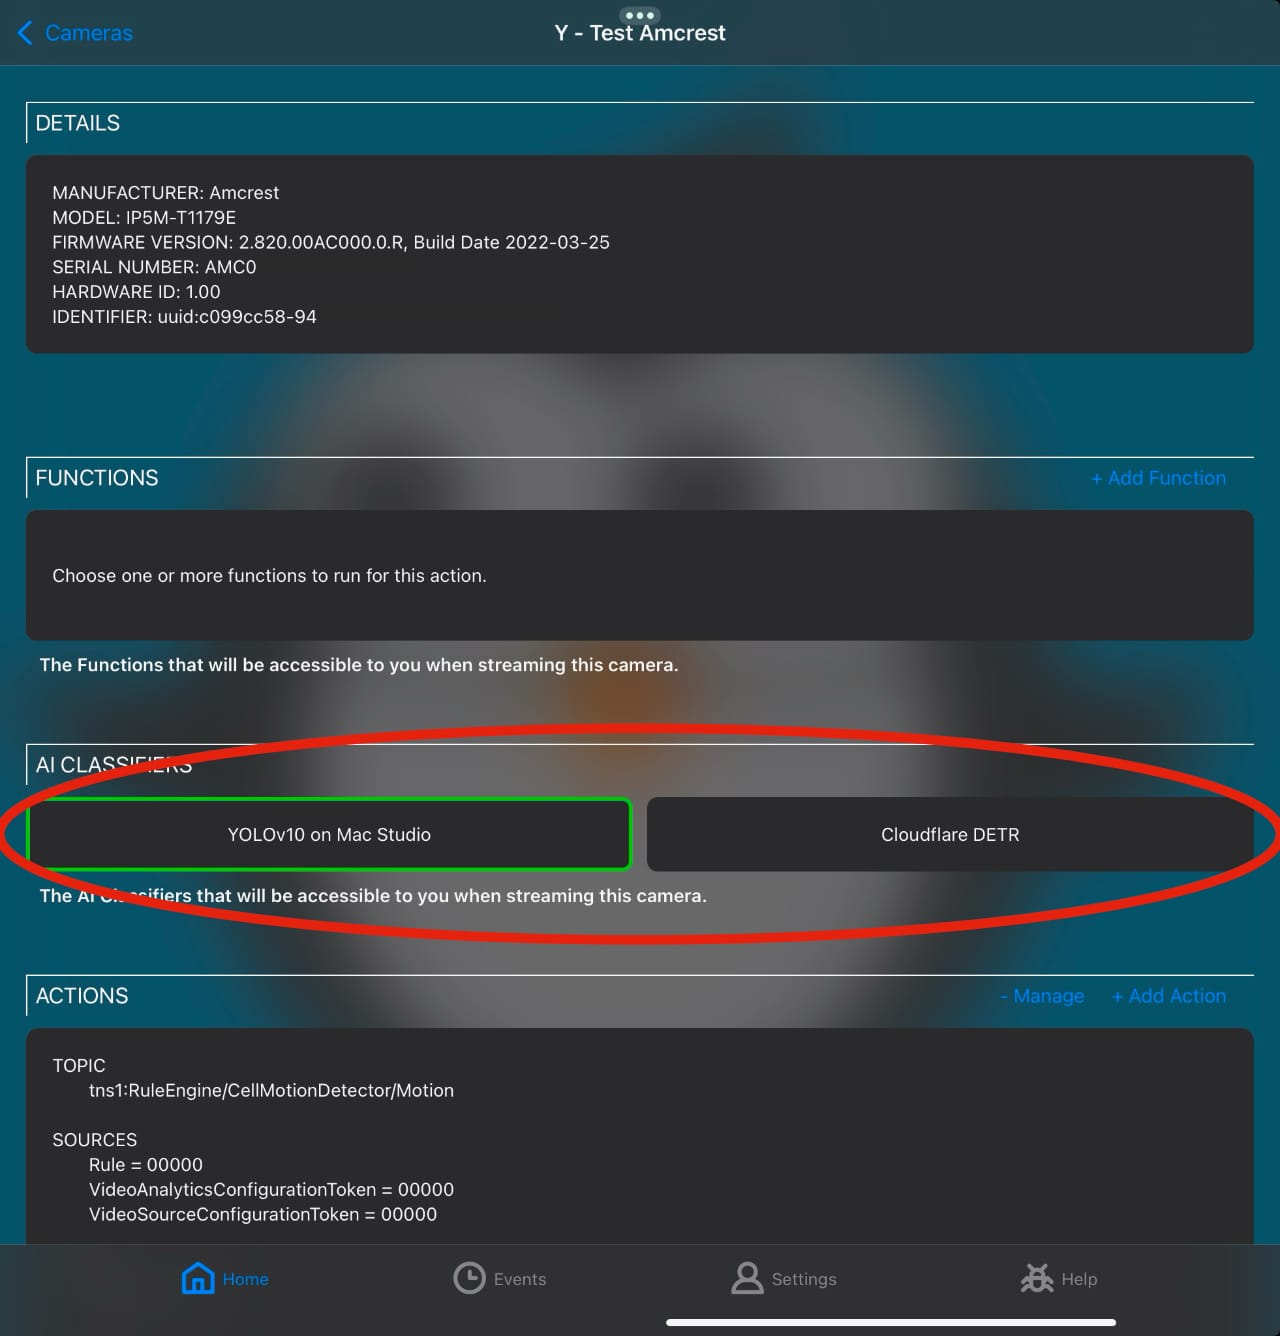
Scroll down. Tap Save & Close and we are done with the configuration.
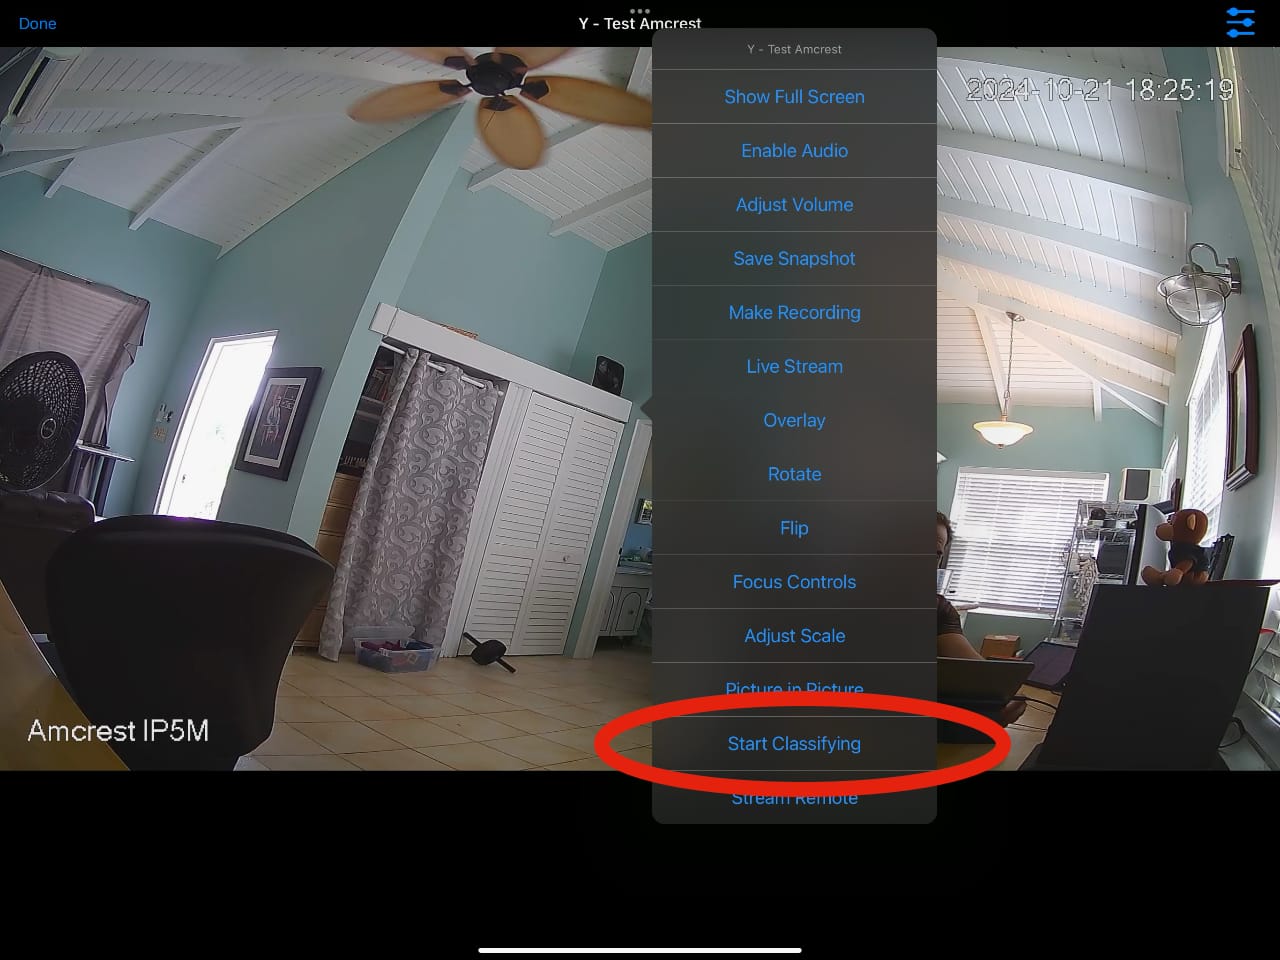
Start streaming your cameras. Tap on the camera to see the streaming options for that camera. Choose the Start Classifier option. As soon as the selected AI processor returns a result, the image will be annotated accordingly.
Wrapping this all up: when you’re all done, you should be able to produce a result like this:
Created: 1 year ago
Updated: 1 year ago
Author: Curtis Jones
Topics: AI How To Tutorial Integrations
Streamie provides a best-in-class user experience on your iPhone, iPad, Apple TV and Apple Silicon Mac, with an intuitive user interface that makes it simple to discover, stream, record, monitor and share your HomeKit, Google Nest, Ubiquiti UniFi Protect and ONVIF-compatible IP and RTSP cameras. Streamie keeps you informed with motion event notifications and it works with most cameras using its advanced audio and video codec support. You can watch your cameras from anywhere, record 24/7 to your private NAS, remotely manage multiple locations, device permissions and seamlessly synchronize settings across your devices; configure Hubitat smart home automations, live stream to YouTube and rely on the in-app technical support system when you need help -- and you can also reach us by phone. Download Streamie today for all of your CCTV needs.