NOTE: If you follow the instructions precisely, you will succeed. However, if you need assistance do not hesitate to contact us.
The Google Commercial Development review process turns out to be impossibly expensive, so until that changes, these instructions are here to guide you through the steps necessary to add your Google Nest cameras to Streamie.
Many moons ago, Streamie dropped support for the old Nest accounts. Supporting that involved “scraping” the html in a hidden web view to find the rtsp url. That mostly worked on iPhones and iPads, but there as no way to port that functionality to Apple TV. So, the first requirement is that you have migrated your Nest account to Google.
These instructions are partly based off the Home Assistant Nest instructions, if you want to see some screenshots and such.
We also cover some of the setup process in a tutorial video, which you can watch here:
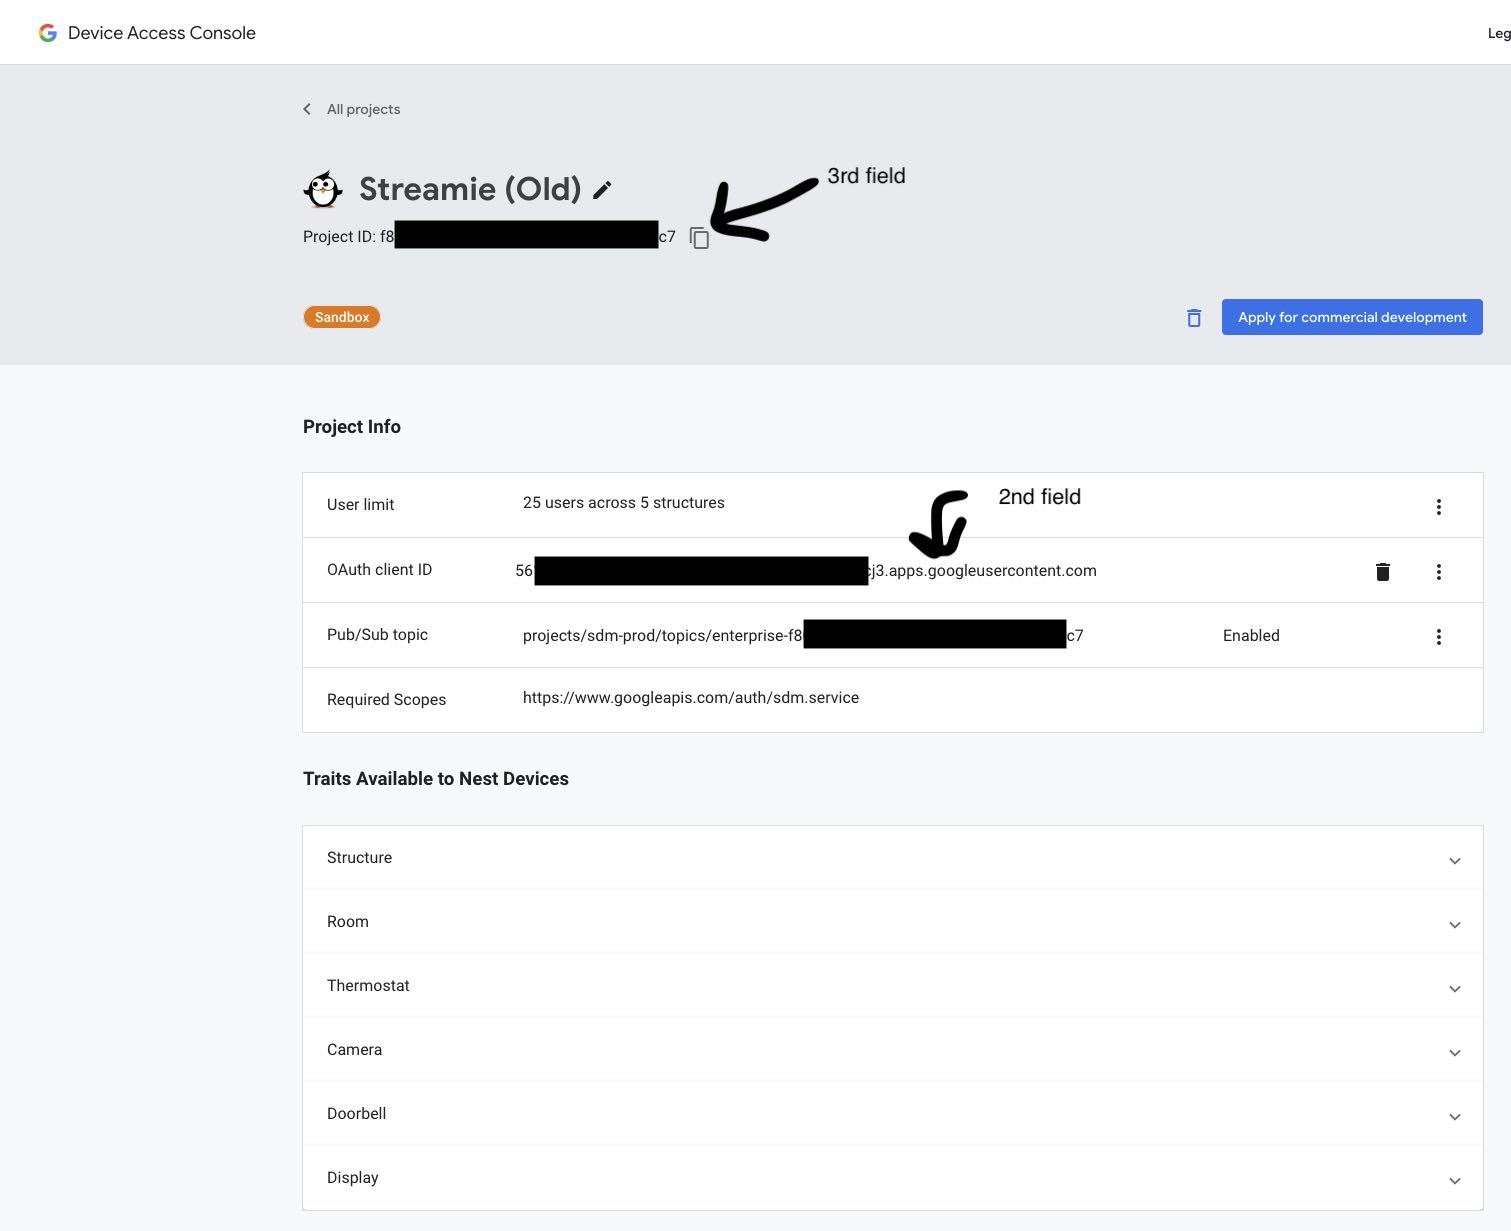
And there are some screenshots at the bottom of this article that should help in case you run into any questions.
- Go to: Google Developer Console.
- Click "OAuth Consent screen"
- Click “Create Project”
- Enter a name in “Project name”
- Click “Create”
- Click "External" ==> "Create"
- Enter "App name", "User support email", "Developer contact email"
- Click "Save and Continue"
- On the Scopes step click "Save and Continue"
- On the Test User step click “Add”
- Enter your "@gmail.com" Google Account
- Click "Save and Continue"
- Click "OAuth Consent screen" ==> "Publish App"
- Click "Credentials" ==> "Create Credentials" ==> "OAuth client ID" ==> "Web application"
- Enter a name
- Enter the redirect uri: "https://streamieapp.com/google-nest-redirect"
- Click "Create"
- Note your "client_id" and "client_secret"
- Go to: Nest Registration.
- Click "Go to Device Access Console"
- Click "Accept the Terms of Service" ==> "Continue to Payment" (pay $5)
- Go back to the Device Access Console
- Click "Create Project"
- Enter a name
- Click "Next"
- Enter the client_id
- Click "Next" ==> "Enable" ==> "Create project"
- Note your "project_id"
- Go to: https://console.cloud.google.com/apis/library/smartdevicemanagement.googleapis.com?project=project_id … replacing project_id with the value from the previous section.
- Click “Enable” (look for the Grant Permissions link)
- Go to the Settings tab (in the Streamie app)
- Tap on “Integrations”
- Tap on “Add Integration”
- Choose “Google”
- Enter the client_id, project_id and secret
- Click "Save & Close”
- Tap on the new Google integration
- Tap on “Sign in with Google”
- Continue through the OAuth flow, eventually ending up back in the app
- Tap on “Save & Close”. You’re ready to add your cameras.
- Go to the Home tab (in the Streamie app)
- Scroll down to Cameras
- Click the hamburger menu ==> "Add Camera"
- Scroll down to the Google Nest section and select the camera you want to add to Streamie.
- Click “Save” and you should see your Nest camera at the bottom of the camera list.


Created: 4 years ago
Updated: 1 year ago
Author: Curtis Jones
Topics: Google Nest How To Tutorial Integrations
Streamie provides a best-in-class user experience on your iPhone, iPad, Apple TV and Apple Silicon Mac, with an intuitive user interface that makes it simple to discover, stream, record, monitor and share your HomeKit, Google Nest, Ubiquiti UniFi Protect and ONVIF-compatible IP and RTSP cameras. Streamie keeps you informed with motion event notifications and it works with most cameras using its advanced audio and video codec support. You can watch your cameras from anywhere, record 24/7 to your private NAS, remotely manage multiple locations, device permissions and seamlessly synchronize settings across your devices; configure Hubitat smart home automations, live stream to YouTube and rely on the in-app technical support system when you need help -- and you can also reach us by phone. Download Streamie today for all of your CCTV needs.