The Weather Module included with Streamie has access to a preset collection of background images, one of which is selected based on the short forecast, such as “hazy” or “chance of thunderstorms and showers”. The selection of images covers most weather conditions, but there are only a couple images for each forecast type.
This tutorial relies on v4.0.1 of Streamie (or later).
Let’s have AI make the background more interesting. Specifically, let’s try out OpenAI’s Dall-E 3 and Cloudflare Worker’s AI.
To accomplish this, we’re going to do a few things:
- Create a Cloudflare Worker to proxy our weather forecast prompts to whatever AI we want to use.
- Create a custom template for the Streamie Weather Module that’ll reference our Worker for backgrounds.
- Create a new Weather Module in Streamie that points to our custom template.
Easy peazy!
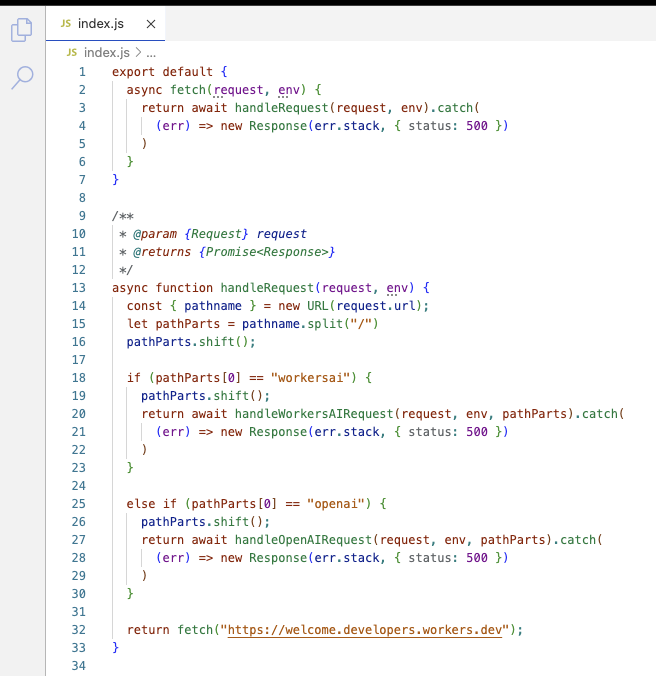
You don’t have to use Cloudflare Workers; you can host your code wherever you prefer. Also, don’t copy my JavaScript. I’m terrible at JavaScript. But, for the sake of reference, here’s the source code.

The purpose of this Worker is to take our short weather forecast and pass it over to an AI for image generation and then to return the resulting image.
You’ll need to set up your OpenAI API key environment variable if you intend to use OpenAI.
You can give it a test by calling: https://your-project-name.company.workers.dev/workersai/cloudy+with+a+chance+of+thunderstorms. With any luck, you’ll see a great image that’s not too imaginative. AI is crapshoot.
Next, we need Streamie to use a custom template that we’ll create that makes use of this Cloudflare Worker to feed it the background image.
If you create a new Weather Module in Streamie, you’ll see the default template URL. We want to grab that JSON, modify it, and then save it somewhere that’ll be accessible to Streamie. That URL should look something like: https://chinstrap.streamieapp.com:8443/static/file/modules/weather.json.
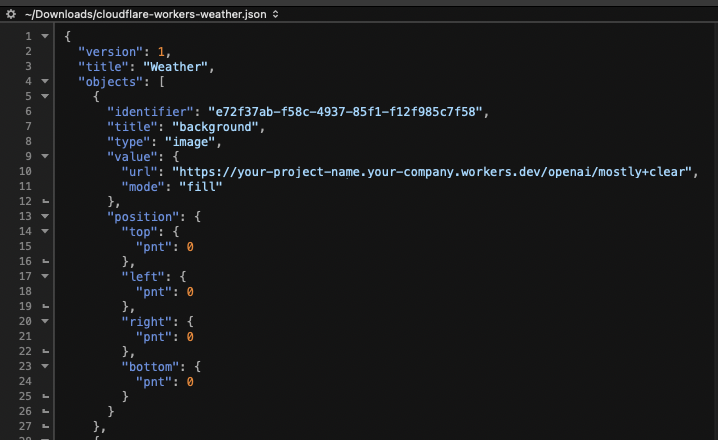
We just need to modify one line — the URL for the background image — to reference the Cloudflare Worker we set up. The Weather Module will grab this URL and append the forecast summary to the end of it, substituting a “+” for each space character.
Your template should have a URL that looks like this: https://your-project-name.your-company.workers.dev/openai/

Save this template JSON file somewhere that Streamie can access. We’ll need this URL for the next step.
Let’s create a new Weather Module that uses the custom template that we just created.
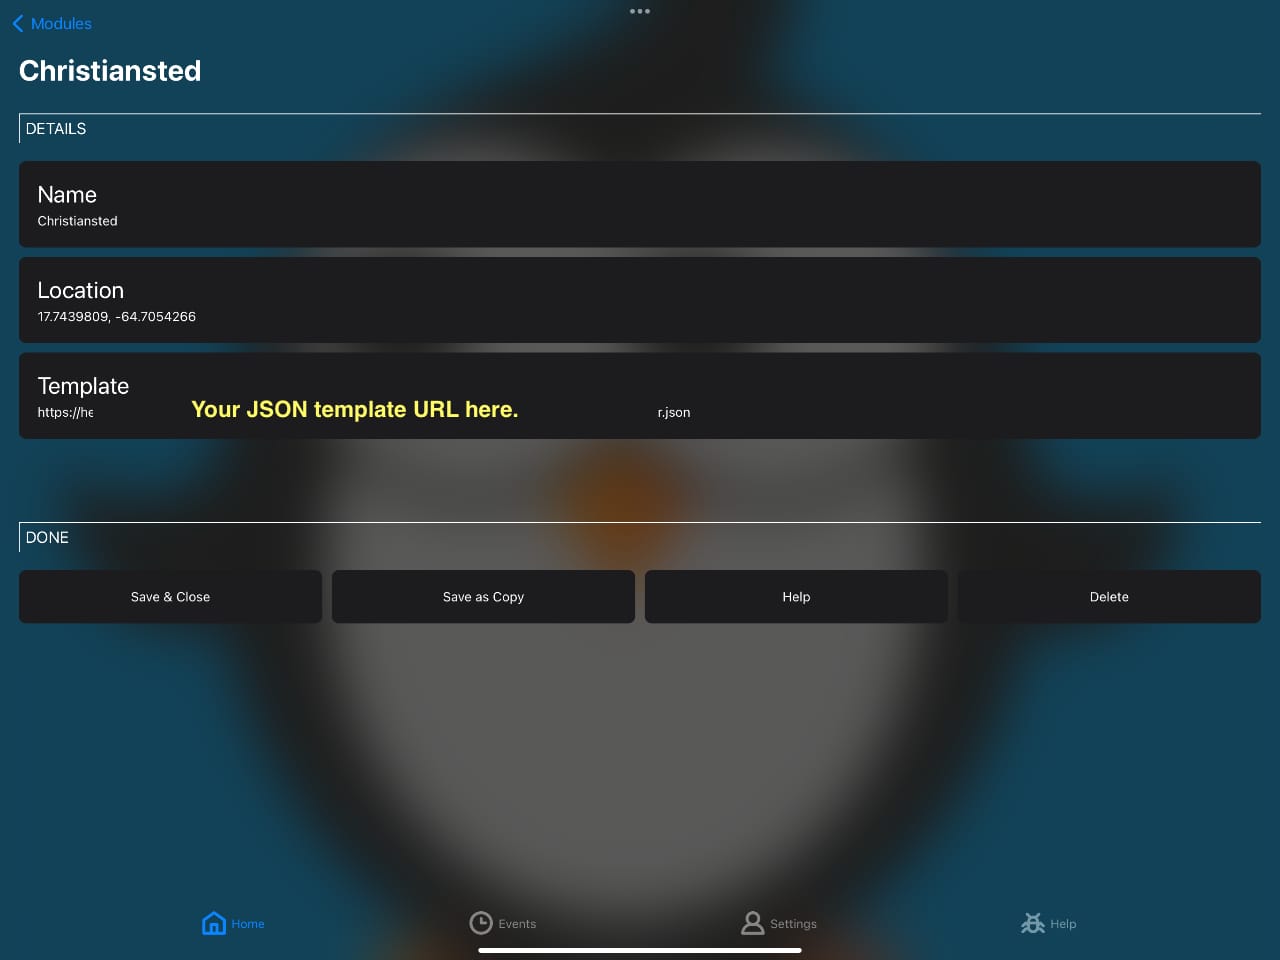
Navigate in Streamie to Home ==> Modules ==> Options ==> Add Module ==> Weather. Give your new Weather Module a name and choose a location. Enter the URL of the customized template JSON file that we made earlier. Save & Close.

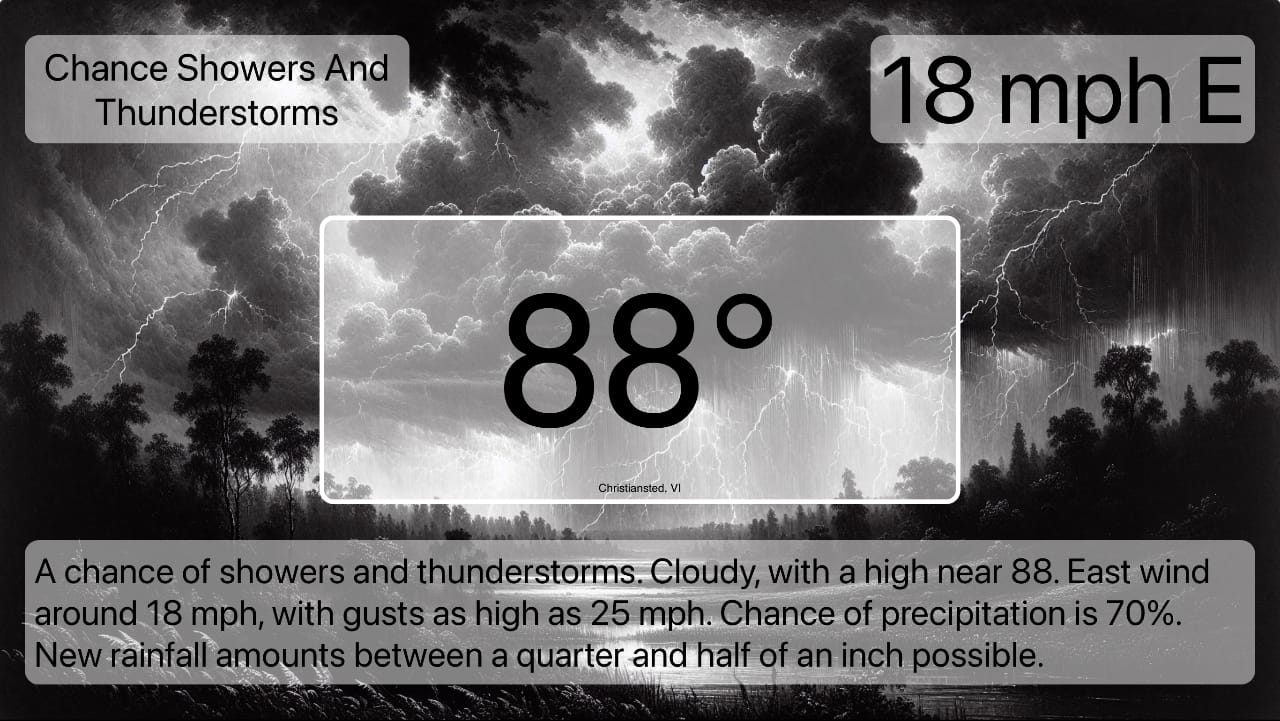
Tap on your new Weather Module and let’s see if it works….

Not bad!
You can use Modules to put custom content on the screen. This is just one quick example of its flexibility.
Created: 1 year ago
Updated: 1 year ago
Author: Curtis Jones
Streamie provides a best-in-class user experience on your iPhone, iPad, Apple TV and Apple Silicon Mac, with an intuitive user interface that makes it simple to discover, stream, record, monitor and share your HomeKit, Google Nest, Ubiquiti UniFi Protect and ONVIF-compatible IP and RTSP cameras. Streamie keeps you informed with motion event notifications and it works with most cameras using its advanced audio and video codec support. You can watch your cameras from anywhere, record 24/7 to your private NAS, remotely manage multiple locations, device permissions and seamlessly synchronize settings across your devices; configure Hubitat smart home automations, live stream to YouTube and rely on the in-app technical support system when you need help -- and you can also reach us by phone. Download Streamie today for all of your CCTV needs.