The S3 Integration for Streamie lets you configure Streamie to access your S3 storage bucket. Once configured, Streamie can then do 24/7 recording of your cameras to S3. Let’s get started!
First, you need a storage bucket from an S3 service provider. There are many such providers. For this demo, we’ll work with Cloudflare R2. Here is a list of some popular options:
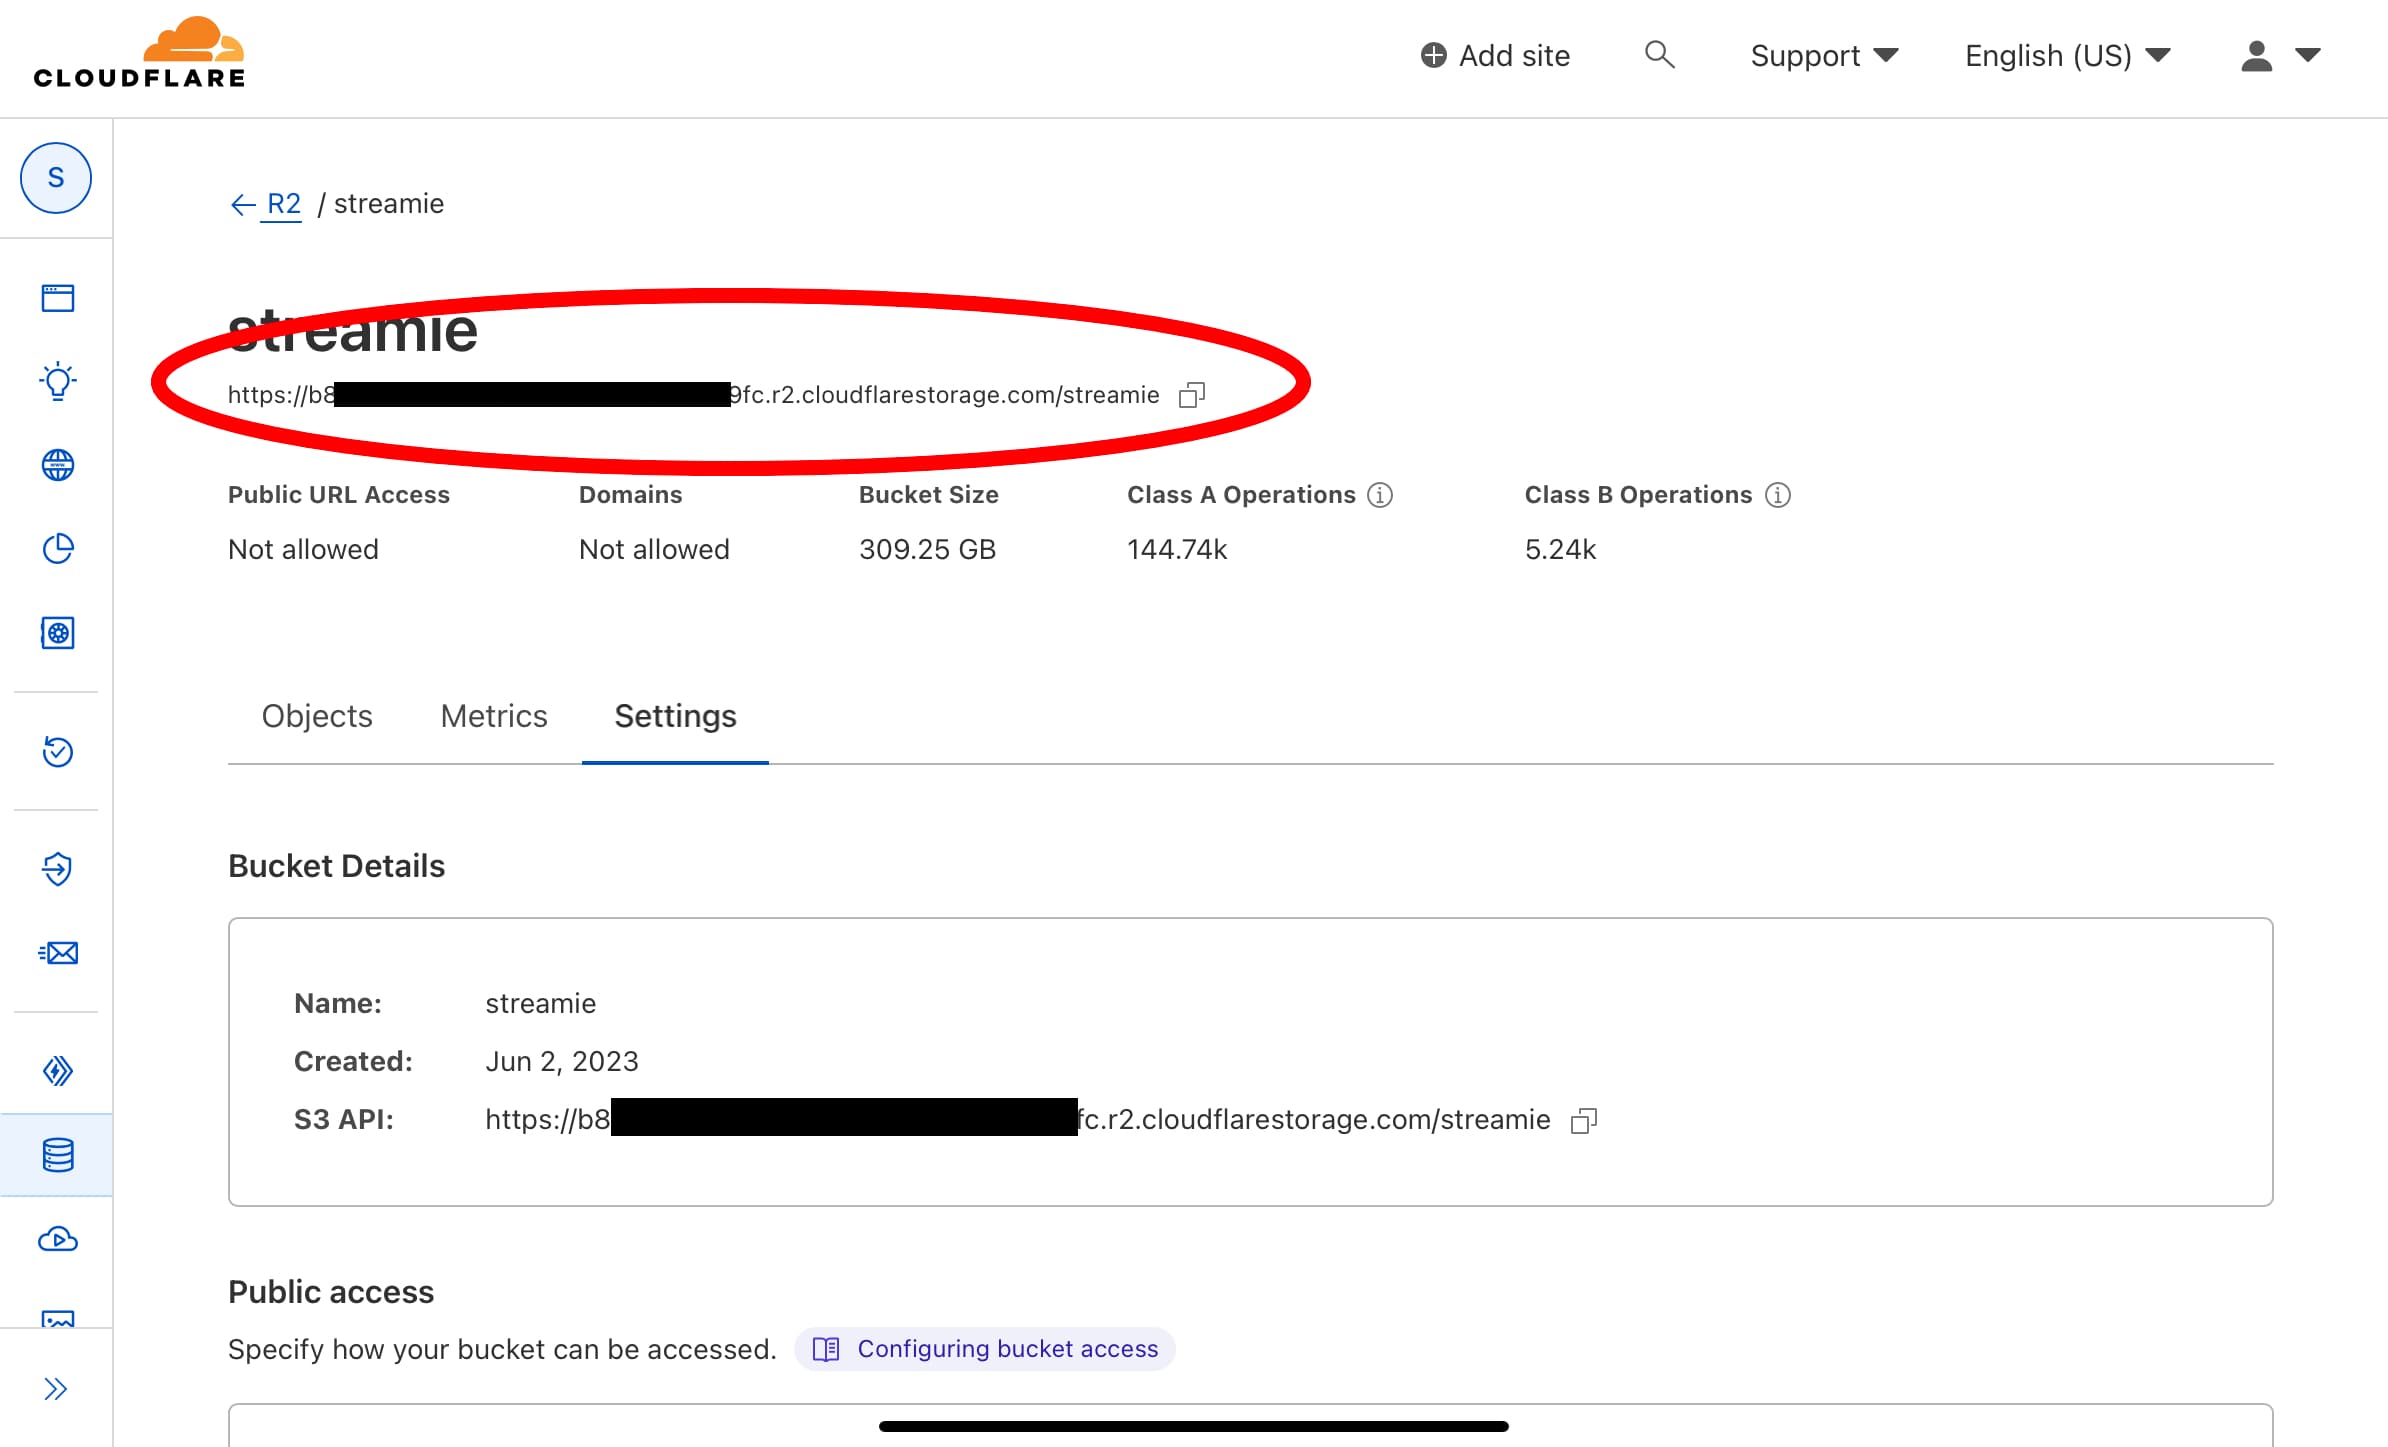
Create a bucket and give it a name. In this case, I’ve chosen “streamie” as the bucket name. You can see the S3 API URL. To configure the S3 integration, we need a bucket hostname which is similar, but not identical to that URL. We’re going to take the bucket name (“streamie”) off the end, and prepend it to the hostname resulting in:
https://streamie.b8[snip]9fc.r2.cloudflarestorage.com
This is the host name that Streamie will want in a moment.
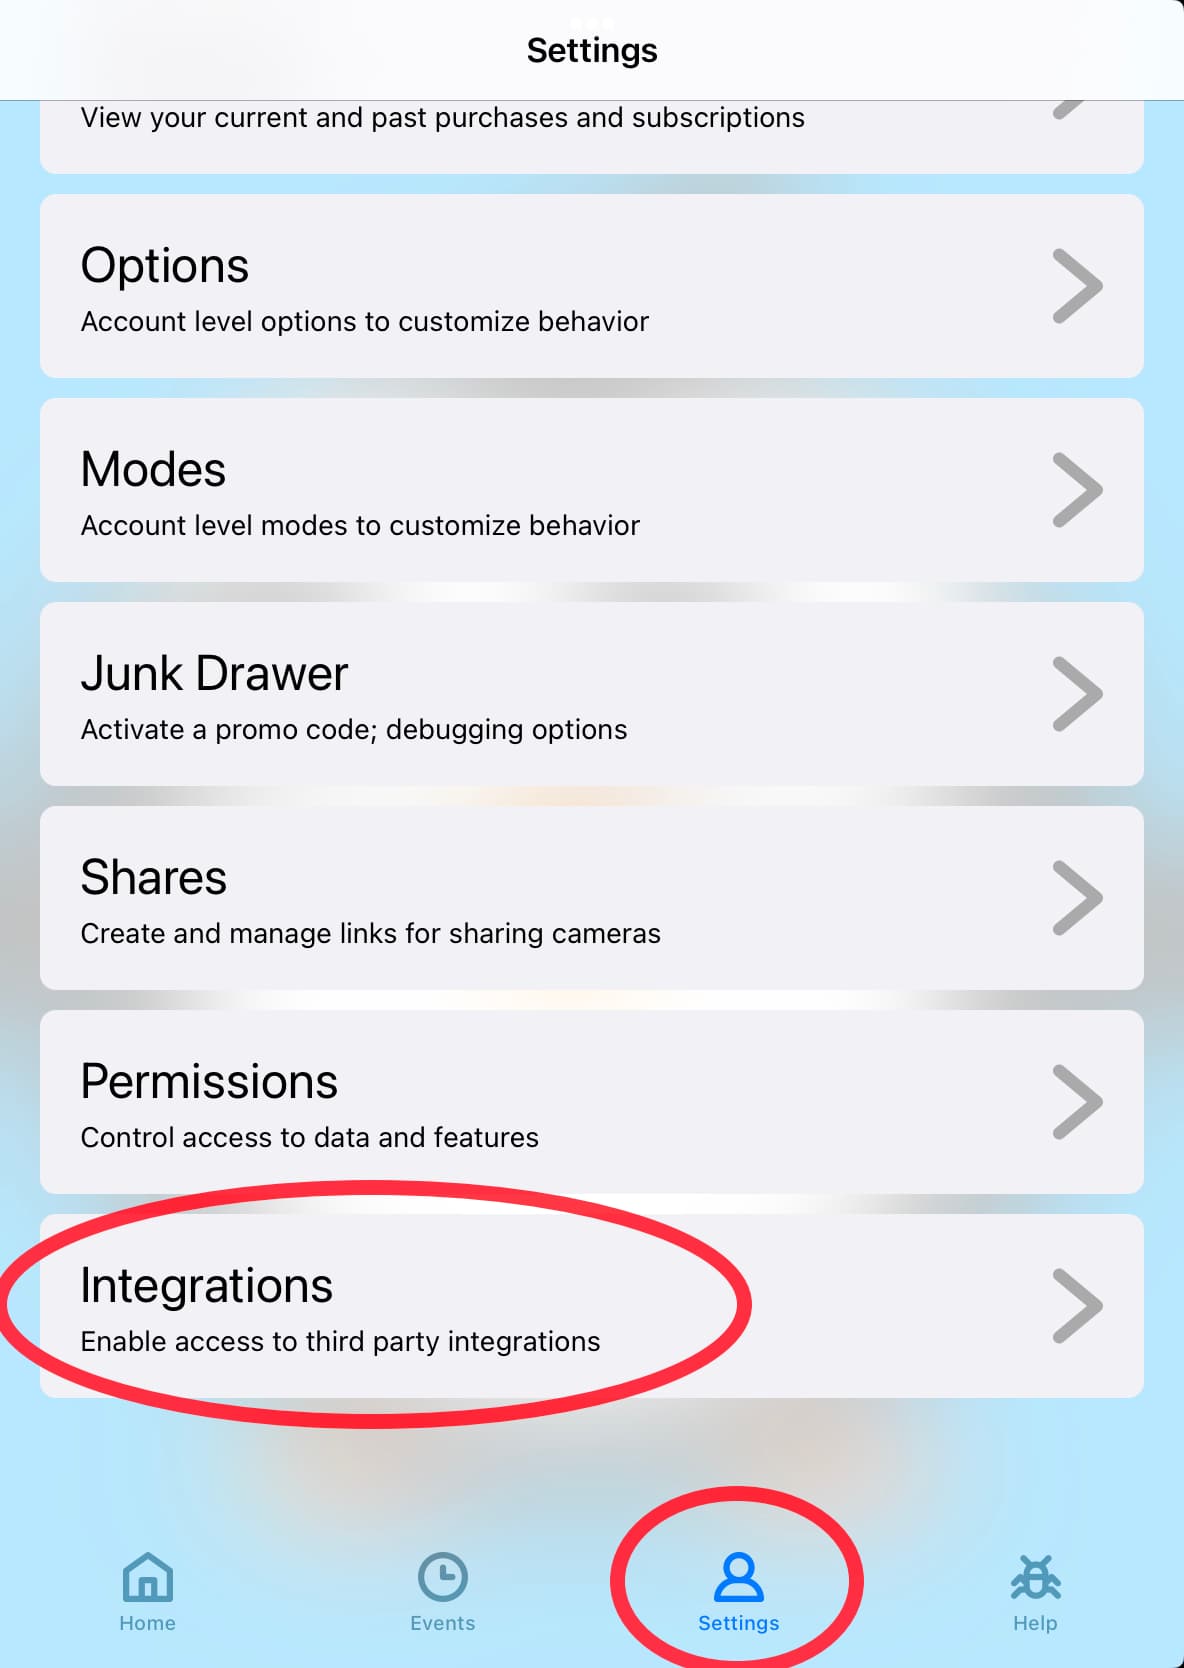
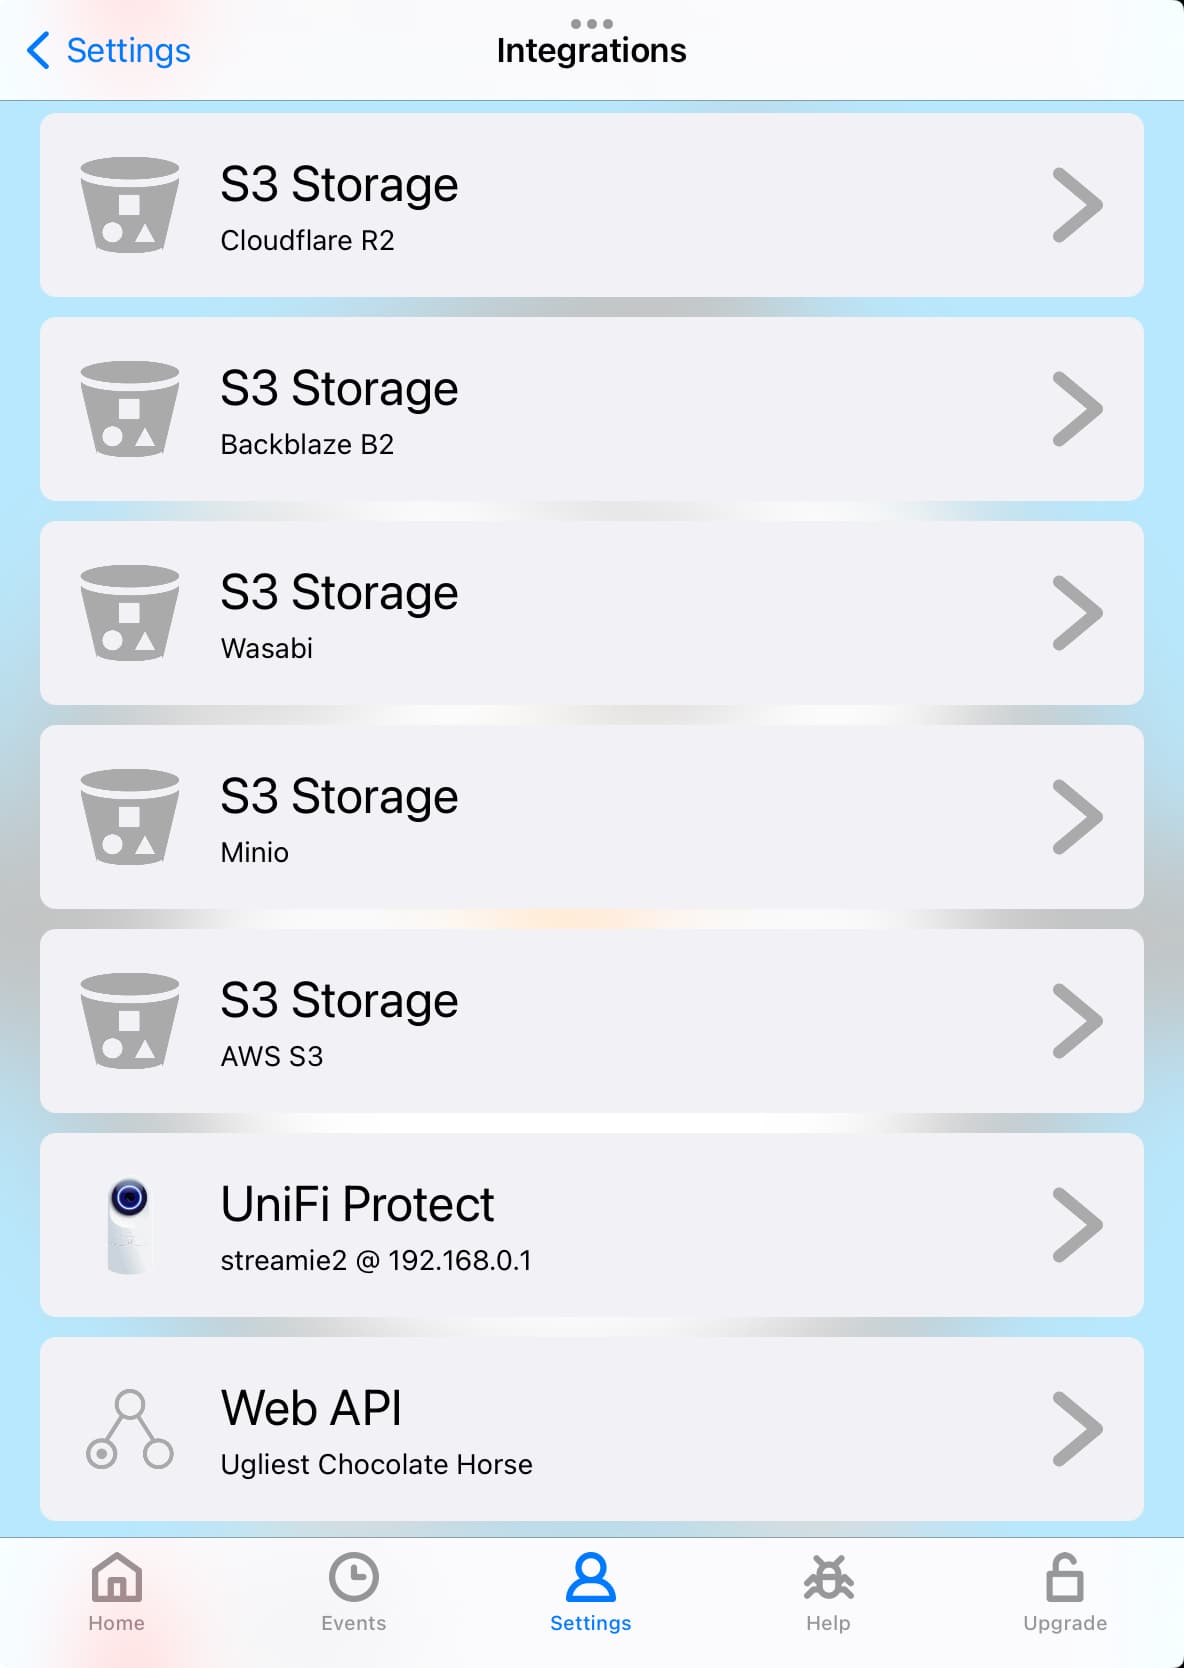
In Streamie, navigate to Settings ==> Integrations.
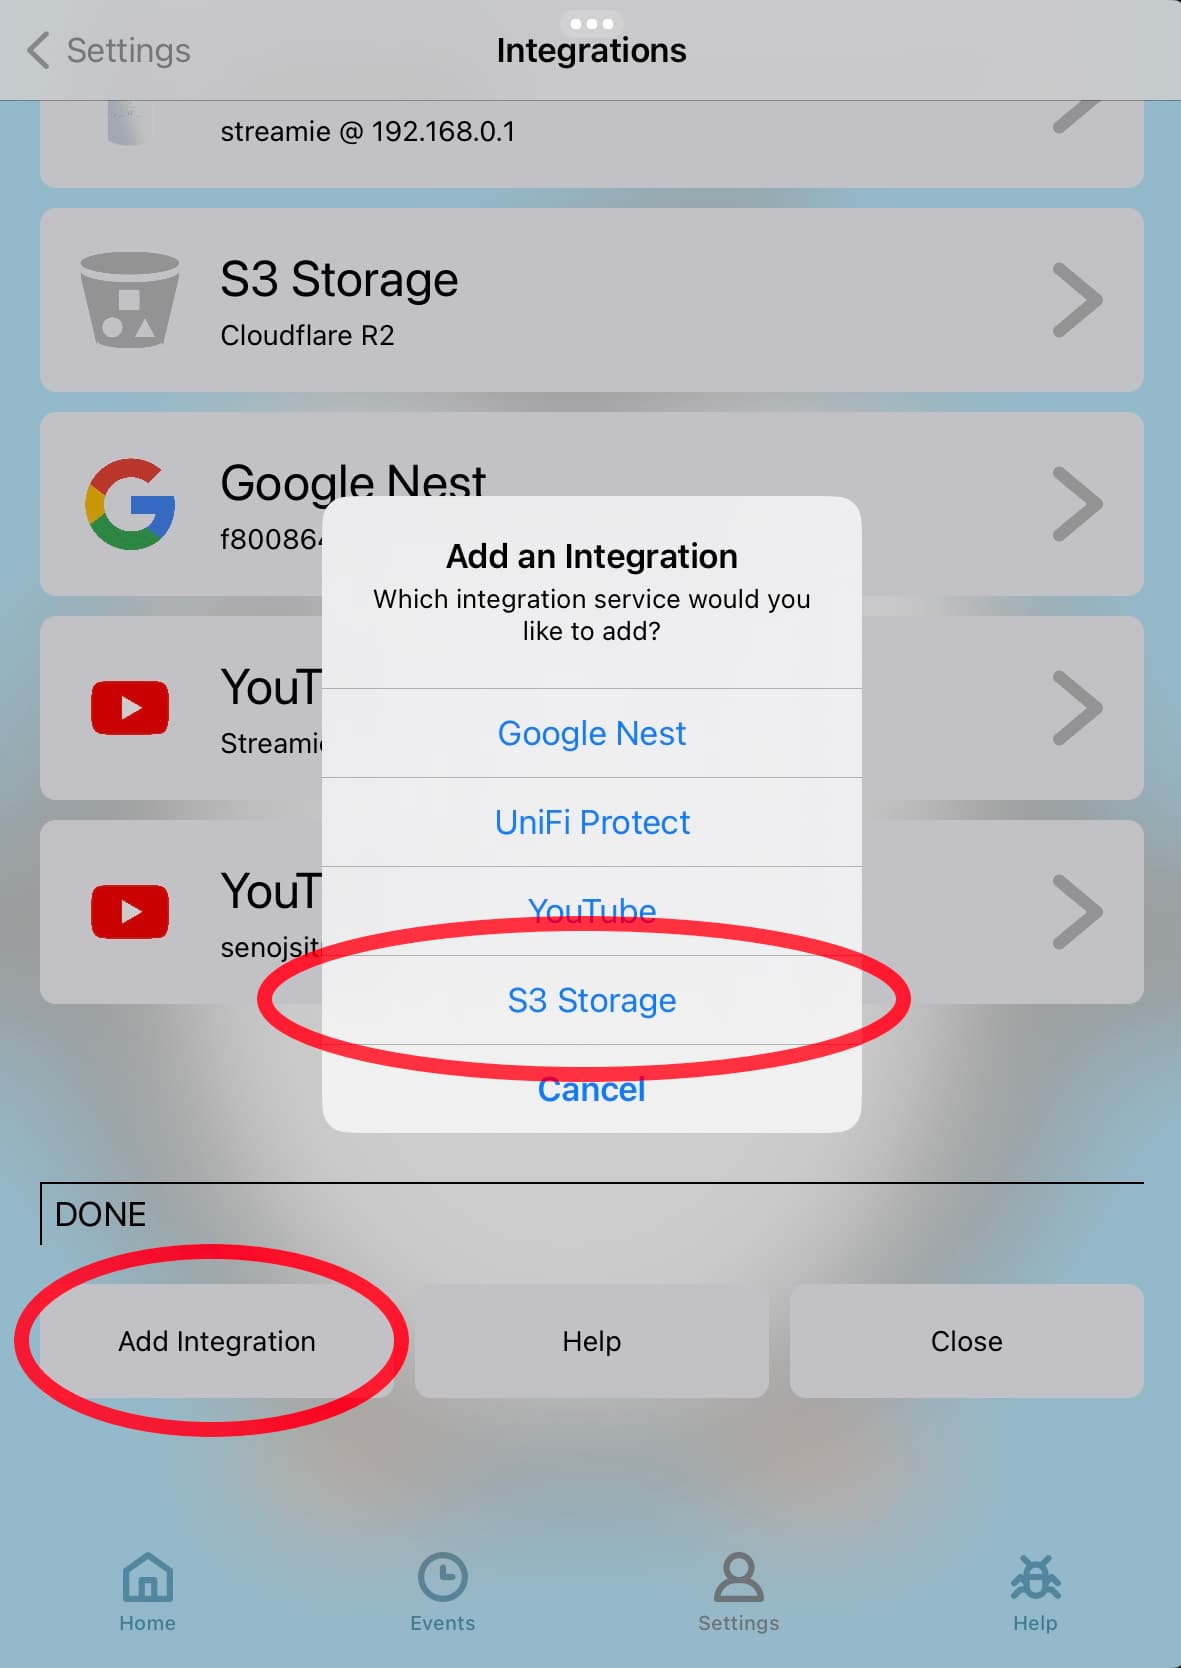
Choose “Add Integration” ==> S3 Storage
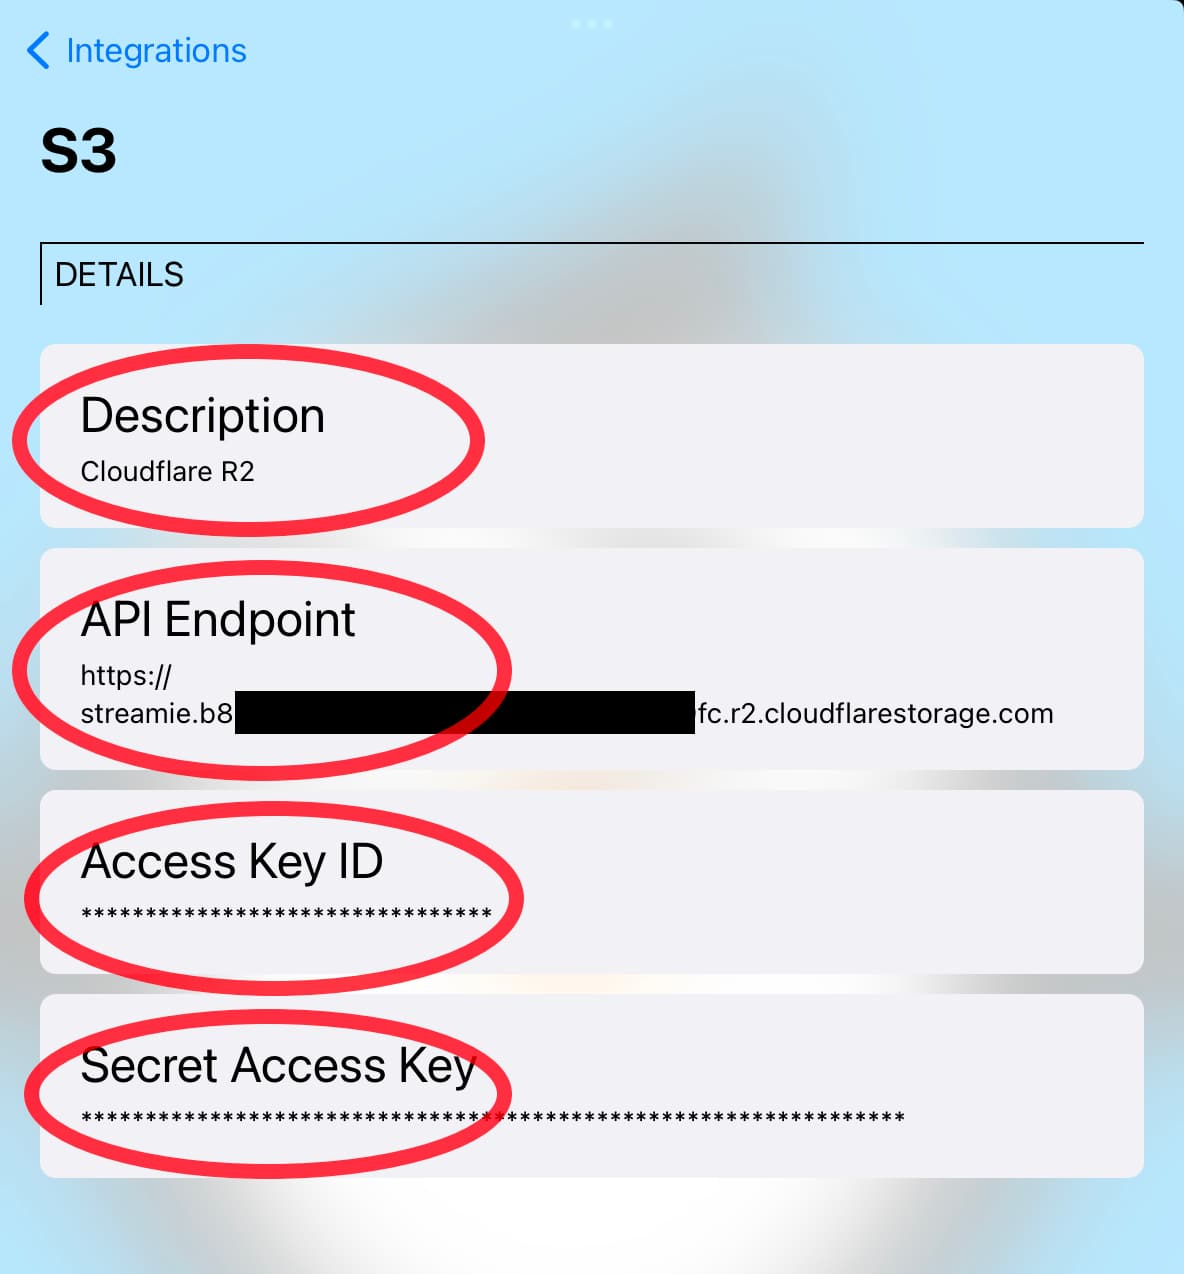
Configure the S3 Integration by giving it a name (which is anything you want), API endpoint, access key id and secret access key. Those last fields are all values that you get from your S3 service provider.
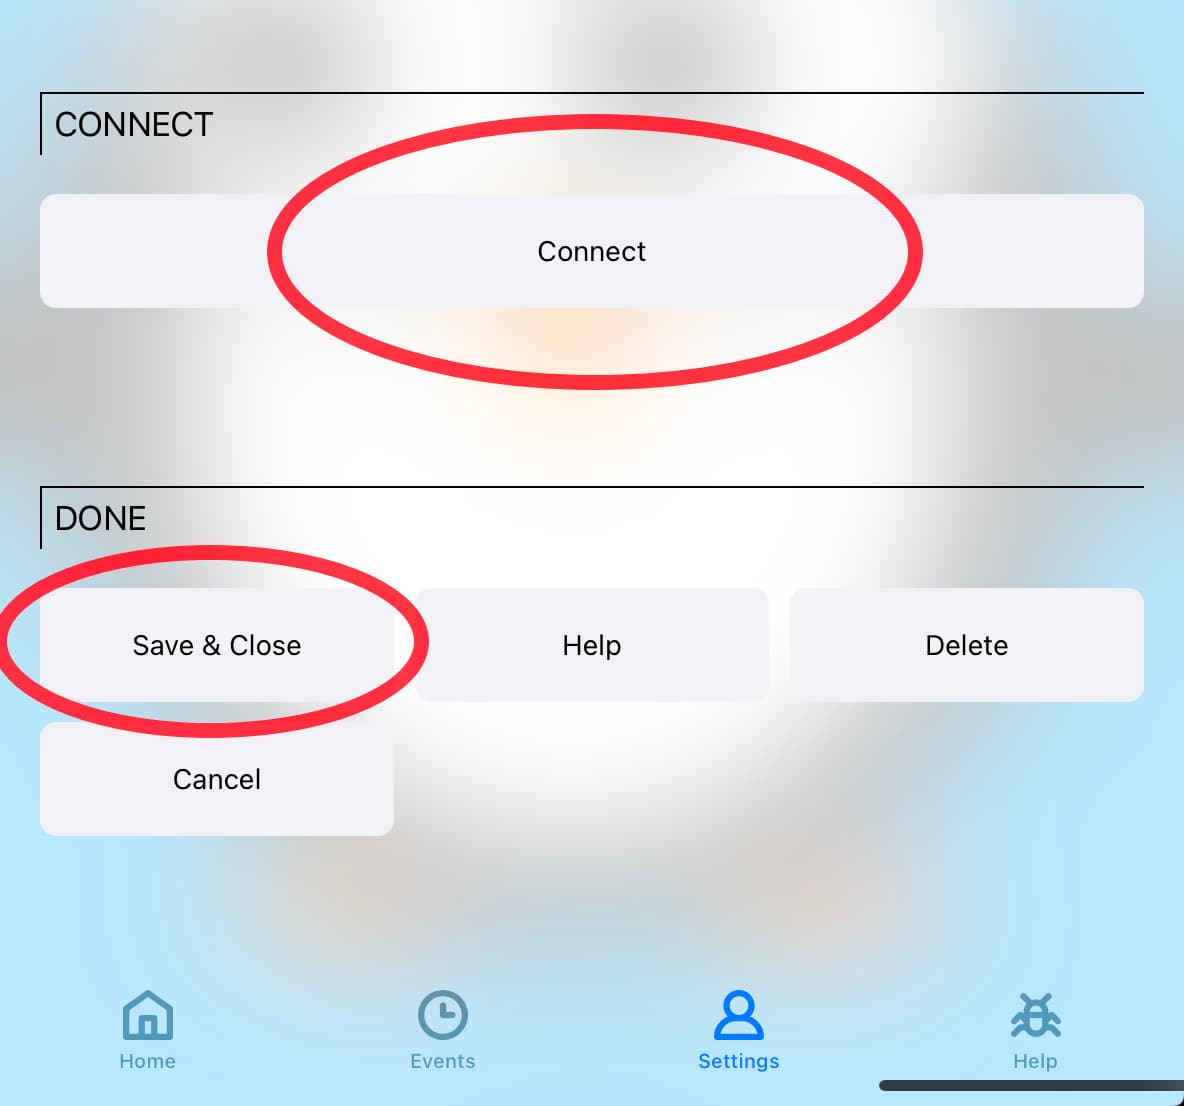
Scroll down and hit the Connect button. Streamie will attempt to validate the information you’ve provided. If this step fails, please verify the secret values you’ve copy-and-pasted.
After everything works, hit the Save & Close button and we’re done with this step.
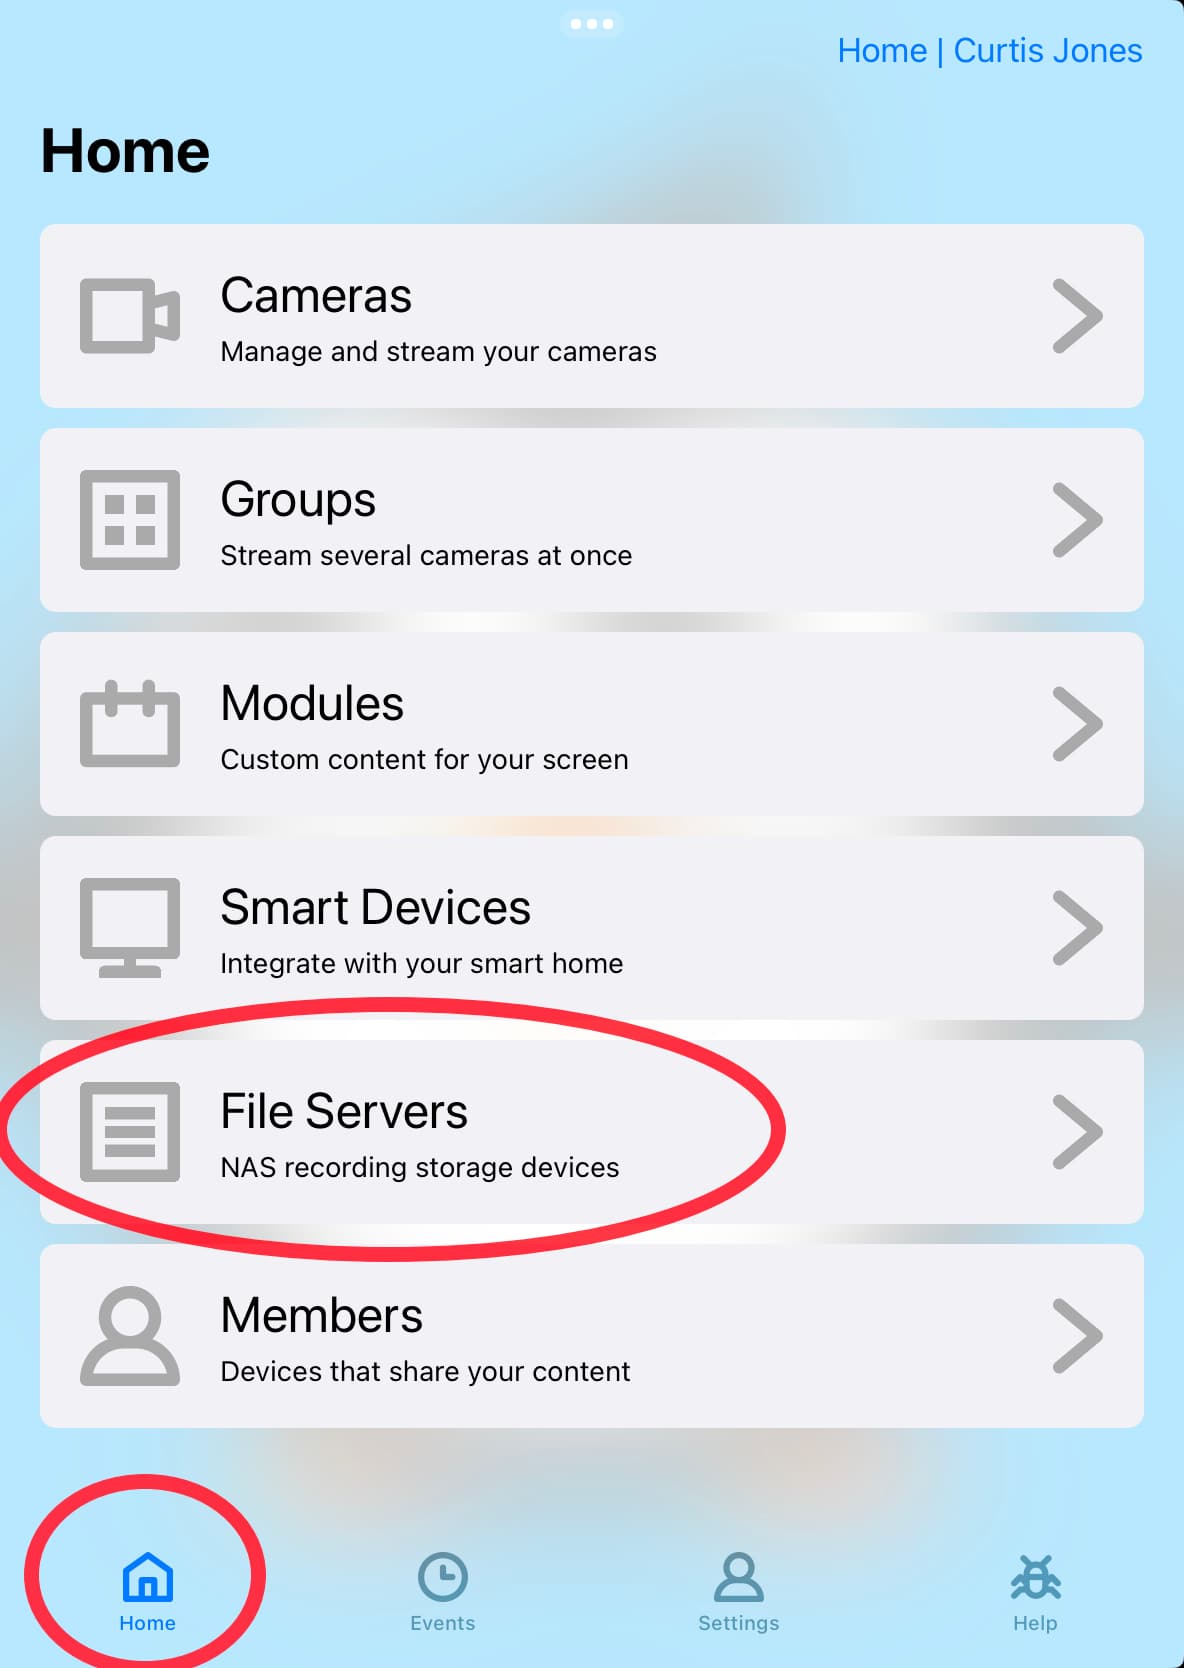
Let’s configure a File Server to work with this new S3 Integration. Navigate to Home ==> File Servers.
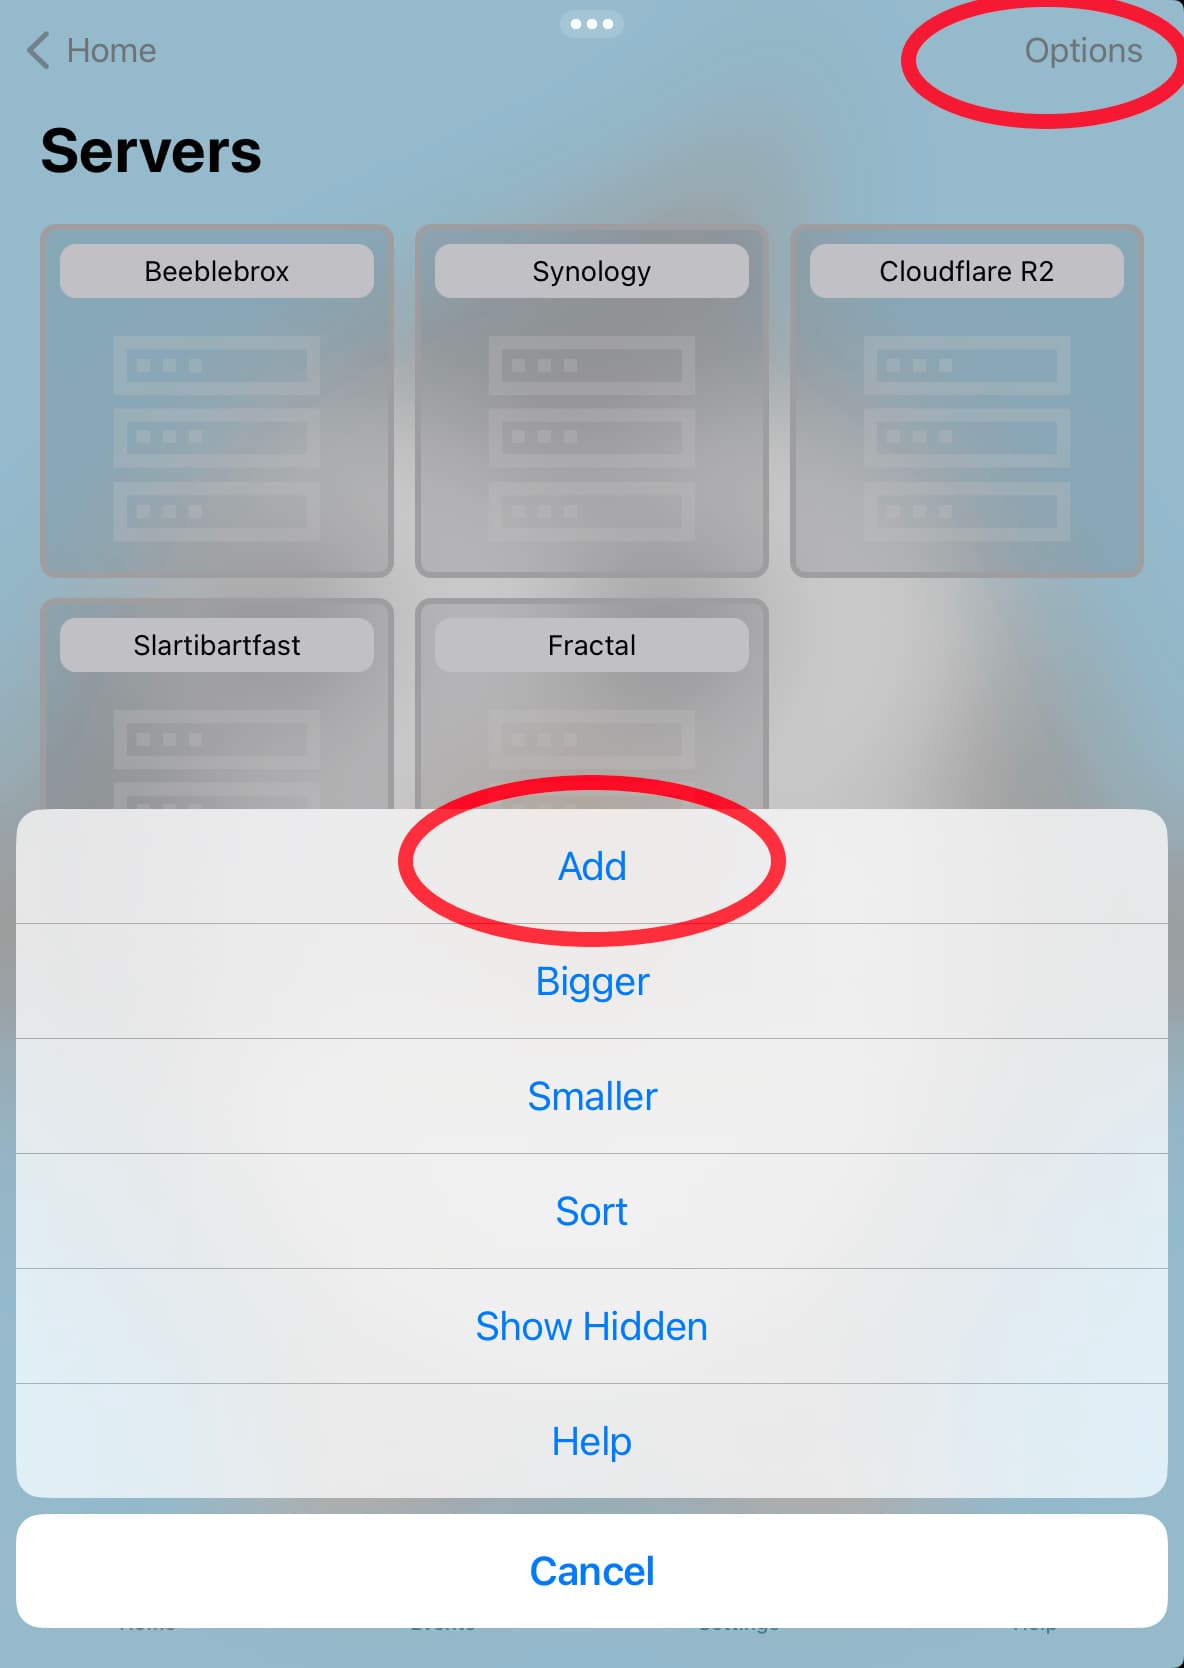
Choose “Options” ==> Add.
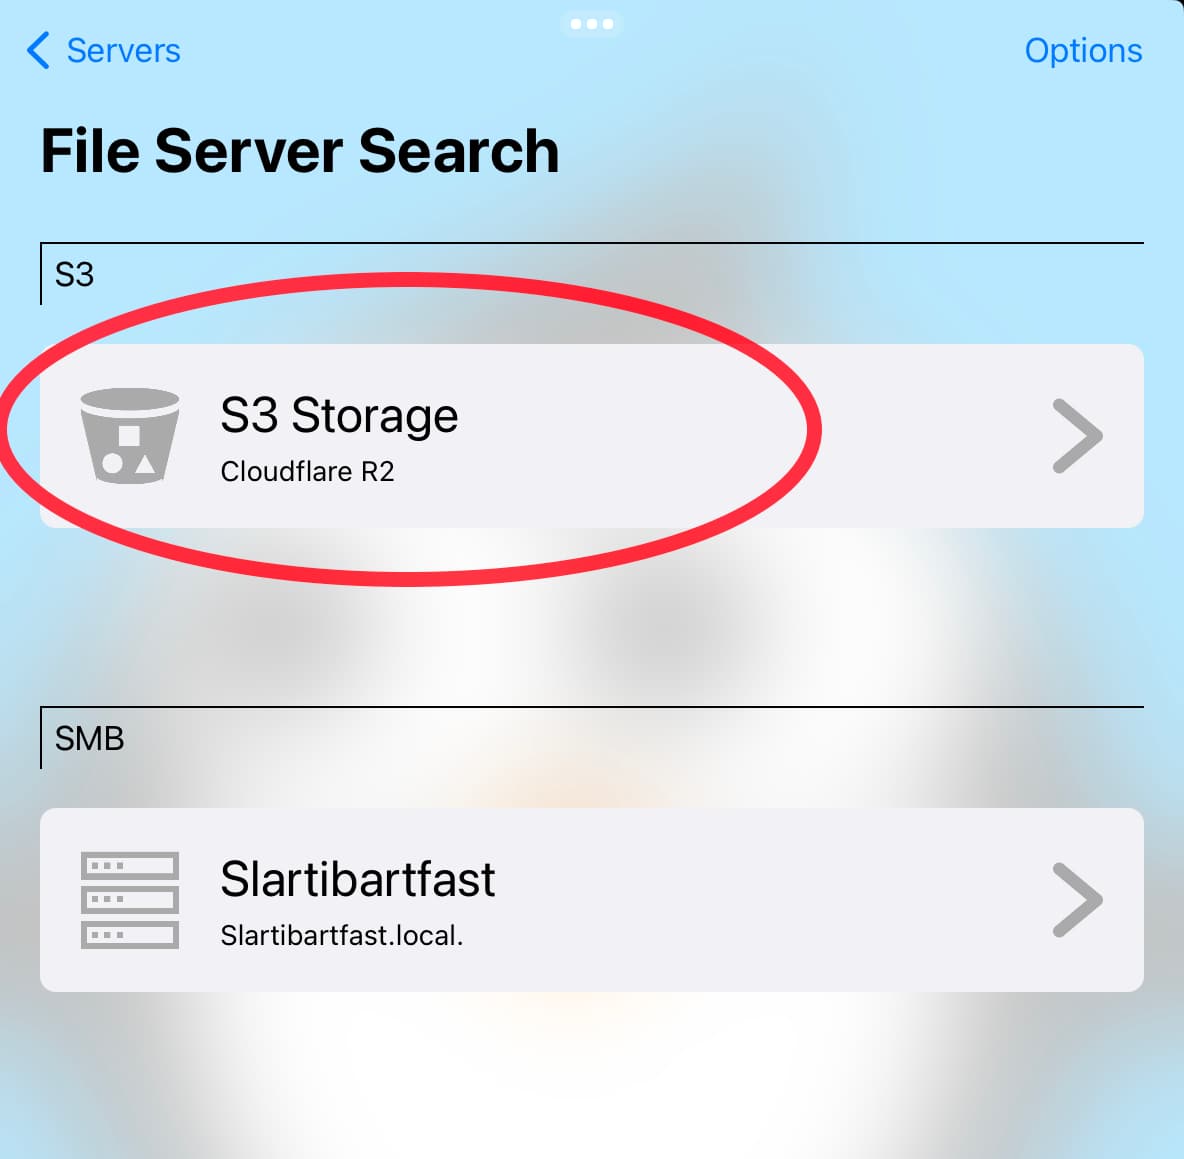
Your S3 Integration should show up in this list. Tap on it.
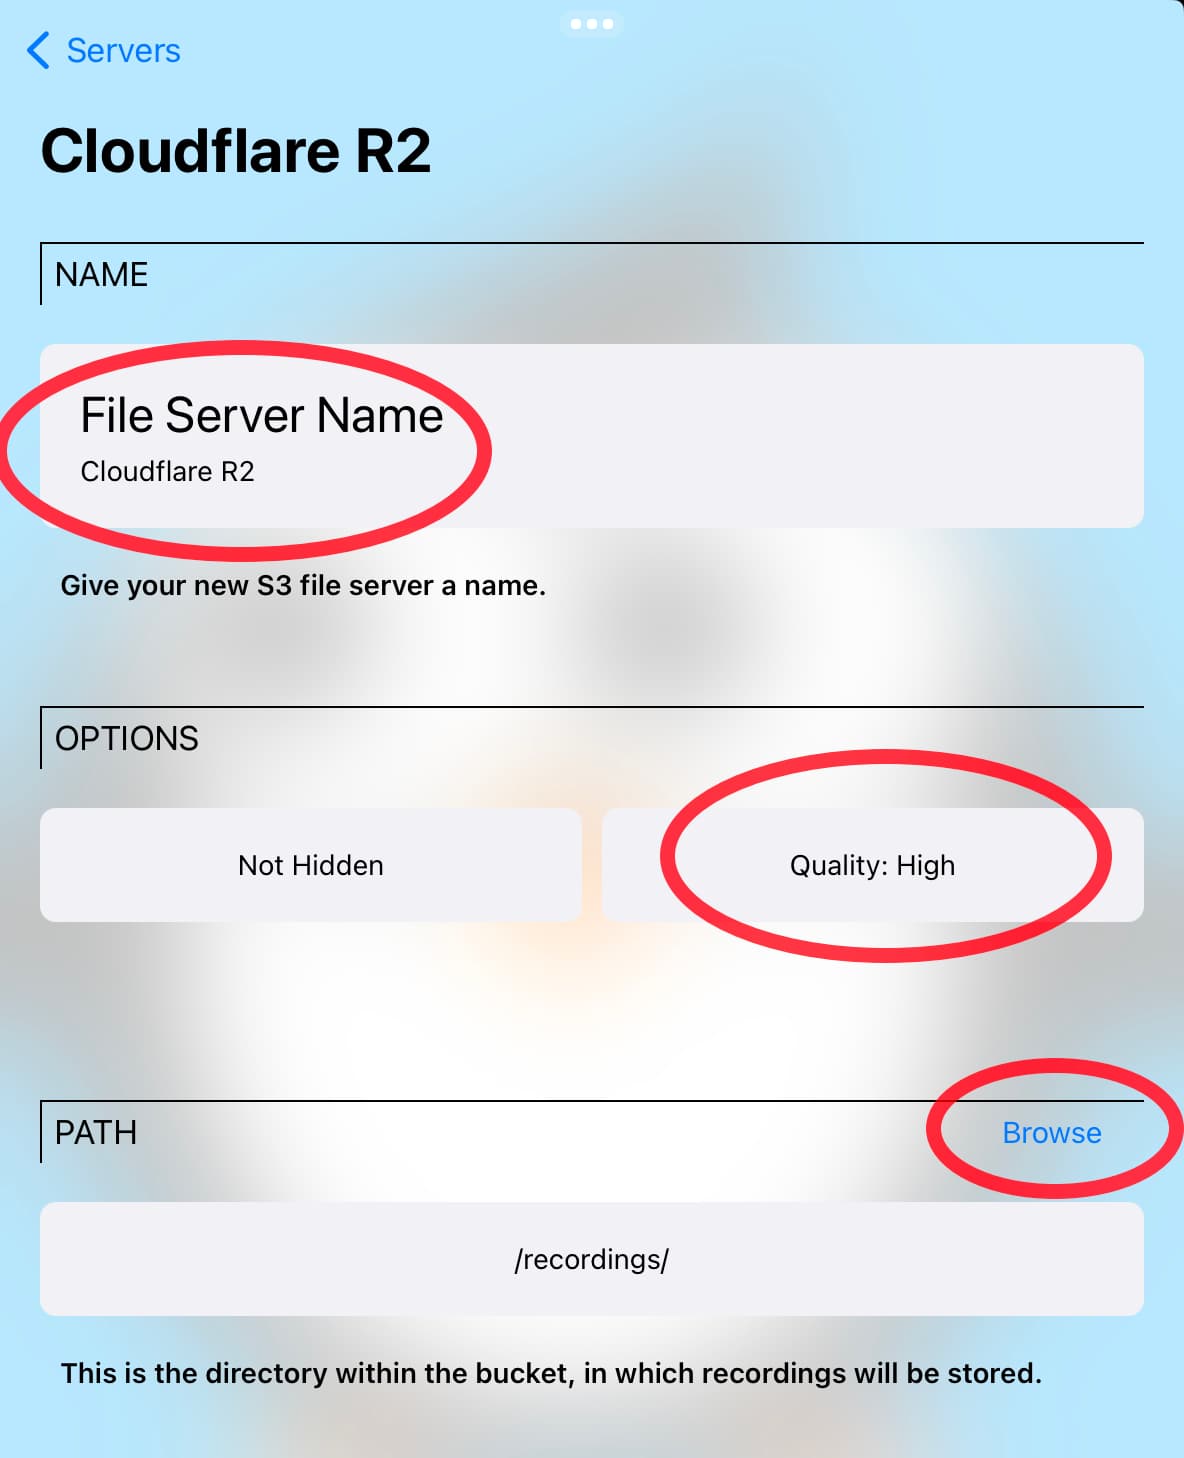
Give your File Server a name. Choose a Quality. The High quality setting will use the original quality from the camera. Any quality other than High will cause transcoding to occur. The trade-offs are that the high quality doesn’t require as much GPU work on the device, but it requires more storage space and bandwidth.
Next, hit the Browse button and choose a location in your bucket for the Streamie recordings.
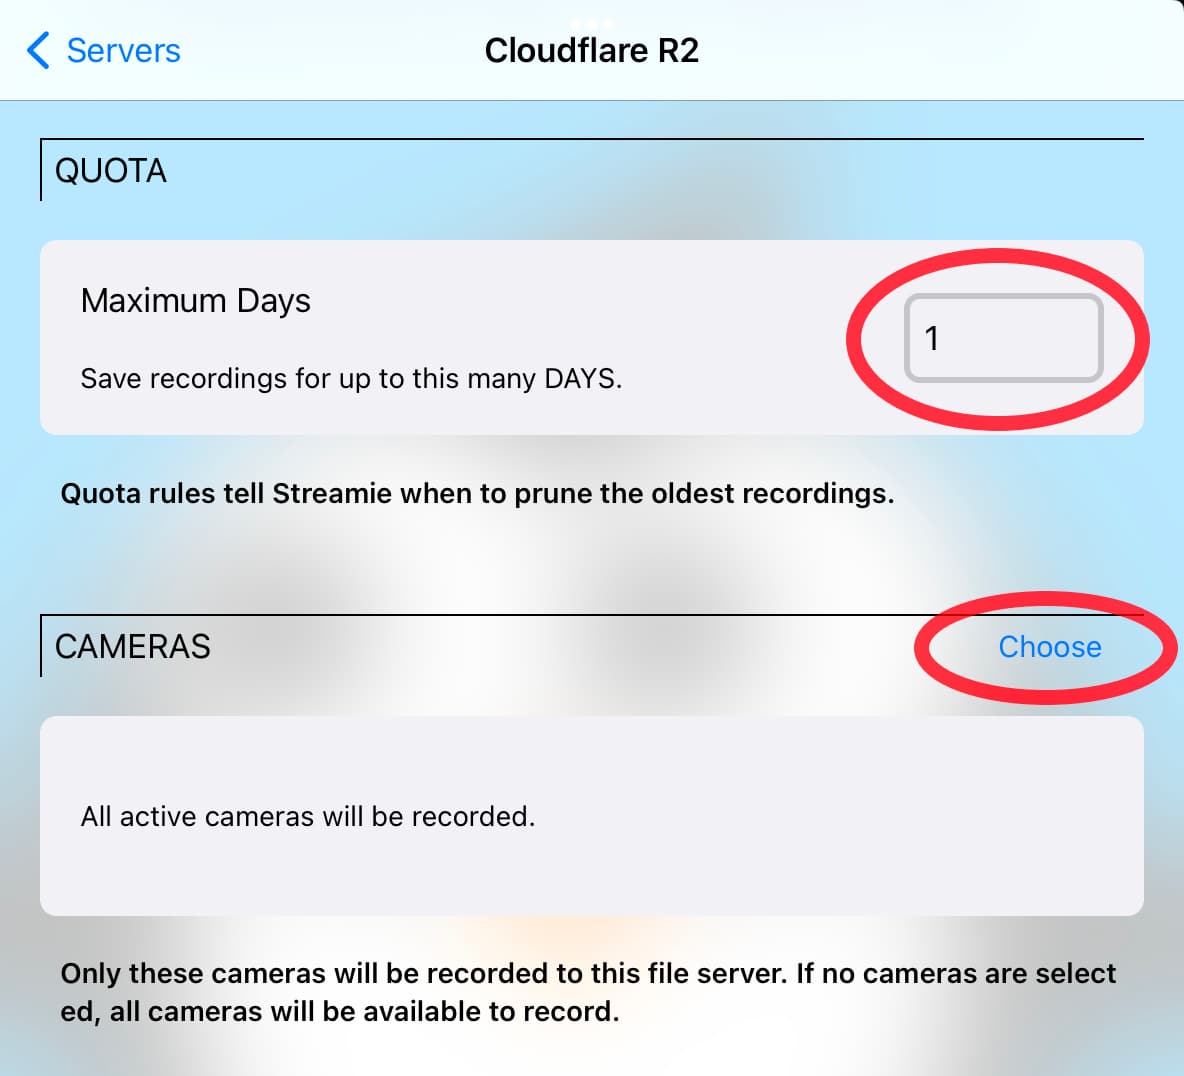
The Quota lets your decide how many days of recordings to store. If you choose 1 day, then all of today’s recordings, and all of yesterday’s recordings will always be available. Anything older than that will be pruned.
Choose which cameras you want recorded. If you leave this list blank, then any camera you’re streaming will be recorded.
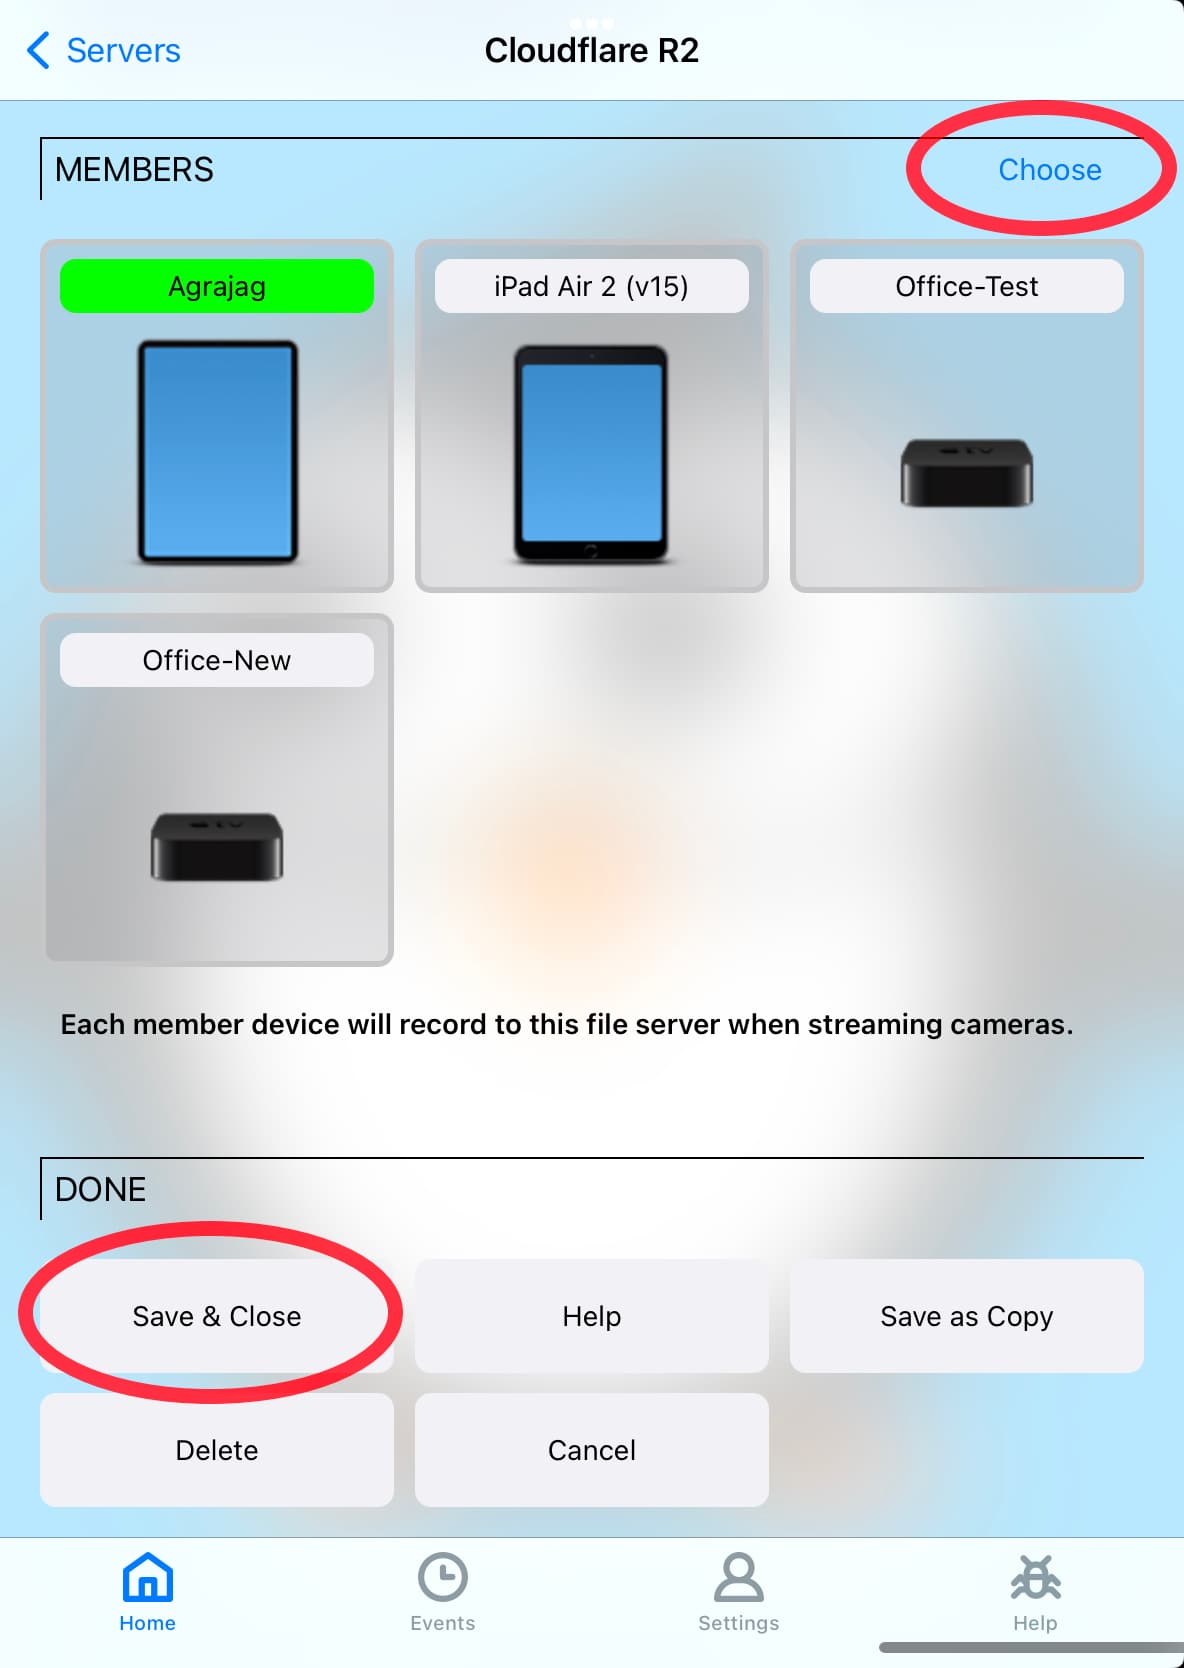
Choose which devices should perform recording. By default the current device is a part of this list.
Finally, hit Save & Close and you’re ready to record.
Choose a camera or group of cameras to stream. Every ten minutes (approximately), Streamie will emit a recording for each camera and push it to your S3 bucket.
Depending on your camera and its configuration, recording it may consume a considerable amount of data. Some internet providers cap the amount of monthly transfer you can do without incurring an additional charge. Please be aware of the limits of your internet account.
In the following sections, you’ll see working configurations for various S3 providers. If you discover any compatibility issues, let us know so that we can investigate and improve Streamie.
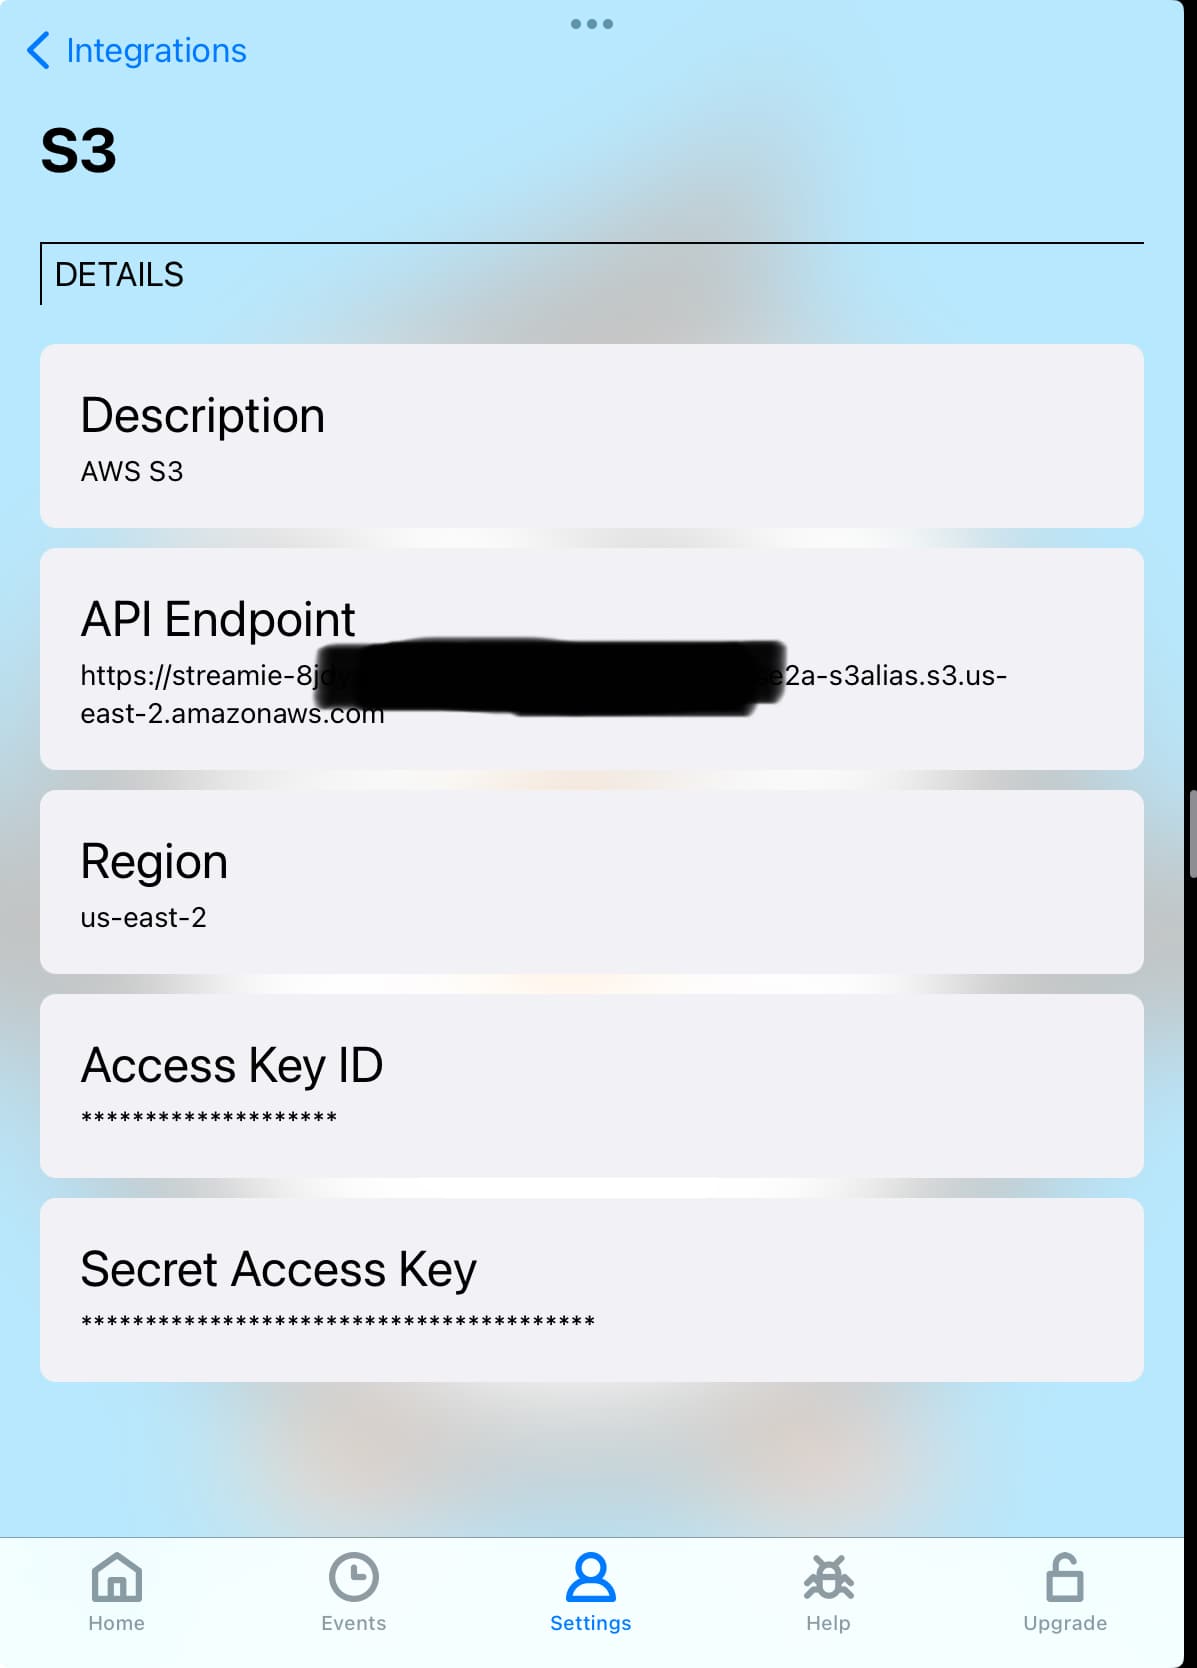
For AWS, you’ll notice that the bucket name (“streamie”, followed by a unique identifier) is the first part of the hostname for the endpoint. Don’t forget that the region (“us-east-2”, in this case) needs to be correctly specified both in the Endpoint URL and in the Region value.
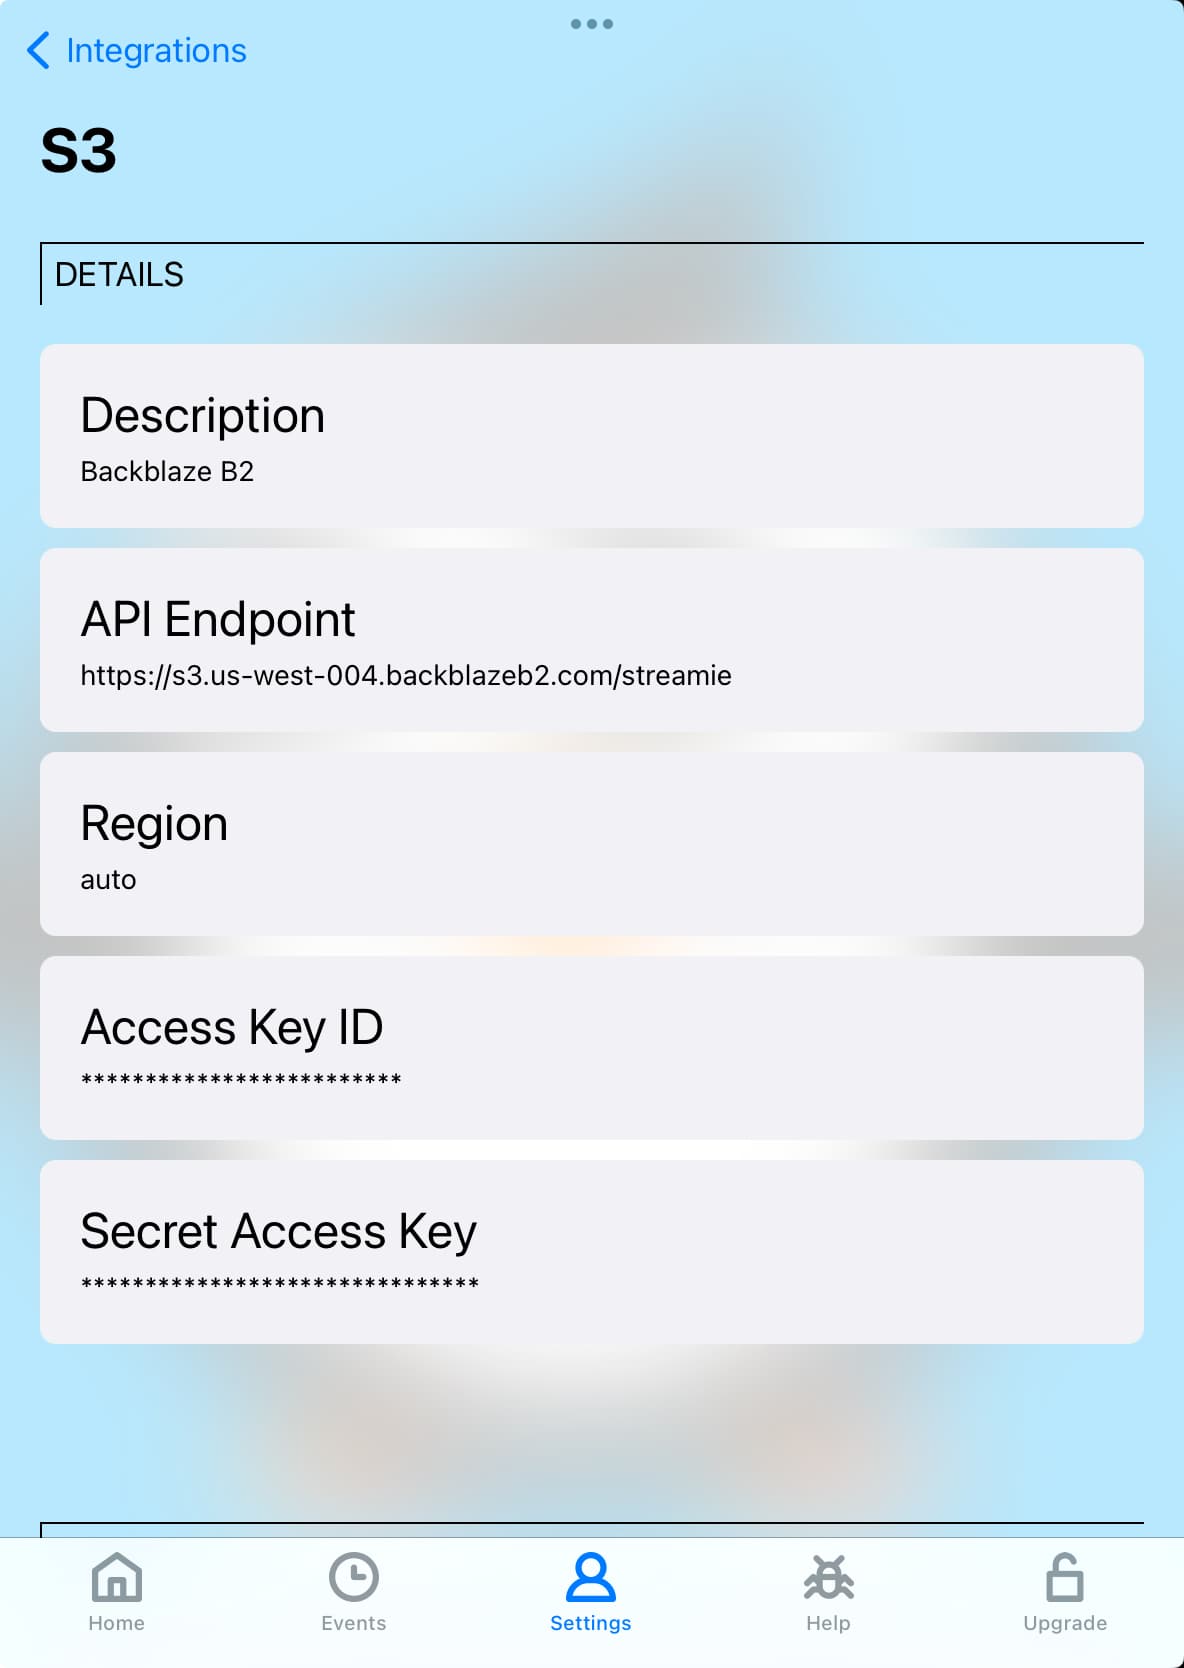
For Backblaze, the name of your bucket (“streamie”) must be appended to the endpoint as the path. This path will be prepended to each operation.
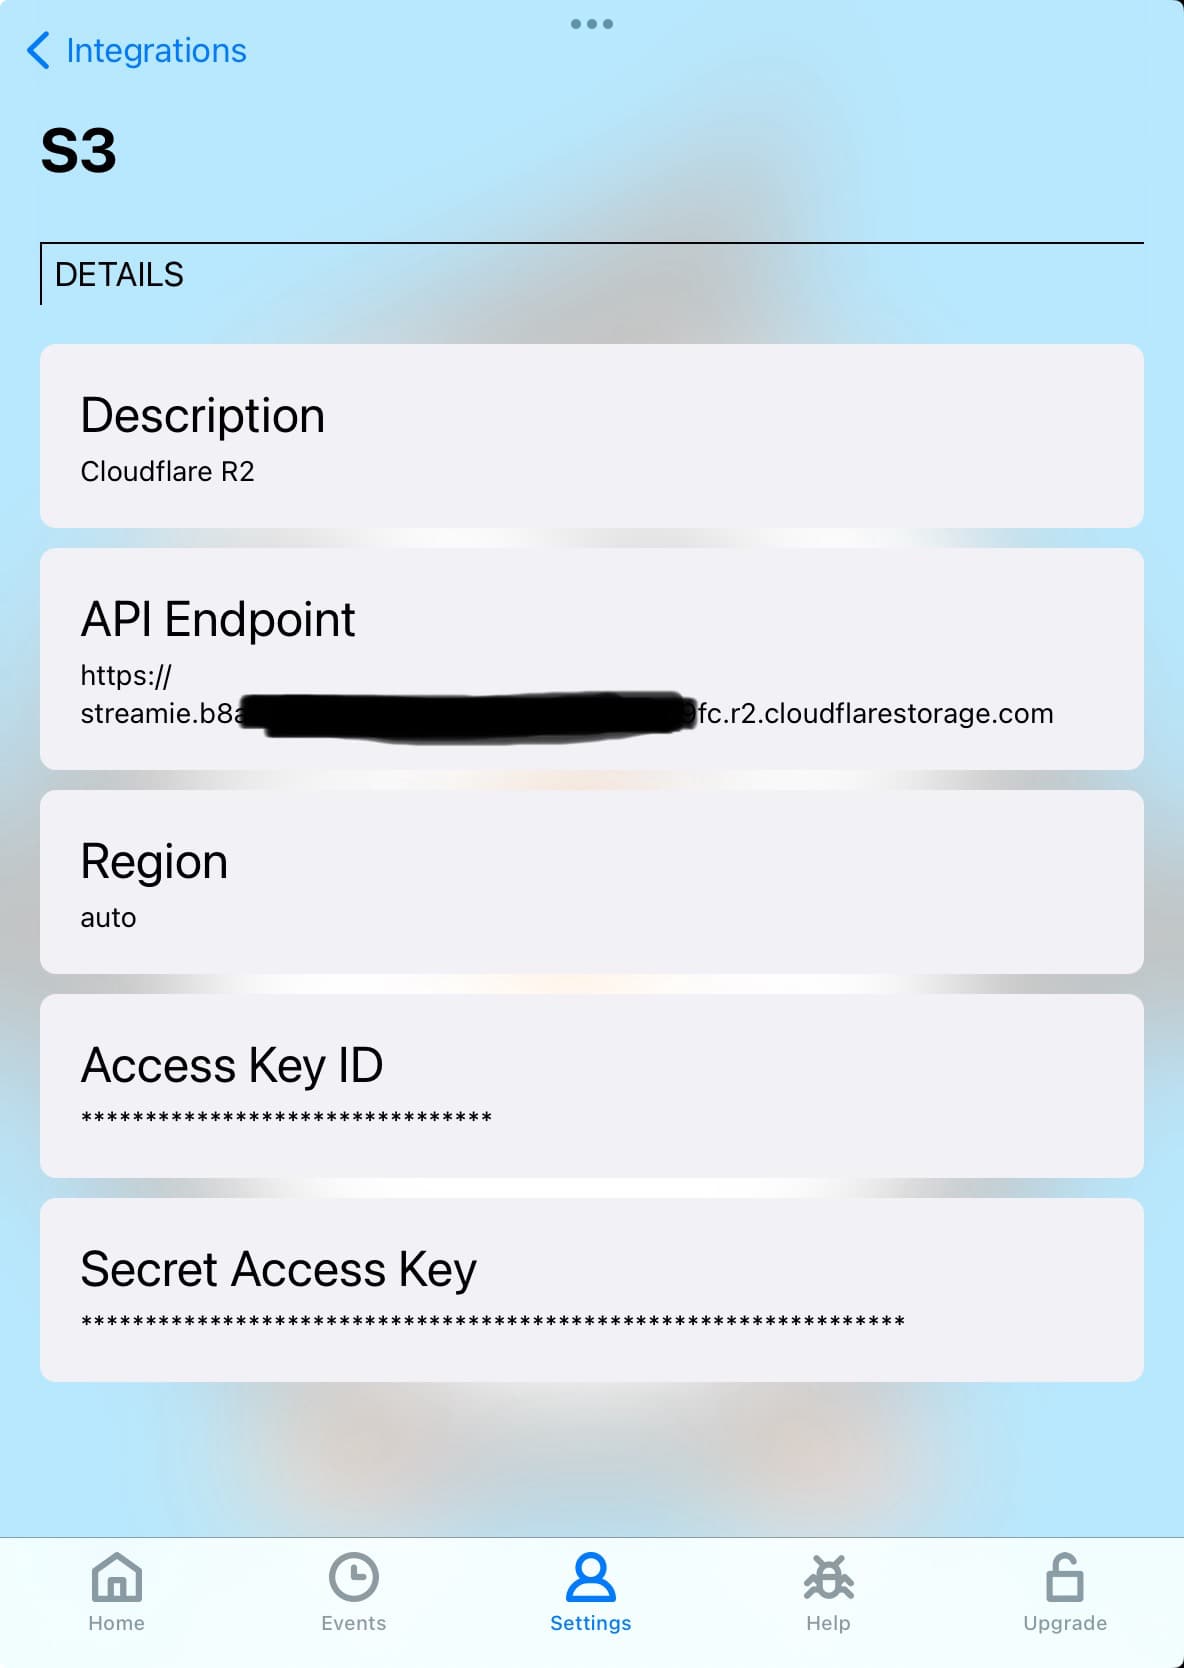
For Cloudflare, the bucket name (“streamie”) can be prepended to the S3 API endpoint that R2 provides. You should alternatively be able to append the bucket name as the path component of the endpoint URL, but I haven’t specifically test that.
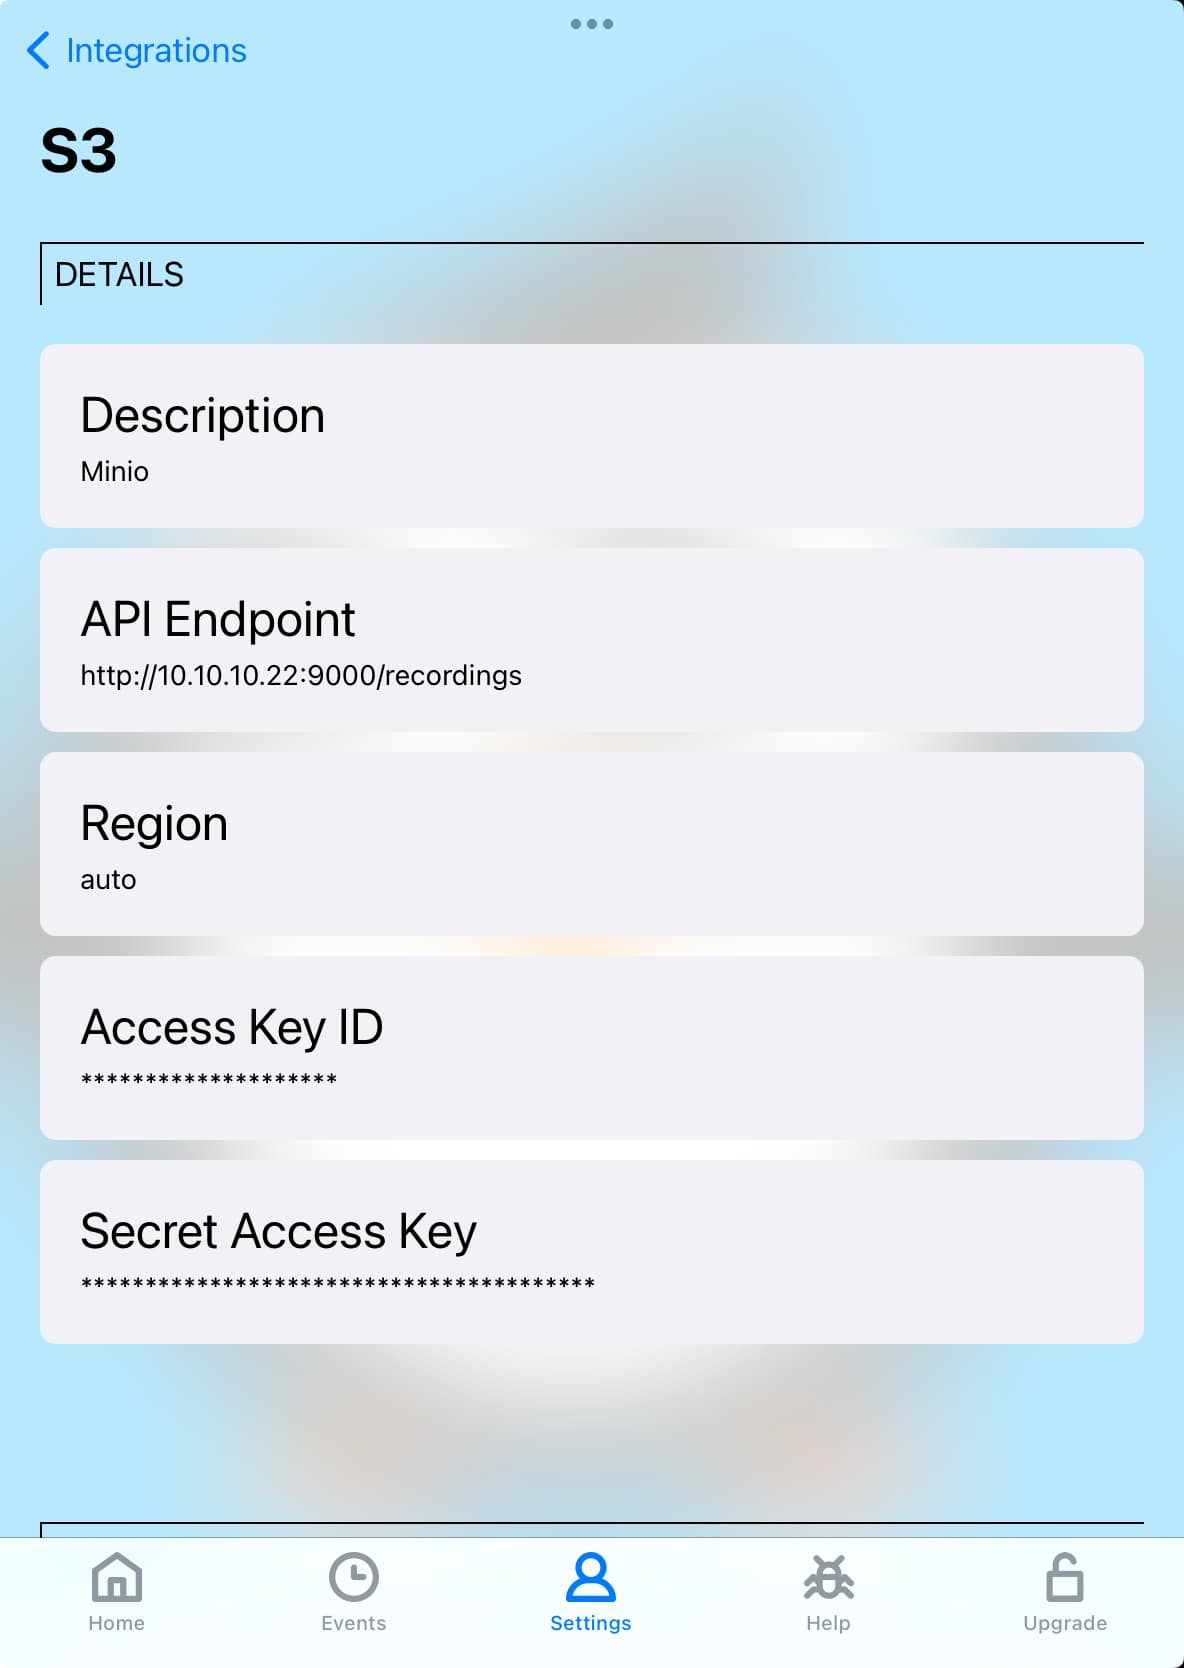
For MinIO, the bucket name (“recordings”) is specified as the path component of the endpoint.
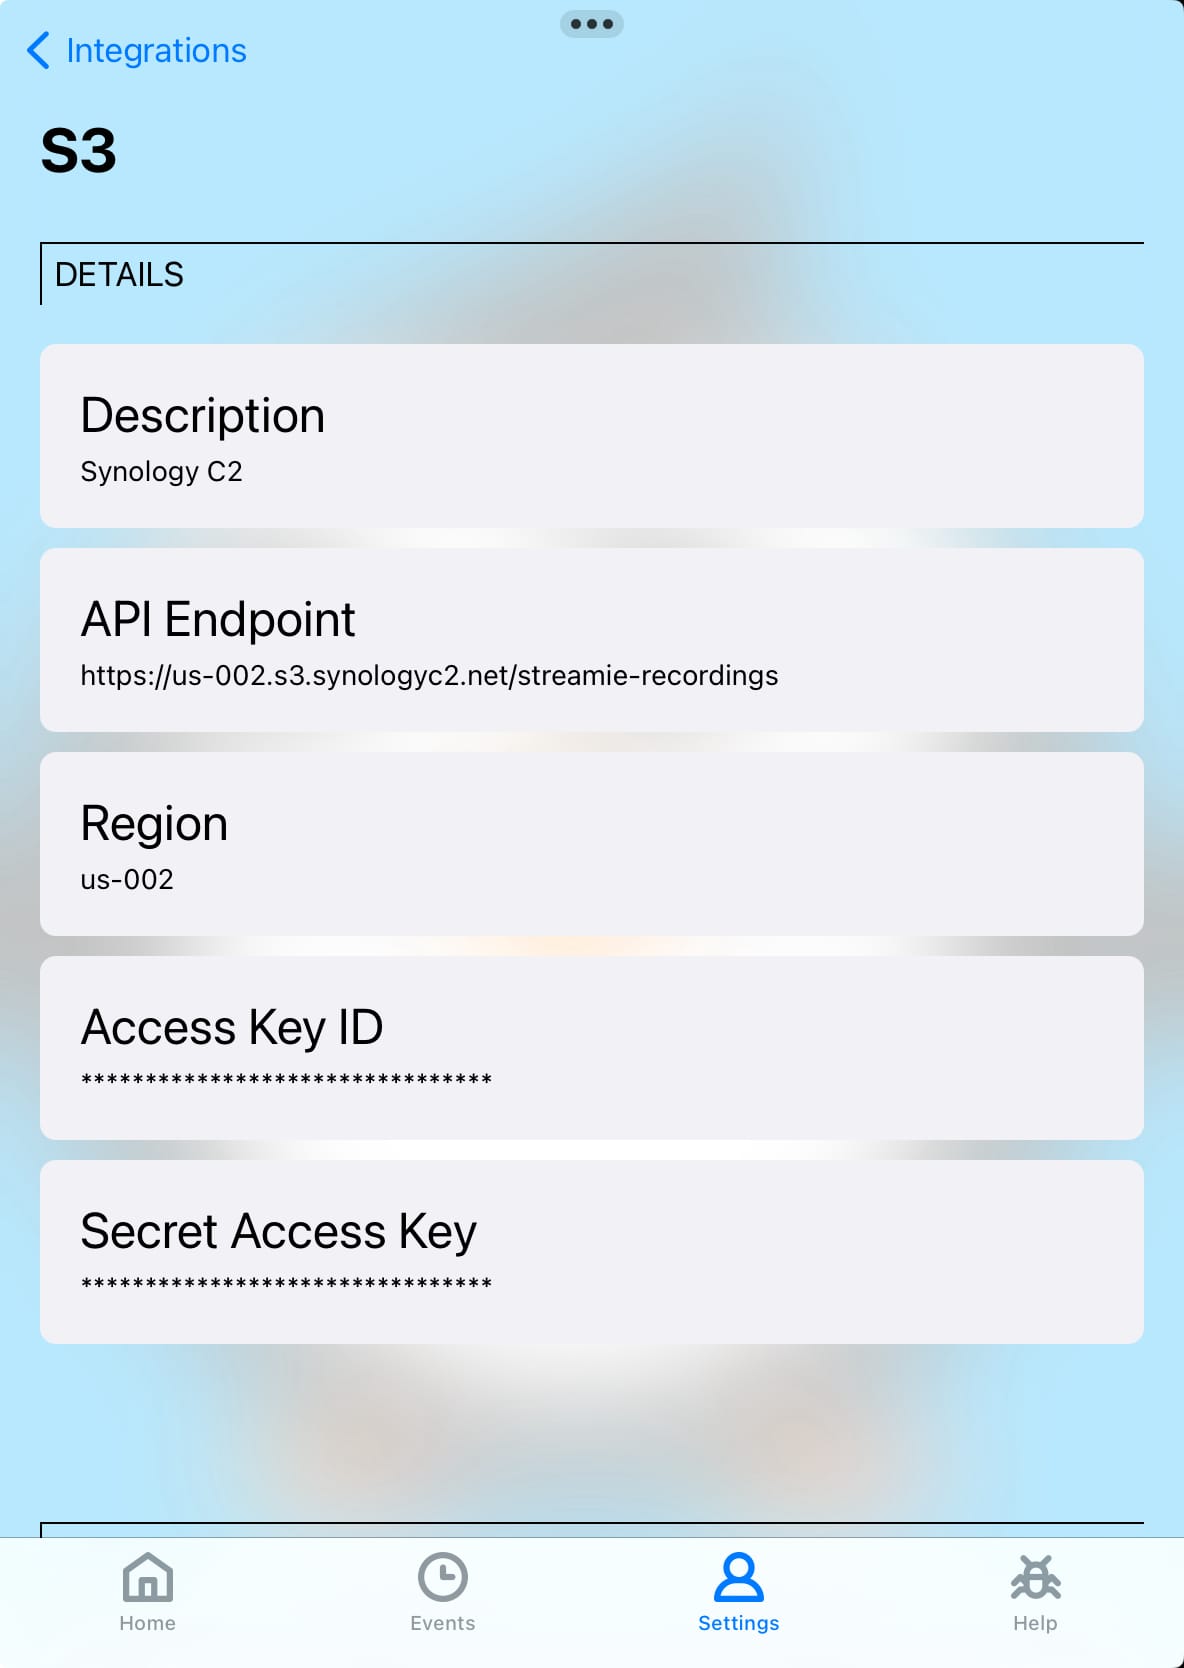
For Synology C2, the bucket name (“streamie-recordings”) is specified as the path component of the endpoint. Additionally, you need to extract the region name from the hostname (“us-002”).
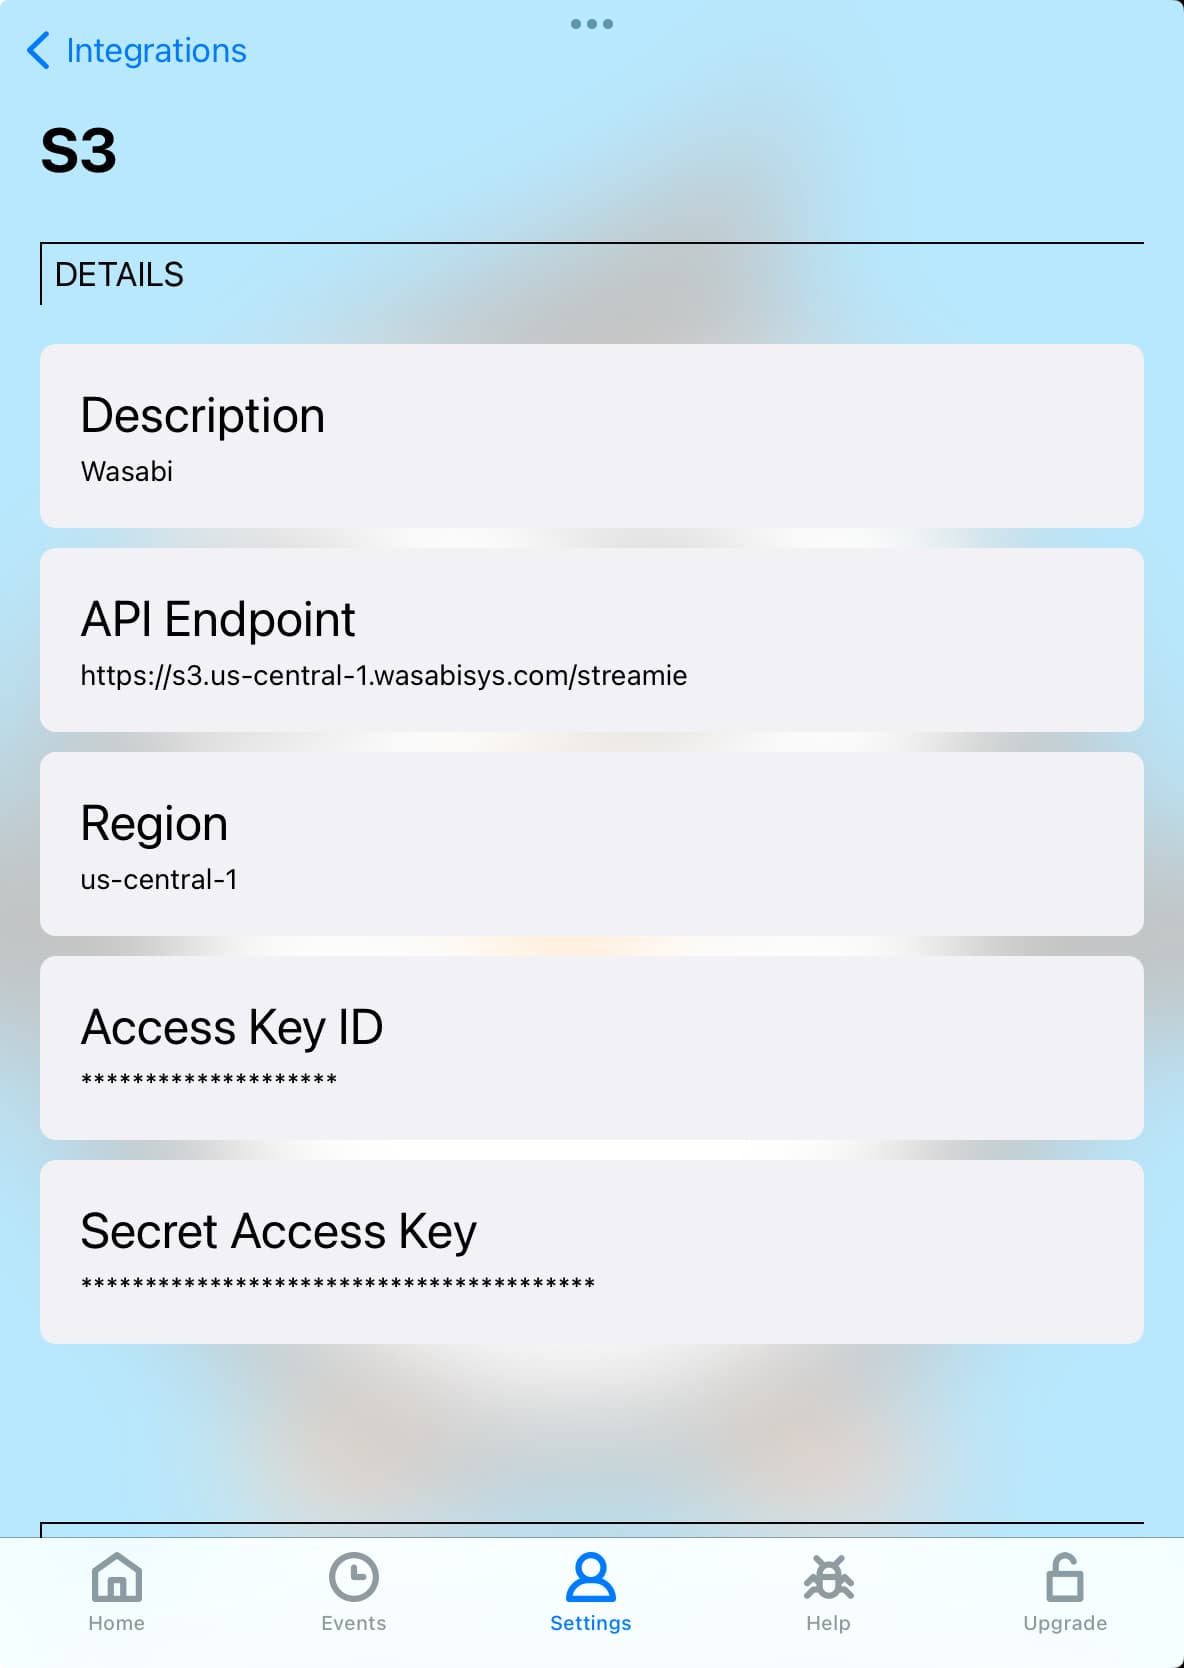
For Wasabi, the bucket name (“streamie”) should be specified as the path component of the endpoint URL. Also, note that you need to correctly specify the region (“us-central-1”, in my case) both in the endpoint URL and the Region value.
Created: 3 years ago
Updated: 1 year ago
Author: Curtis Jones
Topics: S3 How To Integrations Record to Cloud
Streamie provides a best-in-class user experience on your iPhone, iPad, Apple TV and Apple Silicon Mac, with an intuitive user interface that makes it simple to discover, stream, record, monitor and share your HomeKit, Google Nest, Ubiquiti UniFi Protect and ONVIF-compatible IP and RTSP cameras. Streamie keeps you informed with motion event notifications and it works with most cameras using its advanced audio and video codec support. You can watch your cameras from anywhere, record 24/7 to your private NAS, remotely manage multiple locations, device permissions and seamlessly synchronize settings across your devices; configure Hubitat smart home automations, live stream to YouTube and rely on the in-app technical support system when you need help -- and you can also reach us by phone. Download Streamie today for all of your CCTV needs.