When editing a camera group, you can now (as of v3.8.0) configure the precise layout of the cameras in the group as well as the behavior mode of the cameras. Read on for more details.
You can find a quick demo video here.
Long-press on a camera to drag-and-drop it to arrange the cameras. The aspect ratio of the view is the same as the window in which you are viewing the app, so if a camera is “below the fold” then it won’t be visible without scrolling when you stream the group.

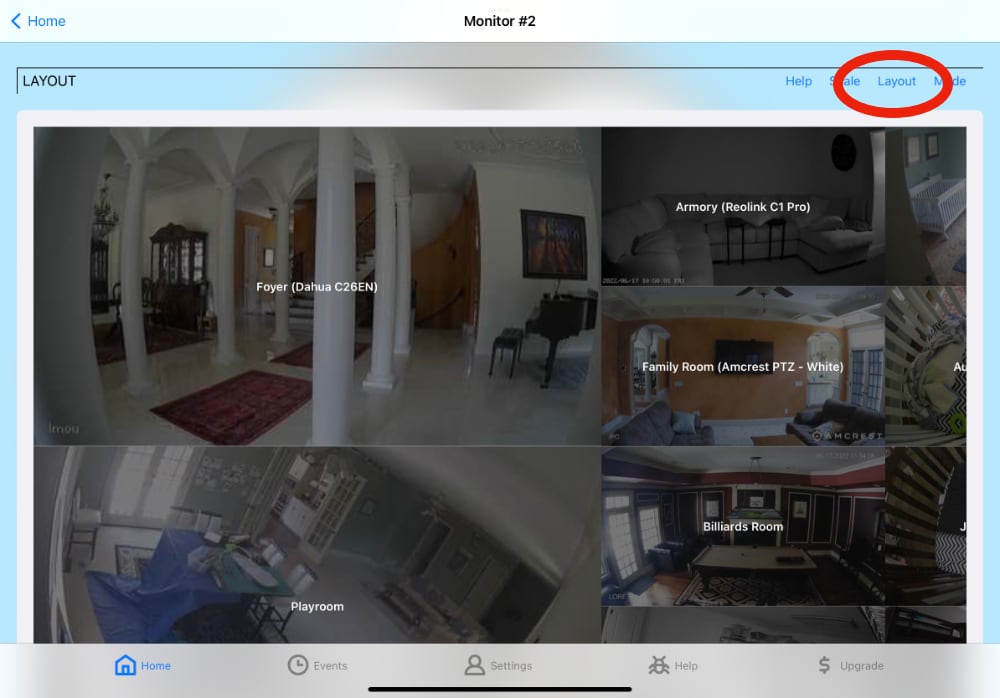
The layout feature affects how cameras are arranged on the screen and the scrolling direction. The three layout modes are: Horizontal, Vertical and Automatic. By default, Streamie scrolls vertically. You can change the default behavior for a group using the Layout button. The order of the cameras remains the same, but the layout direction changes.
Horizontal
Cameras are arranged from top-to-bottom and then from left-to-rightright. Cameras that don’t fit on the screen are accessible by scrolling to the right. The scale defines how many cameras will fit from top to bottom.
Vertical
Cameras are arranged from left-to-right, and then from top-to-bottom. Cameras that don’t fit on the screen are accessible by scrolling to the bottom. The scale defines how many cameras will fit from left to right.
Automatic
No scrolling is involved with this setting. Instead, the scale of the layout and the scale of individual cameras is automatically adjusted to fit all of the cameras on the screen with as little wasted space as possible. The layout itself is done in the same fashion as the Vertical option.

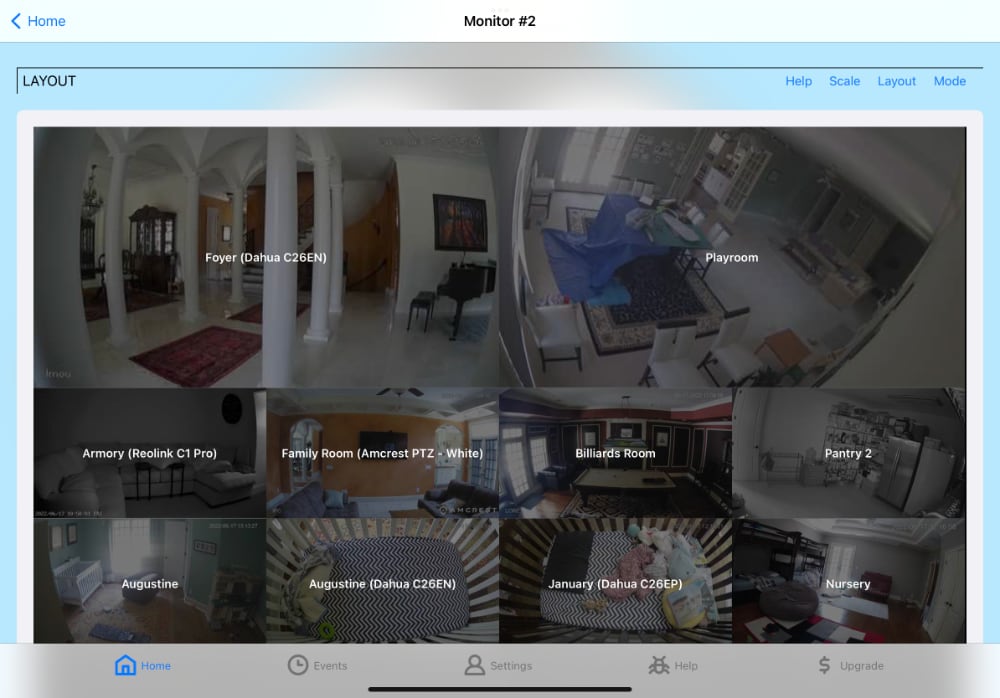
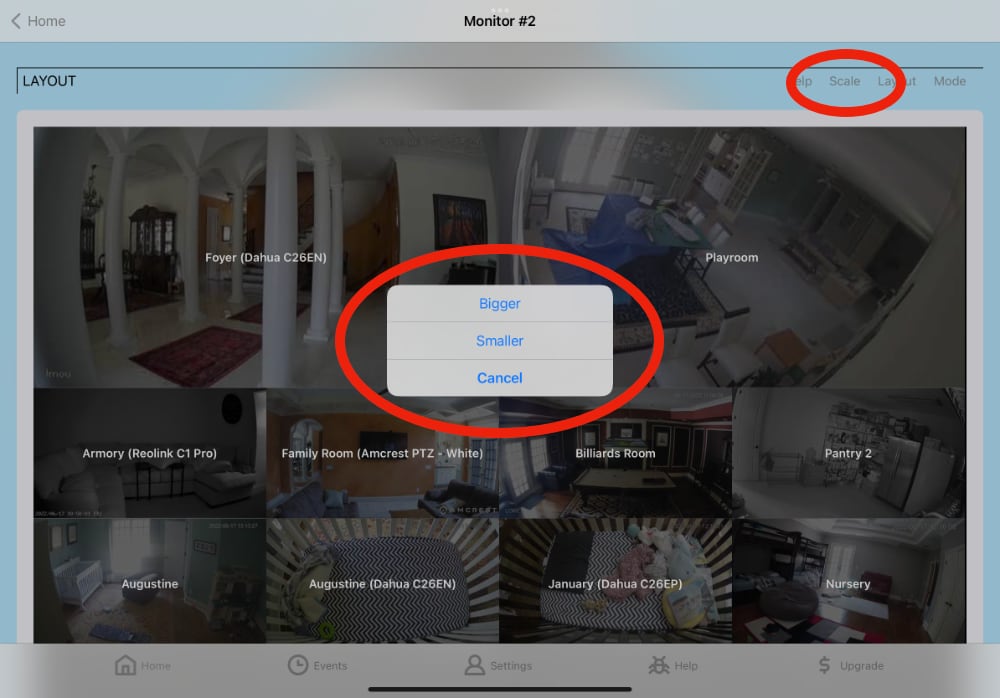
The scale of the layout represents the number of cameras that are arranged across the primary axis. In the screenshot seen below, the scale is set to four. The two larger cameras each take up two “slots” in the layout. You can adjust the individual size of a camera by tapping on the camera itself. You can adjust the scale of the layout by tapping on the Scale button.

Irrespective of the specific camera, you can change the behavior of the “slot” where a camera is positioned.
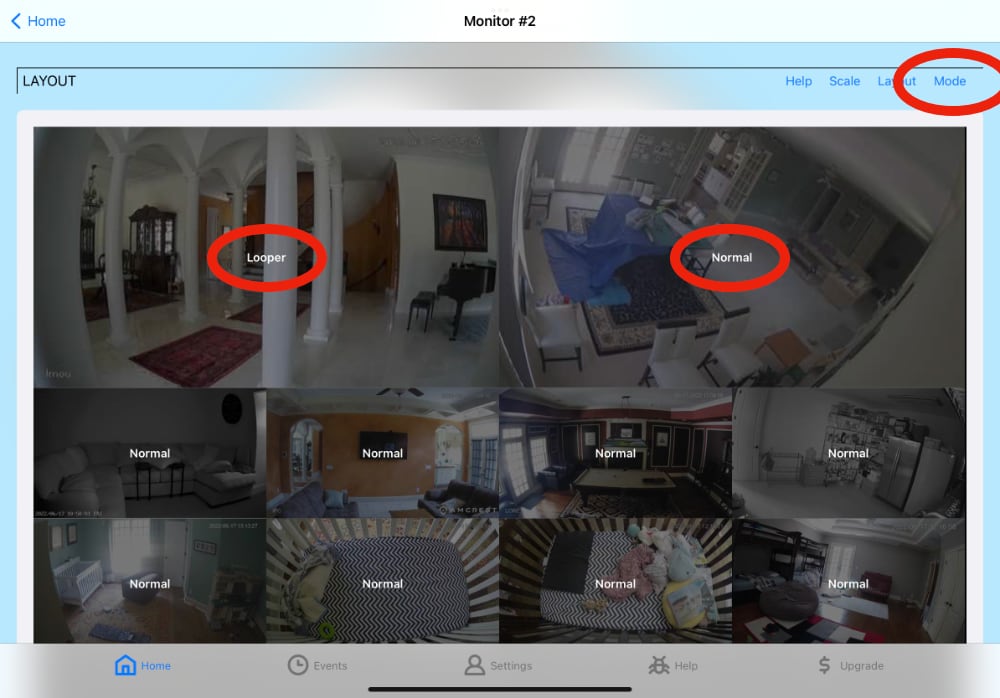
Looper — The Looper mode loops in offscreen cameras into that position automatically while you’re streaming the group. This allows you to, for instance, have ten cameras in a group that only displays four cameras at a time, and Streamie will cycle through the six offscreen cameras, periodically bringing them onscreen.
To set Looper mode for a camera, first tap on the Mode button which will show you the current mode for each slot. Then tap on a slot to set its mode.
Focus — The Focus mode causes cameras with motion events to appear at designated locations on screen. After selecting and arranging your cameras, tap the Mode button and designate which on-screen locations should be used for focus events. Save & Close. Navigate to the Cameras screen and edit each of your cameras that supports motion events, and add a new “Focus” action to each camera. Once complete, start streaming your group and cameras will be moved to any of the focus locations you’ve designated when motion events occur.

Don’t forget to his Save & Close when you’re done, so that you don’t lose your changes. Let us know if you have any questions.
Created: 3 years ago
Updated: 1 year ago
Author: Curtis Jones
Streamie provides a best-in-class user experience on your iPhone, iPad, Apple TV and Apple Silicon Mac, with an intuitive user interface that makes it simple to discover, stream, record, monitor and share your HomeKit, Google Nest, Ubiquiti UniFi Protect and ONVIF-compatible IP and RTSP cameras. Streamie keeps you informed with motion event notifications and it works with most cameras using its advanced audio and video codec support. You can watch your cameras from anywhere, record 24/7 to your private NAS, remotely manage multiple locations, device permissions and seamlessly synchronize settings across your devices; configure Hubitat smart home automations, live stream to YouTube and rely on the in-app technical support system when you need help -- and you can also reach us by phone. Download Streamie today for all of your CCTV needs.