
Streamie has a feature called Shares. Shares, which enable camera sharing with just a link, now include support for Modes. Modes were originally used to easily enable or disable your camera actions. Later on, Modes added support for Schedules. Now, with this latest change, your shared cameras can also operate on schedules and be controlled by Modes.
This is all new in Streamie v4.5.0.
In this tutorial, we’ll create a business hours mode, a shared camera and then limit the shared camera to business hours.
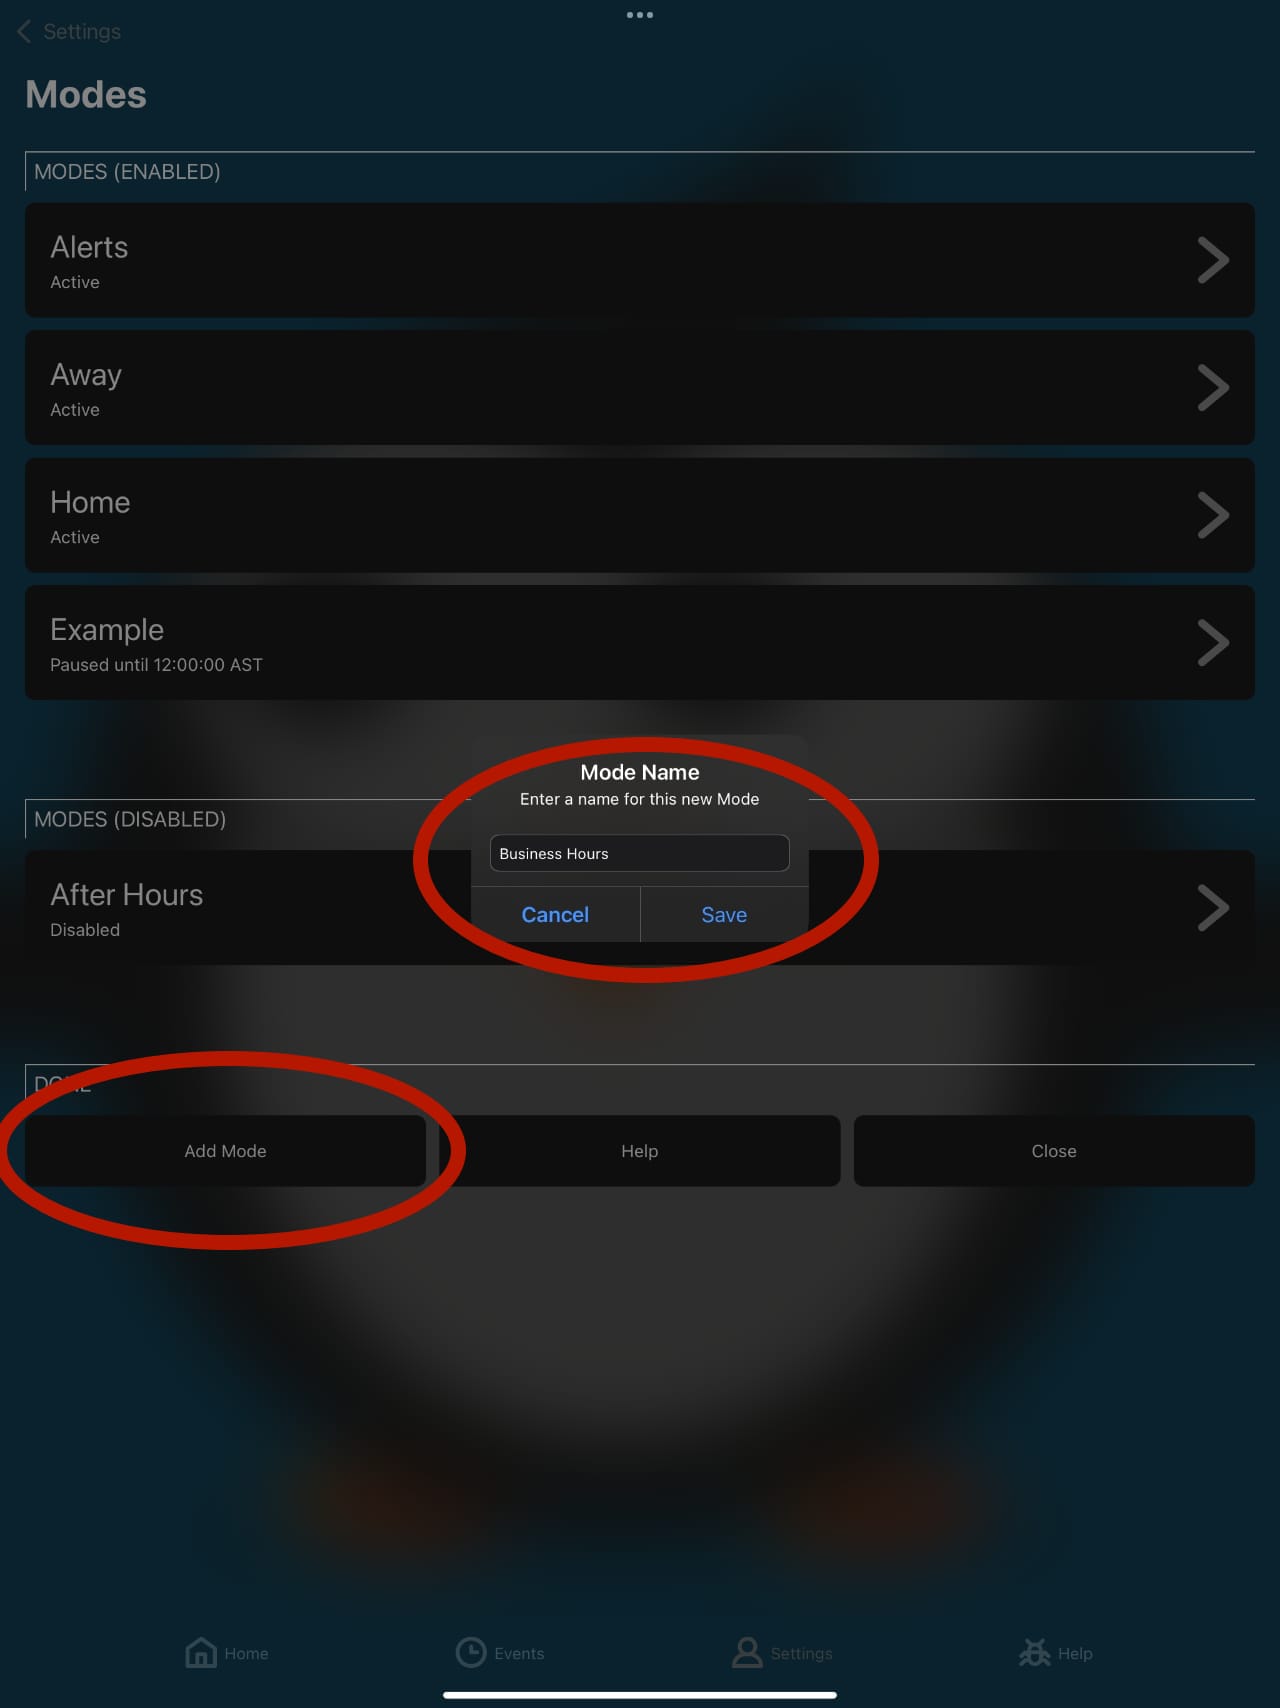
Navigate in Streamie to Settings - Modes - Add Mode. Give this new Mode a name, such as “Business Hours” and choose Save.
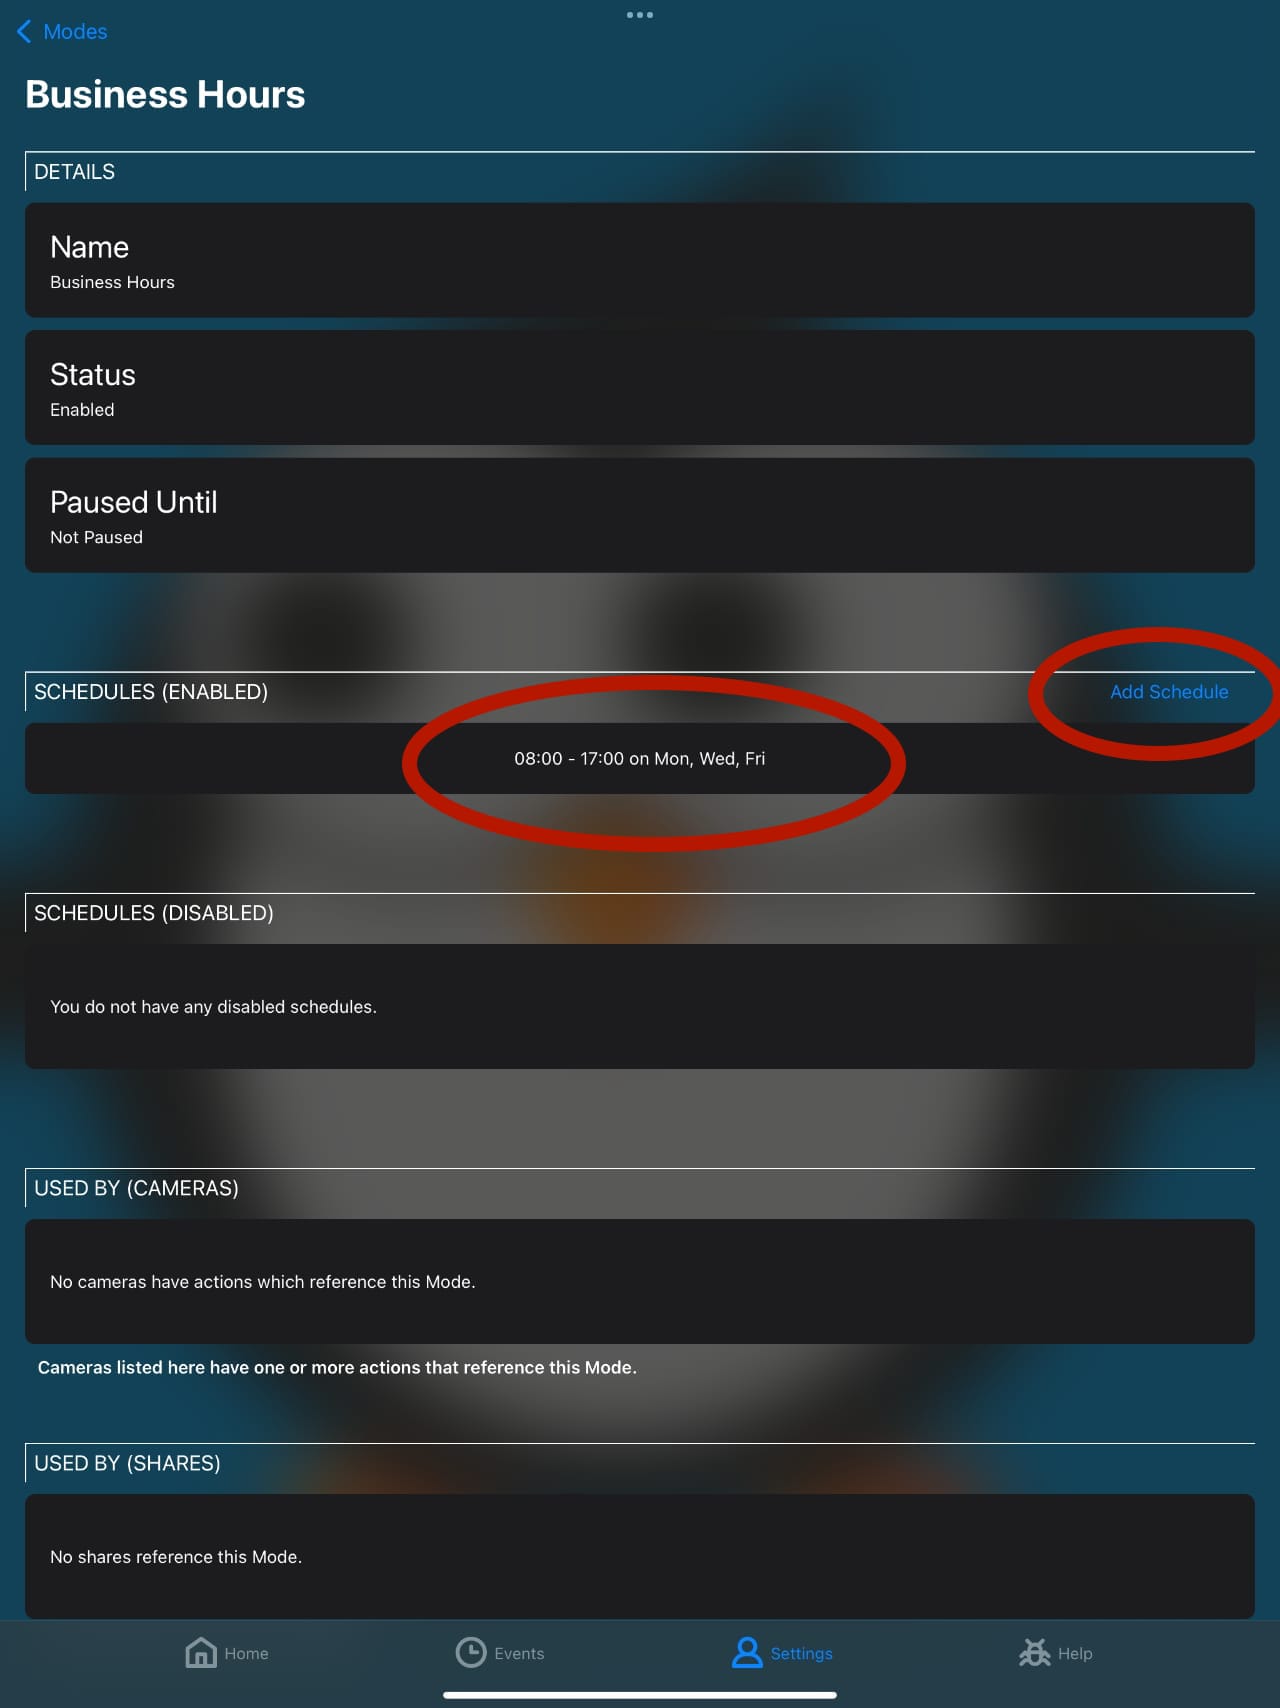
We’ve got our new Mode. It is already active because it has no schedules associated with it and it is enabled by default. Let’s configure it. Tap on the new Mode to get started. Next, tap on Add Schedule. A basic schedule will be created right away. Tap anywhere on this new schedule to customize it.
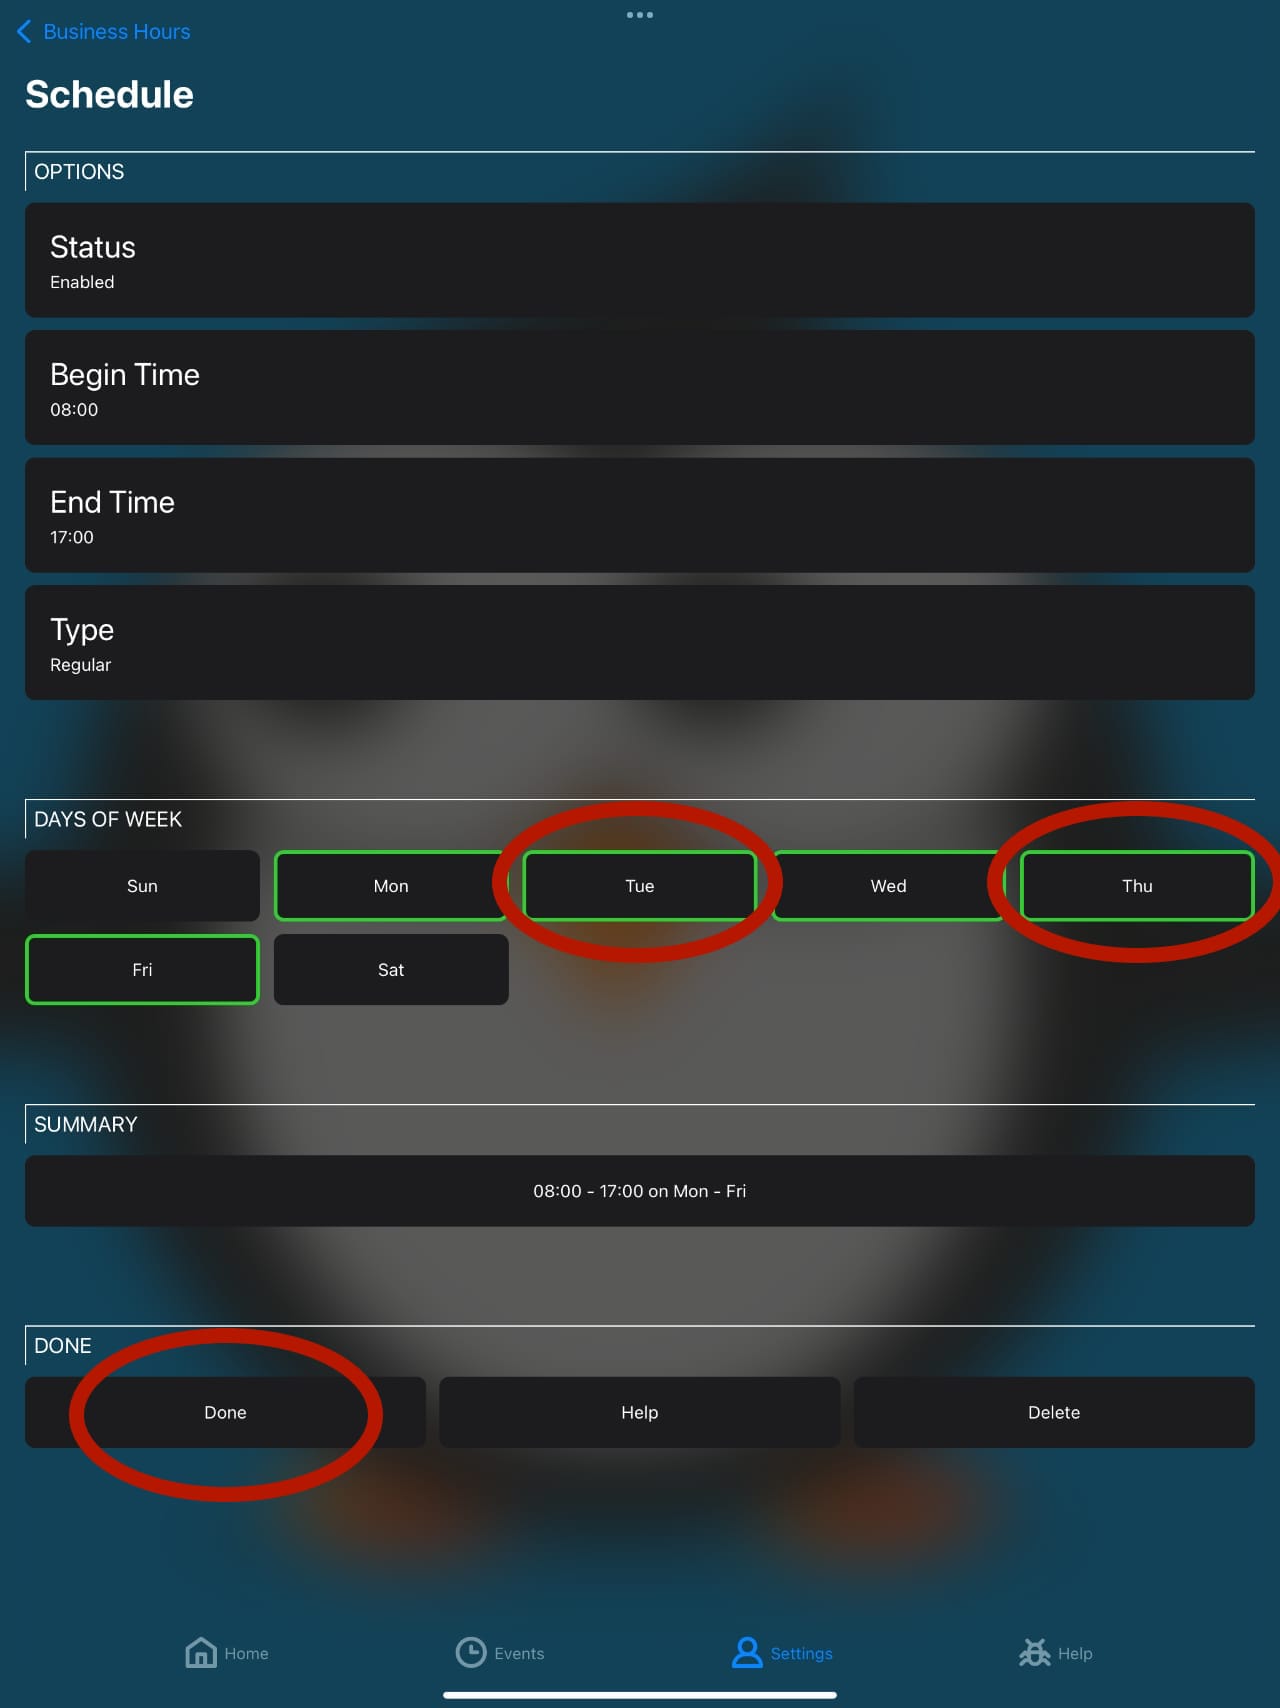
The default schedule runs from 8am - 5pm. Modify that as you see fit. The default schedule is set to Mon, Wed and Fri. Let’s make that Mon - Fri by tapping on Tue and Thu to add them to the set. The summary section should confirm that your schedule is now set to 8am - 5pm on Mon - Fri.
Click Done to return to the Mode screen. You should now see one schedule in the Schedules (Enabled) section. You can add more schedules if you need to. To continue, scroll down to the bottom and click Save & Close.
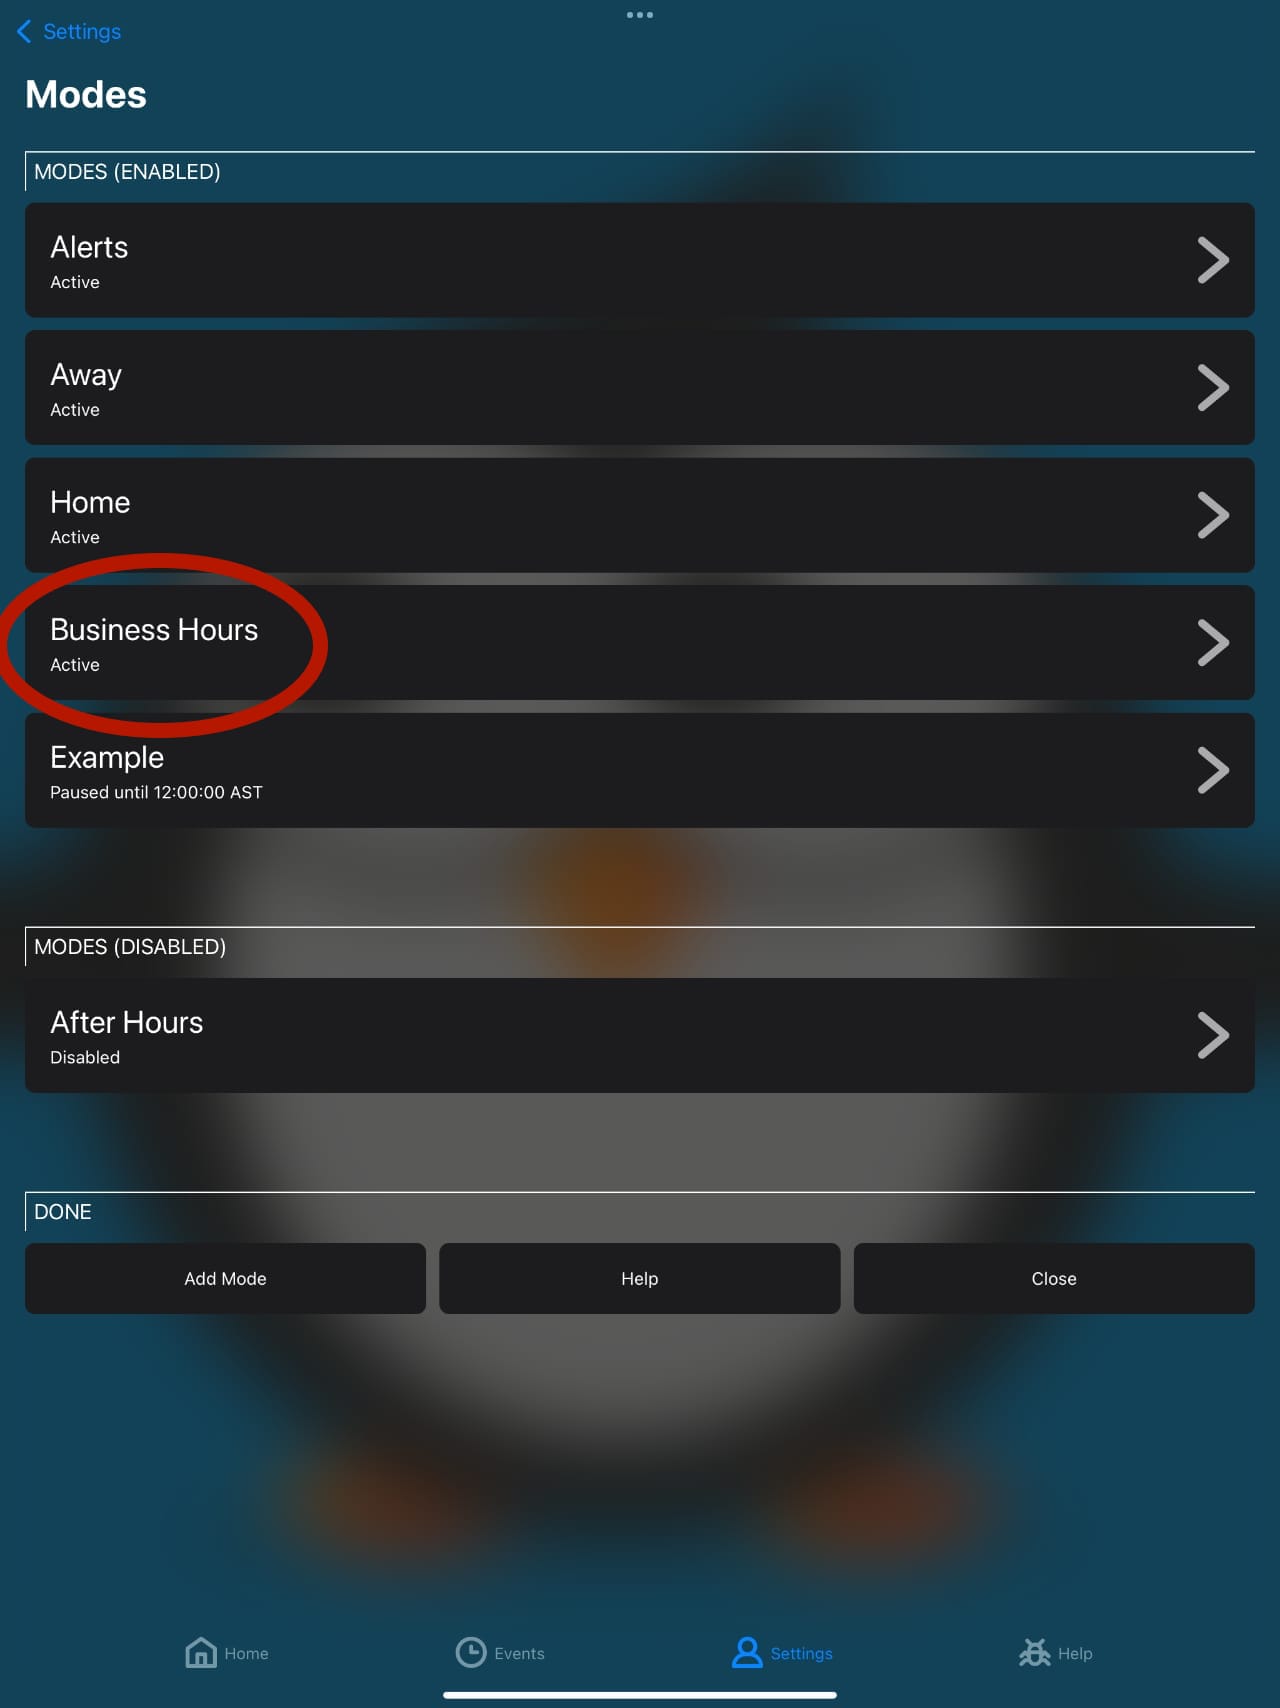
Back on the Modes screen, you should see your Business Hours Mode which will show Active if it is presently within the business hours you defined for your schedule.
For the purposes of this tutorial you should already have one or more cameras configured. HomeKit cameras will not suffice as it is not possible to access those video streams. You need an ONVIF, RTSP, Google Nest, Attached (ie, built-in) or USB camera. For instance, your iPhone or iPad has a built-in camera, and you can use this feature to share that camera with others. If you’re using your device in split-screen mode, the built-in camera will NOT be accessible to Streamie. Just FYI….
Navigate in Streamie to Settings - Shares - Add Share. The Source List screen will appear. From that list, choose the camera you want to share and tap on it.
One selected, your camera should appear in the ACTIVE section.
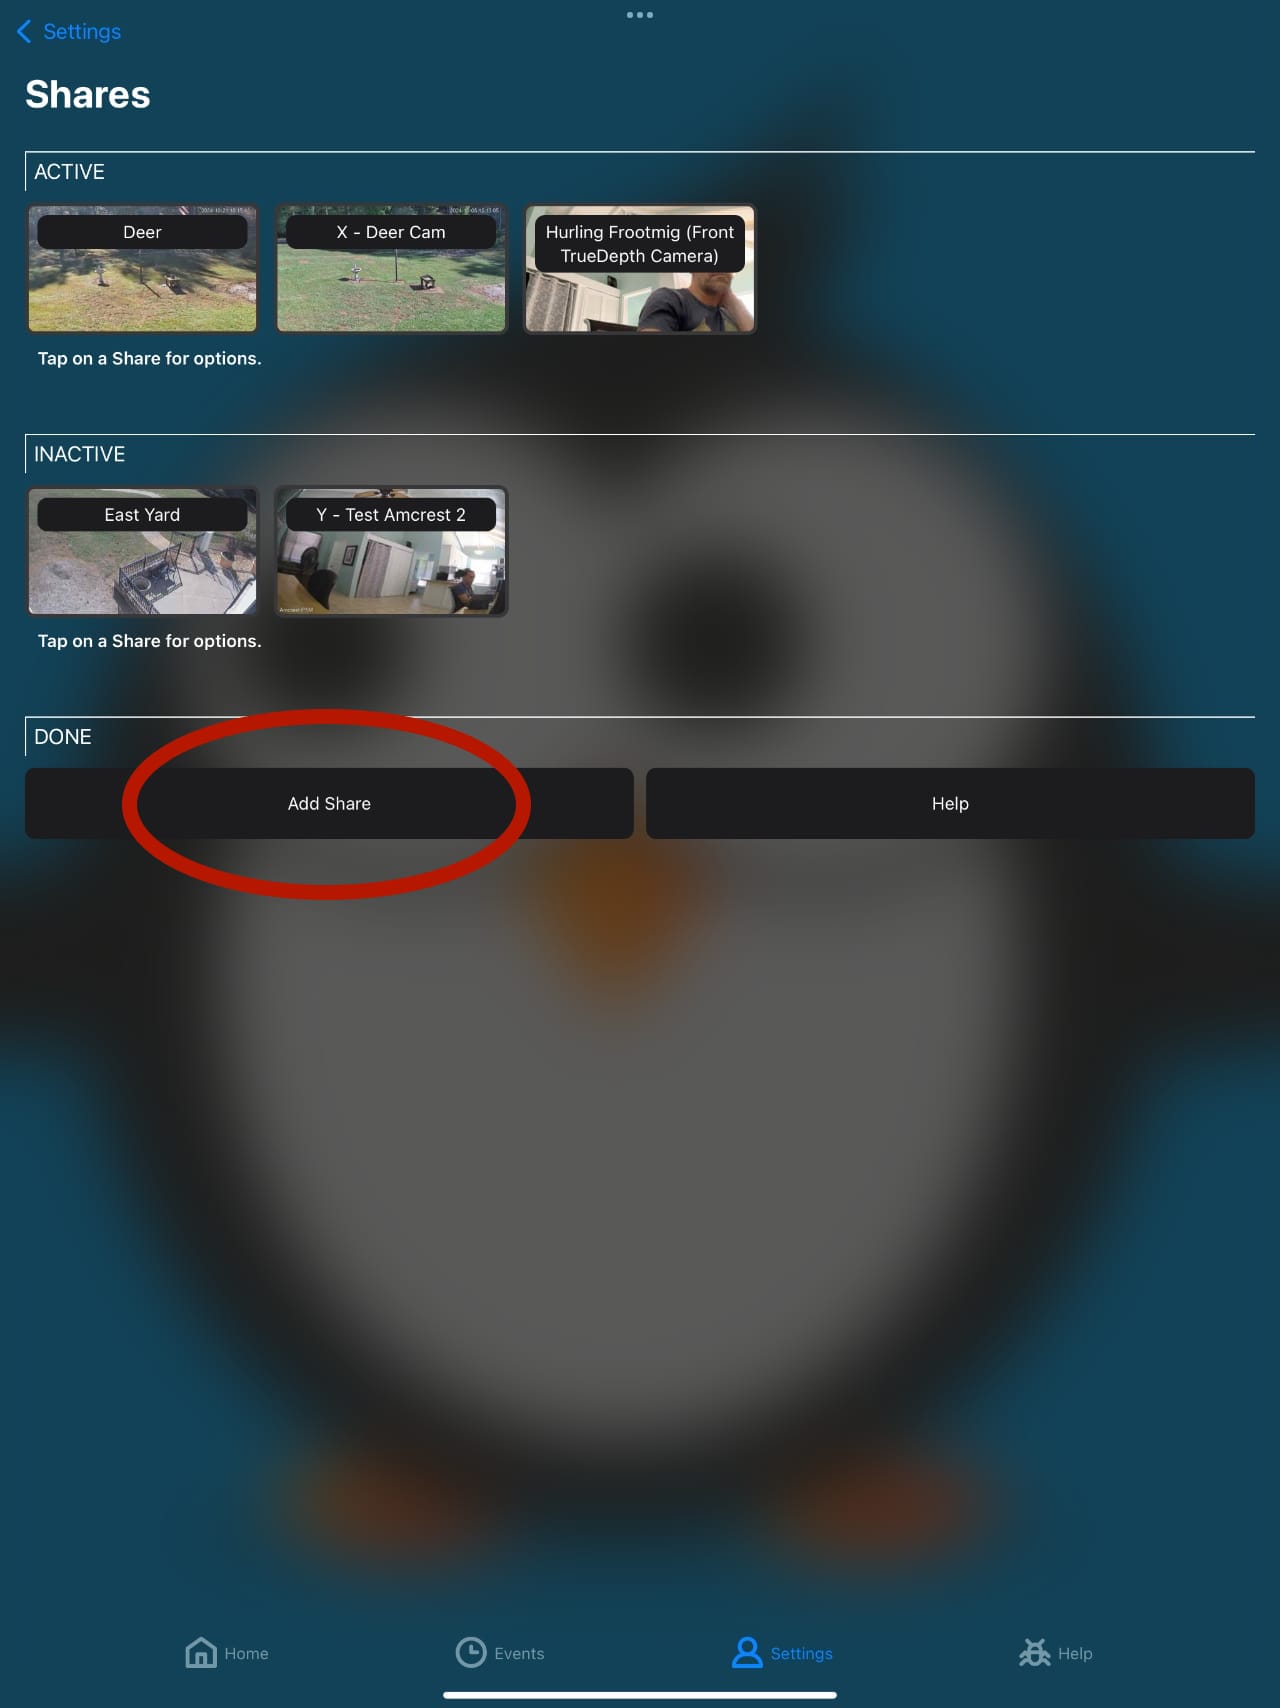
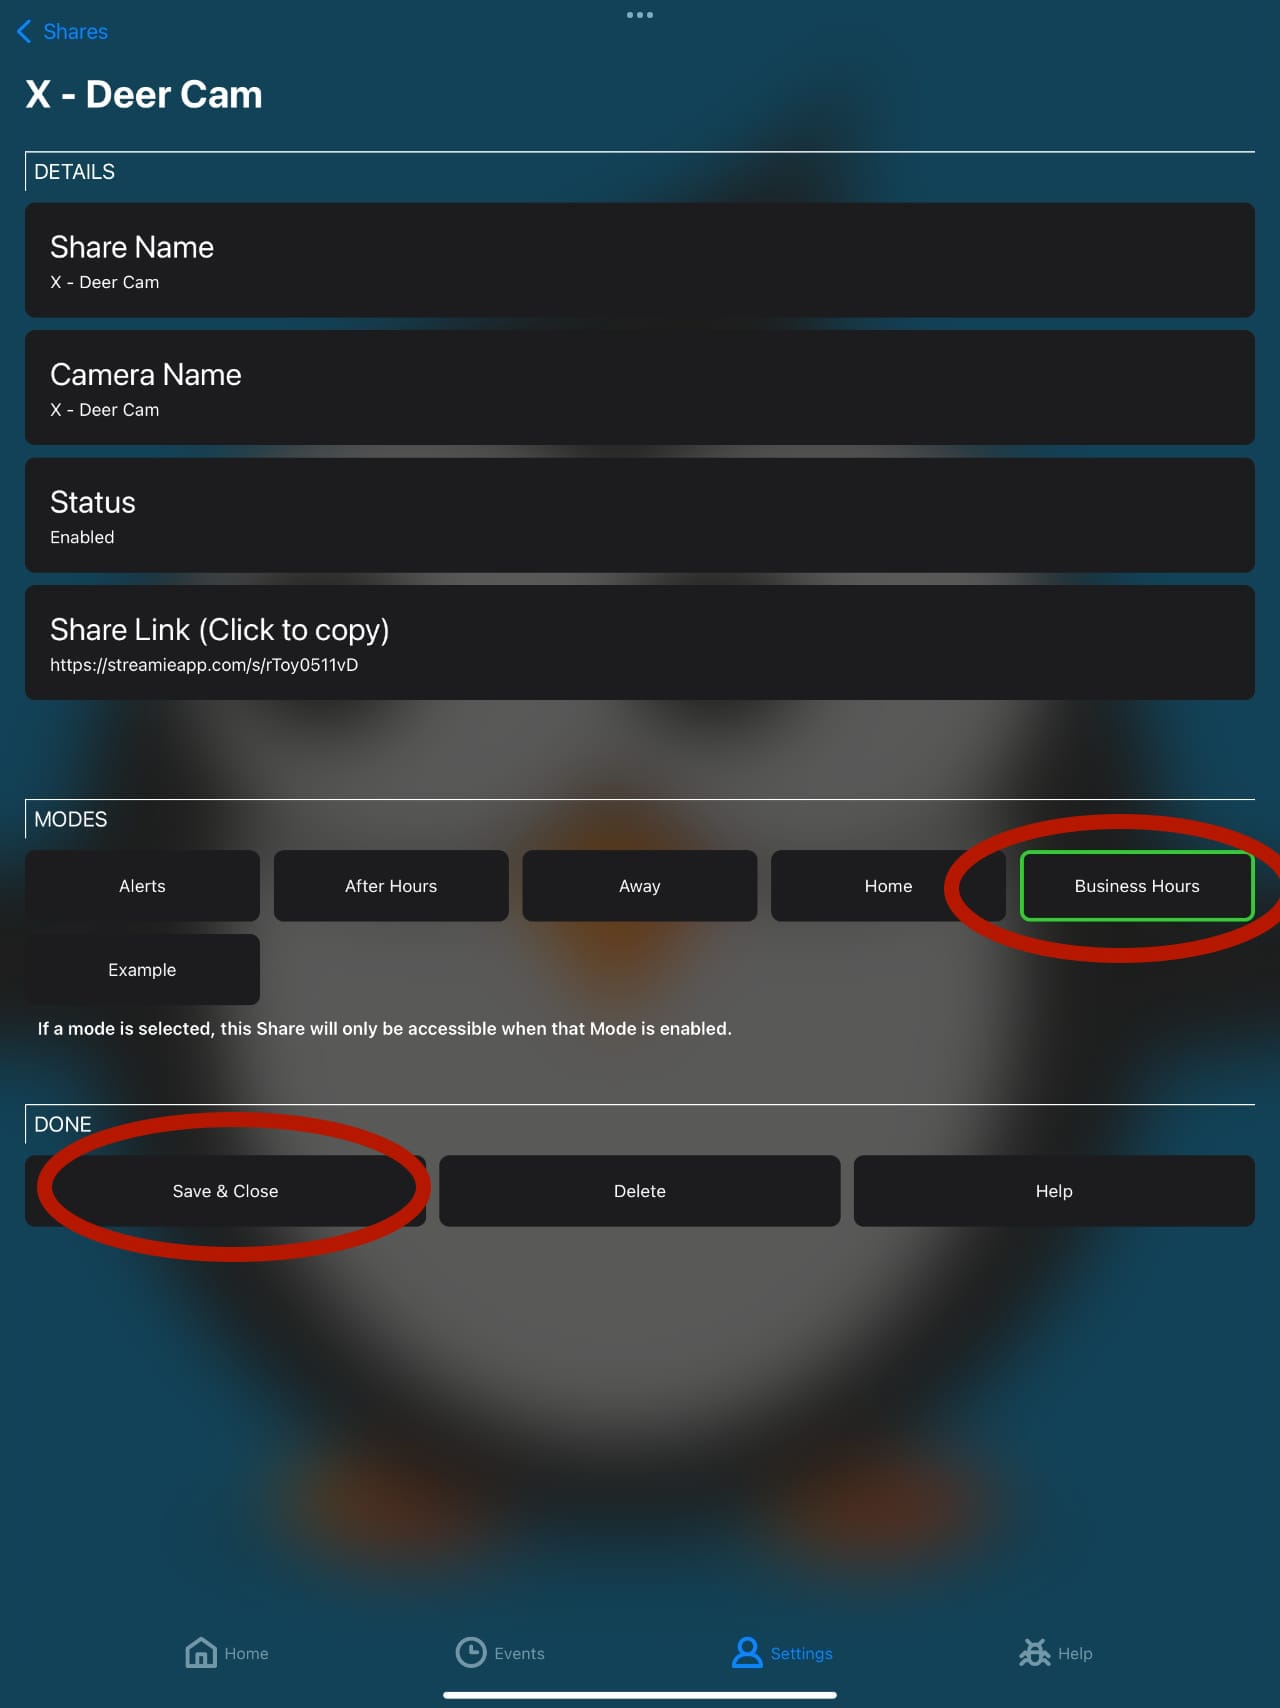
Tap on the camera and choose Edit. Also, you’ll see there’s a Copy Link option for when you want to share this camera. On the Shared Camera screen, find the Modes section and tap on your Business Hours mode to select it. Choose Save & Close and you’re done.
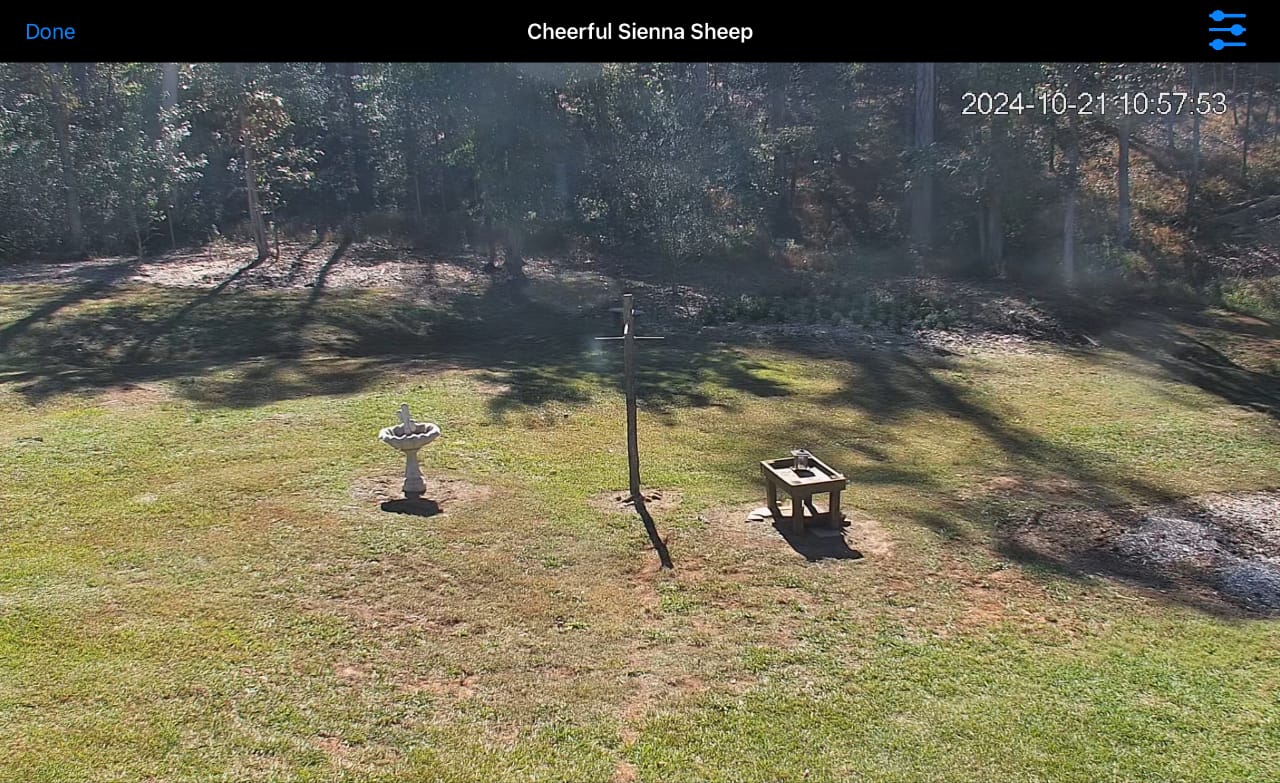
Copy the shared camera link and send it to a friend. Your friend will need to install Streamie (of course). The link will only work while the mode is active. Any ongoing streams will be stopped as soon as the mode becomes inactive. And that’s it!
The shared cameras feature only works while Streamie is running in the foreground on at least one device that has access to the shared camera.
Created: 1 year ago
Updated: 1 year ago
Author: Curtis Jones
Topics: Modes Shares Remote Streaming Tutorial
Streamie provides a best-in-class user experience on your iPhone, iPad, Apple TV and Apple Silicon Mac, with an intuitive user interface that makes it simple to discover, stream, record, monitor and share your HomeKit, Google Nest, Ubiquiti UniFi Protect and ONVIF-compatible IP and RTSP cameras. Streamie keeps you informed with motion event notifications and it works with most cameras using its advanced audio and video codec support. You can watch your cameras from anywhere, record 24/7 to your private NAS, remotely manage multiple locations, device permissions and seamlessly synchronize settings across your devices; configure Hubitat smart home automations, live stream to YouTube and rely on the in-app technical support system when you need help -- and you can also reach us by phone. Download Streamie today for all of your CCTV needs.